Crafters: Stain a Wolf Silhouette on ¼-Inch Laser Cut Plywood
For a rustic wolf silhouette that actually holds up, lightly sand any charred laser edges with 320-grit sandpaper, then apply one medium-toned stain with a rag, wipe back to control contrast, and seal with matte polyurethane or paste wax. A ¼-inch plywood blank like the Howling Wolf Wood Cutout works well for this because its flat grain takes stain evenly.
✦ Featured From Our Etsy Shop ✦
Handcrafted & Laser Engraved Just For You
TL;DR:
- Sand laser-charred edges with 320-grit sandpaper to ensure even stain absorption and prevent streaking in the final finish.
- For finished laser-cut silhouettes, staining after cutting enhances shadow depth, while pre-staining creates sharper engraved details.
- Use water-based stains indoors for faster drying and less odor, but oil-based stains deepen color more richly if time permits.
- Preserve a weathered look by applying a matte finish or wax, as glossy topcoats tend to make rustic pieces appear artificially new.
- Address common staining issues by sanding affected areas, using pre-stain conditioners, and sealing engraved grooves before staining.
Table of Contents
- What You Need Before You Start Staining
- Should You Stain Before or After Cutting?
- Which Topcoat Keeps the Rustic Look Intact?
- Fixing Blotchy Stain and Other Common Problems
- Why This Method Matches What a Laser Cutter Actually Recommends
- What I’d Try First on a Wolf Silhouette
- Get a Wolf Silhouette That’s Ready for This Exact Technique
- Sources
What You Need Before You Start Staining
Gathering the right supplies before you open a stain can saves you a second trip to the garage mid-project, and it keeps your workspace safer.
- Clean rags and a natural-bristle brush for applying stain
- A water-based or oil-based wood stain in your chosen tone
- Pre-stain wood conditioner
- 120-grit sandpaper for flat faces, 320-grit for edges
- Tack cloth to lift dust after sanding
- Nitrile gloves, a respirator or dust mask, and a drop cloth or cardboard
Work in a ventilated space, especially with oil-based stains, and always wear gloves. Start with a light pass of 120-grit sandpaper across the flat faces of your silhouette to smooth any mill marks, then move to 320-grit specifically on the laser-cut edges. Those edges carry a thin layer of char and smoke residue from the cutting process, and that layer resists stain if you skip it. Lightly sanding the charred edges reopens the wood fibers underneath, which lets stain soak in evenly instead of beading up or streaking. Wipe everything down with a tack cloth, then test your stain on a scrap offcut from the same plywood sheet before touching the actual piece.
Pro Tip: Keep the offcuts that come with your cutout order. They’re cut from the same batch of plywood, so a test swatch on one tells you almost exactly how the stain will behave on the real silhouette.
Should You Stain Before or After Cutting?
The order matters more than most first-time crafters expect, and it changes the final look dramatically.
If you’re working with a piece that’s already been laser cut, like a finished wolf silhouette, staining after the fact gives you a darker, more soaked-in antique appearance. Post-staining creates deeper shadowing in engraved areas because the charred, porous fibers around any engraved detail absorb more stain than the surrounding wood. That’s usually exactly what you want for a rustic silhouette, since the extra shadow reads as age and depth rather than a flaw.
Pre-staining, on the other hand, means staining the wood before it’s engraved. The laser vaporizes the stained top layer during cutting, leaving crisp lighter wood exposed beneath it, which produces sharp, high-contrast detail. That’s the better choice when you want fine engraved lines like fur texture or facial detail to stand out clearly against the stained background. For most rustic wolf silhouettes bought as a finished cutout, though, post-staining is the default that gets you the moody, weathered look most people are going for.
Here’s the full sequence once you’ve decided on your approach:
- Sand the piece as described above, prioritizing the laser-charred edges.
- Apply pre-stain conditioner if you’re using an oil-based stain on plywood, which tends to absorb unevenly across its layers.
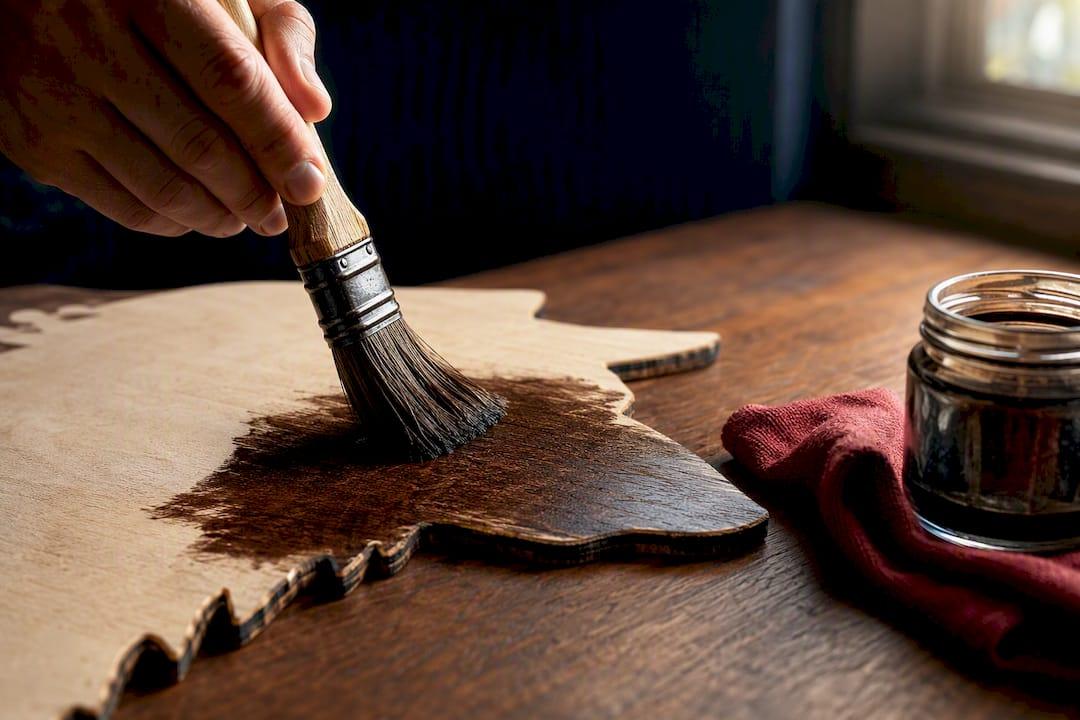
- Load a rag or brush with stain and work it into the wood following the grain, covering the whole silhouette in one pass.
- Let the stain sit for one to three minutes, then wipe back with a clean rag. Wipe faster and firmer for a lighter, worn look; leave it longer in the recessed or engraved areas for extra depth.
- Let it dry fully. Water-based stains dry in about an hour and produce far less odor than oil-based options, which makes them the better pick if you’re working indoors or on a tight timeline. Oil-based stains can take six to eight hours between coats but tend to deepen color more richly.
- Apply a second coat only if you want more saturation, repeating the wipe-back step.
For a genuinely chippy, farmhouse-style finish, distressing is where the character comes from. One reliable method: once your base stain is dry, dry-brush a thin layer of white or cream paint over raised areas, then sand back with 220-grit sandpaper once it’s dry to reveal streaks of the stain underneath. Another approach uses a wax candle as a resist. Rub the candle along edges and any raised detail before painting over the whole piece, then sand lightly; the wax keeps paint from sticking in those spots, so it flakes off easily and exposes the stained wood below in a way that mimics decades of wear.
Pro Tip: Always run your distressing technique on the same offcut you used for your stain test. Dry-brushing and wax-resist look completely different depending on how porous your particular piece of plywood is, and you want to know that before you commit to the real silhouette.
Which Topcoat Keeps the Rustic Look Intact?
Your choice of sealant can make or break the finish you just spent an hour building, since some topcoats fight the aged look you’re going for.
- Matte polyurethane: durable and easy to find, but even matte formulas can develop a slight sheen that reads as too polished on a distressed piece.
- Satin polyurethane: a middle ground that adds a touch more protection than matte without looking glossy or new.
- Paste wax: the most authentic-looking option for rustic pieces since it dries to a soft, low luster instead of a plastic-like film, though it offers less protection against moisture and scuffs.
- Spray clear coat: fastest to apply and gives even coverage on detailed cutouts with tight corners, useful if you’re short on time.
A light matte finish or paste wax tends to preserve that weathered character far better than a glossy poly, which can make a distressed piece look freshly manufactured instead of aged. Apply topcoats in thin, even coats, sanding lightly with fine-grit paper between layers if you’re building up more than one. Give each coat time to cure fully, and add an extra hour or two in humid weather since moisture in the air slows drying considerably.
For hanging, a sawtooth hanger works fine on a lightweight ¼-inch plywood silhouette. If your piece is larger or mounted on a thicker backing, a French cleat distributes weight more evenly and keeps the piece flush against the wall. Hang your silhouette at eye level, roughly 57 to 60 inches from the floor to its center, which is the standard height galleries use for single statement art.
Fixing Blotchy Stain and Other Common Problems
Even careful crafters run into a few recurring issues with laser-cut plywood, and most of them have quick fixes.
- Blotchy or uneven color: sand the affected area back with 120-grit, wipe clean, and reapply stain. Going forward, use a pre-stain conditioner before your first coat to even out absorption across the plywood’s layers.
- Stain bleeding into engraved grooves: this happens when wet stain pools in recessed detail. Sealing engraved areas with a thin clear coat before staining reduces bleed when you need crisp, defined lines.
- Edges that resist stain entirely: this usually means the char wasn’t fully sanded away. Go back over the edge with 320-grit sandpaper until the surface looks matte rather than shiny, then try again on a test spot first.
- Uneven or “too rustic” results: before you sand everything off and start over, consider whether the variation actually works. Slight unevenness is often what separates a handmade rustic piece from something that looks machine-perfect.
Why This Method Matches What a Laser Cutter Actually Recommends
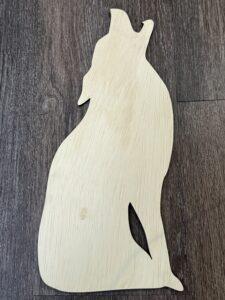
These steps line up with how Signature Laser Designs approaches finishing on its own laser-cut wood cutouts, where char management and stain compatibility come up constantly with craft customers. The Howling Wolf Wood Cutout in ¼-inch plywood is a solid blank for this exact workflow, since its consistent grain takes stain predictably from piece to piece. For more on long-term care once your silhouette is sealed and hung, the full guide to caring for laser-engraved wood covers cleaning and touch-up basics worth bookmarking.
What I’d Try First on a Wolf Silhouette
My go-to combination is a medium walnut stain wiped back hard for contrast, sealed with paste wax instead of poly. It reads aged, not shiny, and it’s forgiving if your wipe-back timing is a little inconsistent. Hang the finished wolf alone as a single statement piece rather than surrounding it with smaller decor. One strong silhouette at eye level does more for a rustic room than a cluster of matching accents ever will.
— Gary
Get a Wolf Silhouette That’s Ready for This Exact Technique
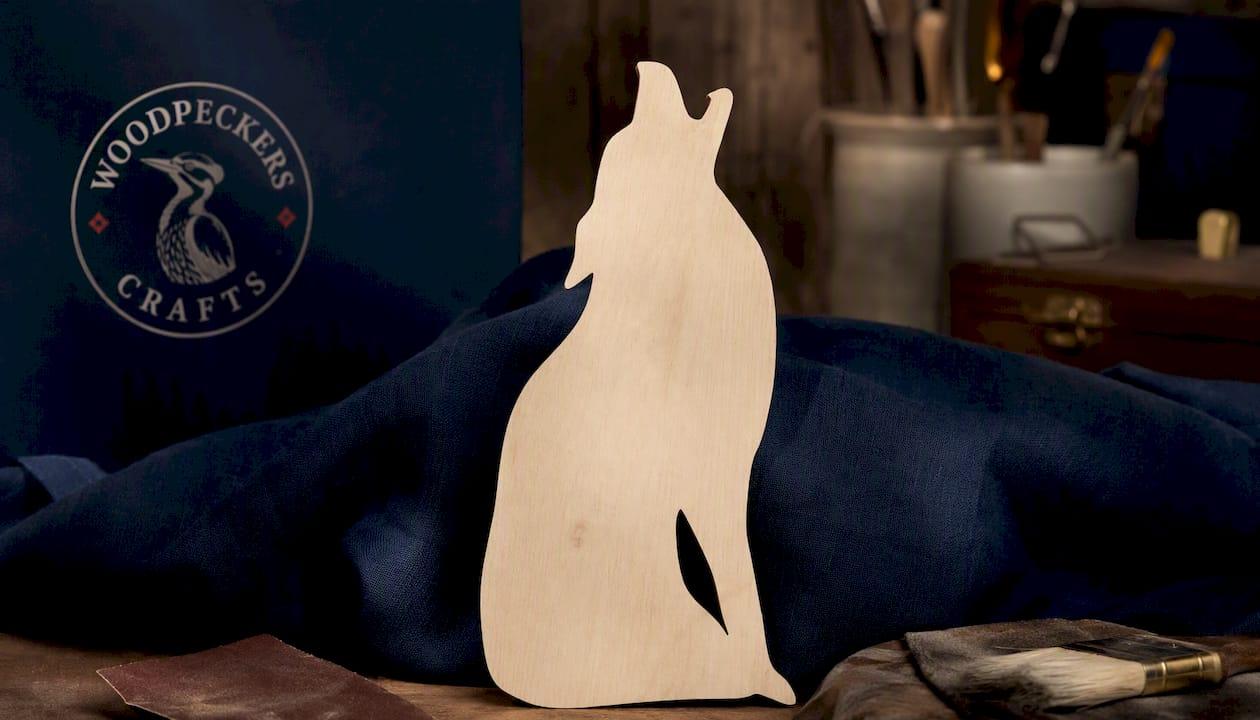
Every step above assumes you’re starting with a blank that behaves consistently, and that’s precisely what the Howling Wolf Wood Cutout in ¼-inch plywood delivers. It ships unfinished, so there’s no factory sealant to sand off first, and the cutout is made from consistent plywood stock, which means the test swatch you stain today will match the real piece tomorrow.
If you’d rather present your finished silhouette as a mounted piece instead of hanging it bare, a partner resource like custom mounted canvas printing is worth a look for framing ideas. But for the cutout itself, head over to the Howling Wolf Wood Cutout listing to check current pricing and order your blank before your next free weekend.
Sources
- Pre-Stain Wood Conditioner | Minwax
- Stain Wood for Laser Cut and Engrave: Pre-Staining vs Post-Staining Application Guide & Pro Tips
Recommended