7 Checks for Unfinished Pumpkin Wood Cutouts From a Georgia Shop
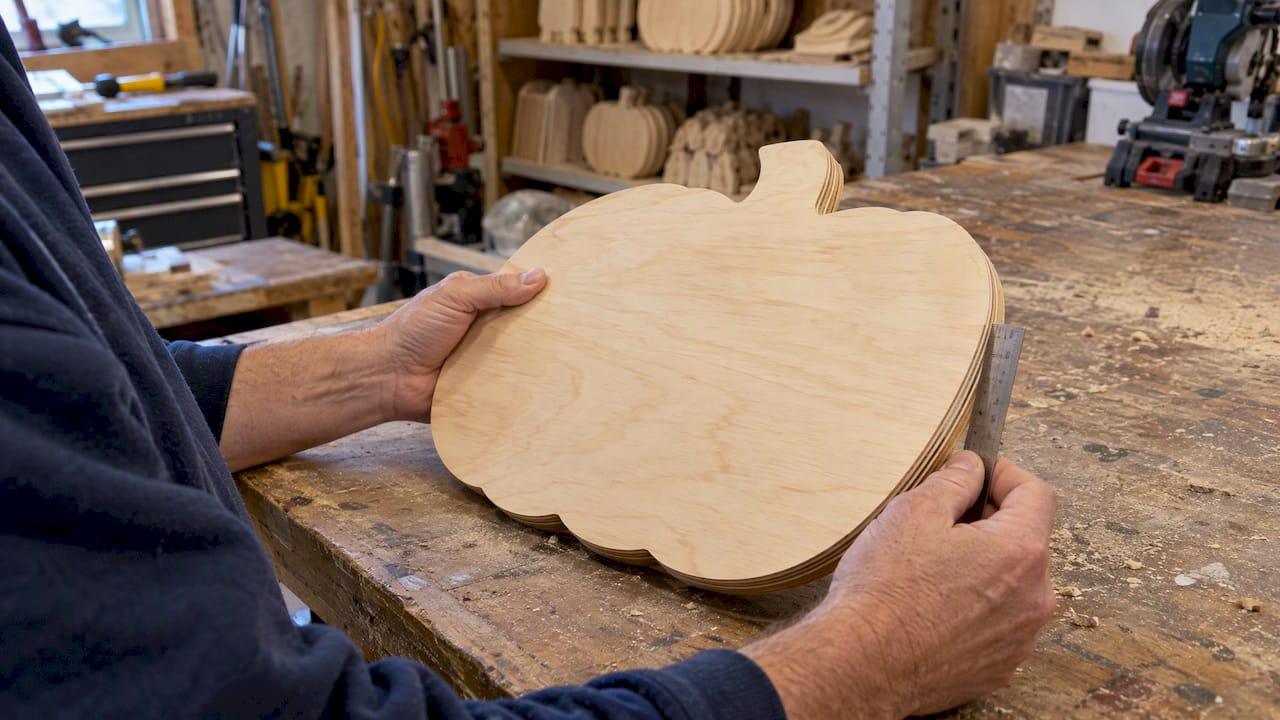
An unfinished pumpkin wood cutout is a pre-cut, paintable wooden blank shaped like a pumpkin, ready for you to prime, paint, and personalize however your fall project calls for. For most seasonal crafts, we recommend a 1/4" plywood or 1/8" birch blank sized to match where you plan to display it. Pick your size, confirm the thickness listed on the product page, and you are ready to add it to your cart.
✦ Featured From Our Shop ✦
Handcrafted & laser engraved in Georgia, just for you
TL;DR:
- Choose 1/8 inch birch or plywood for ornaments and pieces that lean; use 1/4 inch plywood for freestanding signs or secure hardware.
- Check dimensions, thickness, wood type, edge sanding, pack quantity, and shipping time; laser cut edges usually look cleaner than router cut edges.
- For children’s projects, choose virgin or pre consumer wood, use paint with ASTM D 4236 conformity, and avoid solvent based finishes.
- For porch displays, use exterior rated acrylic paint and a clear exterior rated topcoat; let each coat dry fully before applying the next.
- Test wood burning on scrap of the same thickness first; pausing can scorch the surface or burn through 1/8 inch stock.
Table of Contents
- Where to buy and what size or pack options to expect
- Materials and blank types: plywood, birch, MDF, and thickness tradeoffs
- Prep and finishing workflow: sanding, priming, painting, and sealing
- Safety, kids’ projects, and label guidance worth knowing
- Buying checklist: 7 quick checks before you add a blank to cart
- Personalizing and engraving your pumpkin blank at home
- Design ideas for fall, Halloween, and Thanksgiving projects
- Staining and wood burning as alternatives to paint
- Storing and caring for your wood cutouts
- Why we prefer in-house cut blanks for gift-quality projects
- How we help: ready-to-ship blanks, custom cuts, and engraving
- FAQ
- Sources
Where to buy and what size or pack options to expect
You will find unfinished pumpkin blanks through three main types of sellers: dedicated craft retailers, marketplace listings on sites like Etsy and Amazon, and shop pages run directly by the maker. Each one tends to show slightly different information, so it helps to know what you are looking at before you buy.
Marketplace listings usually show overall dimensions, a material note, and at least one close-up photo of the cut edge so you can judge the finish quality. Direct shop pages from a laser studio often go further, listing thickness, wood species, and sometimes a photo comparing laser-cut edges to router-cut ones.
Sizes run from small ornament-style pumpkins suitable for small displays, through tiered-tray pieces that fit well in the mid-size range, to larger standalone sign shapes ideal for more prominent displays. Many sellers offer single pieces suitable for standalone displays and multi-packs intended for garlands, tiered trays, or group gifting.
Before you commit to a listing, scan for:
- Exact material and thickness, not just a size range.
- Whether the edges arrive sanded or raw.
- Cut method (laser-cut edges tend to look crisper than router-cut ones).
- Estimated ship or lead time, especially for multi-packs.
Materials and blank types: plywood, birch, MDF, and thickness tradeoffs
The material behind your pumpkin blank affects how it paints, how it holds up, and how heavy it feels once finished. Cabinet-grade plywood that has been laser cut tends to stay flat and takes both paint and light engraving well, which makes it a solid all-around choice for fall signs and tiered-tray pieces.
Birch and basswood blanks offer a smoother, tighter grain than standard plywood, which matters if you plan detailed brushwork, fine lettering, or stenciled designs. MDF and HDF blanks are smooth and often less expensive, but they run heavier than plywood or birch of the same size, and if you are making something for a child, it is worth checking whether the board uses post-consumer wood content, since that can affect which safety rules apply.
Thickness matters just as much as the wood species:
- 1/8" blanks suit ornaments, tiered-tray pieces, and anything leaning against a stand rather than standing freestanding.
- 1/4" blanks hold up better for freestanding porch signs or anything that will take wear from handling.
- Thicker stock accepts screws or hardware more securely if you plan to mount your piece on a wall or door.
Pro Tip: If you are not sure which thickness to choose, go with 1/4" for anything that will stand on its own outdoors and 1/8" for anything that leans against another surface or hangs.
Prep and finishing workflow: sanding, priming, painting, and sealing
A clean finish on an unfinished pumpkin blank comes down to following the same basic sequence every time, regardless of the design.
- Sand lightly, starting around 120 grit and finishing at 220 grit, to smooth any rough spots left from cutting.
- Apply a primer or sanding sealer if your design calls for crisp lines or a very smooth base coat, since this step helps paint adhere evenly and prevents blotchy color.
- Lay down your base coat using acrylic craft paint for indoor pieces, or an exterior-rated acrylic if the pumpkin will live on a porch or near a door.
- Add stencils or vinyl lettering, pulling the stencil off while the paint is still slightly tacky for the cleanest edges.
- Finish detail work by hand, then seal the piece with a clear topcoat, choosing an exterior polyurethane or spar-style finish for anything facing outdoor weather.
If your project involves multiple small pieces that get glued together later, it is often easier to pre-paint each piece before assembly rather than trying to paint around a finished joint.
Pro Tip: Let each coat dry fully before adding the next, since rushing between coats is the most common reason paint looks cloudy or uneven once it cures.
A basic tool kit covers most of what you need: a flat craft brush for base coats, a small detail brush for lettering, a foam roller if you are covering a larger sign, and painter’s tape for clean stencil lines. Spray paint works too, but it needs good ventilation and a few extra minutes of drying time between light coats.
Safety, kids’ projects, and label guidance worth knowing
Craft paint and wood choices matter more when the project involves children. The CPSC’s guidance on art materials recommends checking supplies for the statement “Conforms to ASTM D-4236” before using them with kids, since that label indicates the manufacturer has reviewed the product for chronic-hazard labeling requirements.
Many crafting and safety resources point to the same simple checklist for kids’ projects: look for ASTM D-4236 conformity on paint labels, choose blanks made from virgin or pre-consumer wood rather than engineered boards with post-consumer content, and skip solvent-based finishes entirely when children are involved.
A few other habits go a long way:
- Work in a ventilated space any time you spray paint or seal a piece.
- Stick to low-temperature glue guns if kids are helping with assembly.
- Have everyone wash up after handling paint, even water-based acrylics.
Buying checklist: 7 quick checks before you add a blank to cart
A few seconds spent reading the product page carefully can save you a return or a mismatched project later.
- Confirm the exact dimensions and thickness listed, not an estimated range.
- Check whether the material is plywood, birch, or MDF, and whether the edges arrive pre-sanded.
- Look at the cut method: laser-cut edges generally look cleaner than router-cut ones.
- Note the quantity included, the price per piece, and the shipping or lead time.
- Match the blank’s thickness to how you plan to mount or display it.
- If you are gifting or selling the finished piece, check whether engraving or personalization is available.
- For kids’ projects, confirm the seller’s paint recommendations call out non-toxic, ASTM D-4236-conforming products.
Personalizing and engraving your pumpkin blank at home
Once your blank is sanded and clean, adding a name, date, or custom phrase is straightforward with the right tools. A wood-burning pen (pyrography tool) works well for freehand lettering or simple line designs, and it gives you direct control over depth and style without needing a separate engraving machine.
If you want cleaner, more uniform lettering, a vinyl stencil applied before painting gives sharp edges that a wood-burning tip cannot always match by hand. Trace or print your design first, transfer it lightly in pencil, then either burn along the lines or mask the area with vinyl and paint over it.
Work slowly and keep your wood-burning tool moving rather than holding it in one spot, since pausing can scorch the wood unevenly or burn through thinner 1/8" stock. Test your design and pressure on a scrap piece of the same thickness before committing to the actual pumpkin blank, especially if you are new to pyrography.
For anyone who wants a guaranteed clean result without the learning curve, having a design laser engraved directly onto the blank before you paint gives a crisp, repeatable outline every time, which is worth considering for gifts or pieces you plan to sell.
Design ideas for fall, Halloween, and Thanksgiving projects
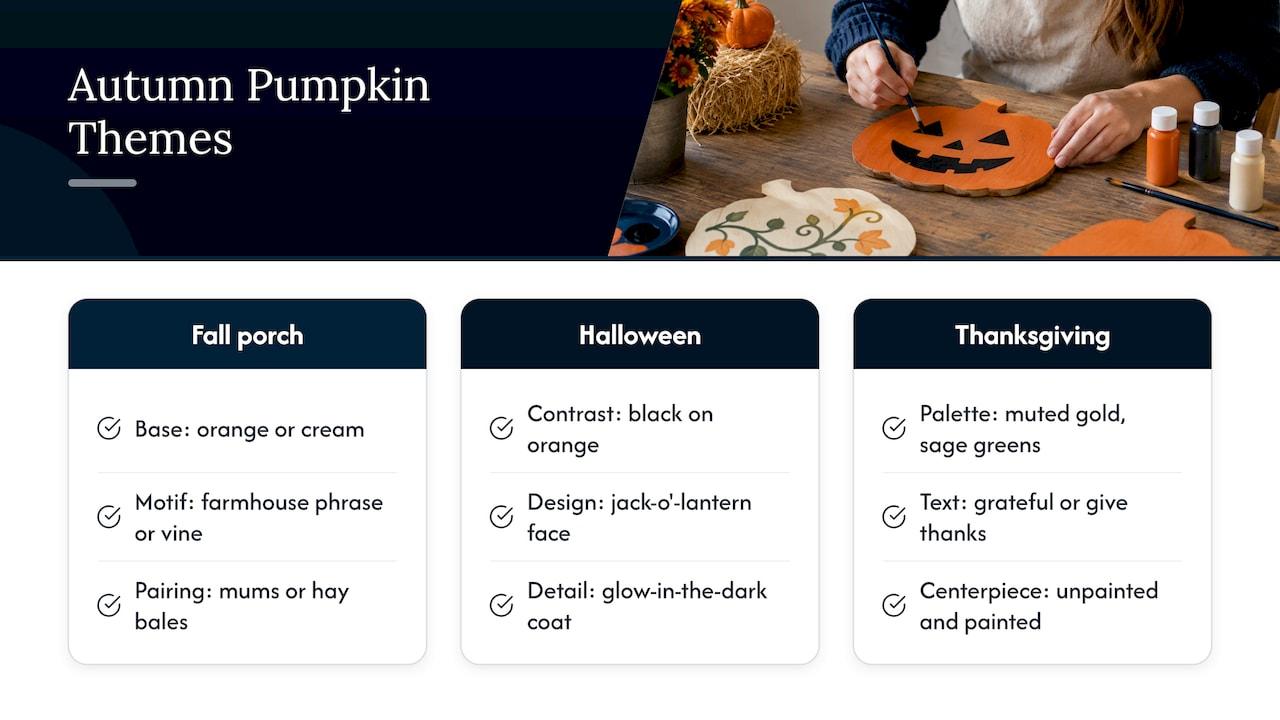
A plain pumpkin cutout adapts to nearly any autumn theme, which is part of why it stays a popular craft blank through the whole season. For a classic fall porch look, a solid orange or cream base coat with a stenciled farmhouse phrase or a painted vine detail reads well from the street and pairs naturally with mums or hay bales, especially when mounted on a sturdy PVC Christmas light frame for windows and arches.
Halloween projects lean into contrast: black silhouettes against an orange base, a painted jack-o’-lantern face, or a glow-in-the-dark detail coat for trick-or-treat night. Layering a few different pumpkin sizes together, each painted a slightly different shade, creates a tiered display that works well on a mantel or entry table.
Thanksgiving versions usually trade the spooky details for warmer, more neutral palettes: muted golds, sage greens, and a stenciled “grateful” or “give thanks” across the front. A cluster of unpainted and painted pumpkins mixed together also makes an easy centerpiece, since the raw wood grain adds texture without extra painting time.
If you are making a batch as party favors or classroom gifts, keep the design simple and repeatable, like a single stenciled letter or initial per pumpkin, so you can move through several pieces quickly without sacrificing a clean finish.
Staining and wood burning as alternatives to paint
Paint is not the only way to finish a pumpkin blank, and sometimes it is not even the best option for the look you want. Wood stain lets the grain show through, which gives a more rustic, natural feel than a solid paint color, and it works especially well on birch or plywood blanks where the grain pattern is visible.
Apply stain with a rag or brush, wipe off the excess after a few minutes, and let it dry fully before adding any painted details on top. Wood burning, or pyrography, adds texture and detail that paint alone cannot, whether that is a stem outline, a face, or lettering, and it pairs naturally with a stain base since the darker burned lines stand out against the lighter stained wood.
Decoupage is another option worth trying, especially for layering patterned paper or fabric onto a flat pumpkin shape before sealing it with a clear topcoat. Combining techniques, a stained base with a wood-burned outline and a painted accent color, tends to give the most dimension, and it is a good way to make a simple blank look more custom without much extra time.
Storing and caring for your wood cutouts
Unfinished blanks keep best stored flat, away from direct sunlight and humidity, since raw wood can warp or discolor if it sits somewhere damp for too long. A closet shelf or a flat storage bin works better than a garage corner that swings between hot and cold.
Once a piece is painted and sealed, keep indoor pieces out of direct sun when possible, since UV exposure fades craft paint faster than normal wear does. For anything displayed outdoors, an exterior-rated topcoat matters even if the blank was sold pre-primed, since the base coat alone will not hold up through a full season of rain and sun.
Dust finished pieces with a dry or slightly damp cloth rather than scrubbing, and store seasonal pieces indoors between uses rather than leaving them outside year-round, which extends the life of both the paint and the wood underneath.
Why we prefer in-house cut blanks for gift-quality projects
As someone who has spent plenty of hours finishing pumpkin blanks, I have found that consistent sourcing and in-house cutting make a real difference in how little sanding you have to do before painting. When a shop controls its own material and laser settings, edge quality stays predictable from piece to piece.
That consistency matters most when a project is a gift or something you plan to sell, where a clean edge saves real time. For a one-off craft night, a mass-market multi-pack is often the more practical choice.
— Gary
How we help: ready-to-ship blanks, custom cuts, and engraving
We use controlled sourcing and cutting processes to ensure consistent edges and thickness from one order to the next, whether you are buying a single pumpkin for a mantel display or a batch for a classroom project. Our unfinished wood blanks ship ready to sand and paint, and if the shape or size you need is not already listed, our custom gift creation services cover custom sizing and personalized engraving on request.
- Browse ready-to-ship pumpkin and fall-shape blanks in our wood blanks catalog.
- Request a custom size or a personalized engraved design through our services page.
- See examples of finished plywood cutouts, including seasonal shapes, on our autumn cutout collection.
If you need a shape we do not currently stock, like a howling wolf cutout (on Etsy) or a guitar sign cutout (on Etsy), those are available through our Etsy shop alongside our pumpkin blanks. Visit our online shop to see what is ready to order now.
FAQ
What thickness should I choose for a pumpkin wood cutout?
Most crafters do well with 1/4" plywood for freestanding signs and 1/8" birch or plywood for ornaments, tiered-tray pieces, or anything that leans rather than stands. Thicker stock holds hardware and screws more securely if you plan to mount the piece.
Is MDF or plywood better for painting pumpkin blanks?
Both take paint well, but plywood tends to stay flatter over time and weighs less, while MDF offers a very smooth surface at a lower cost. For outdoor pieces or anything handled often, plywood generally holds up better.
What paint is safe to use on wood cutouts for kids’ crafts?
Look for craft paint labeled “Conforms to ASTM D-4236” or carrying an ACMI non-toxic certification, since the CPSC recommends checking for this conformity statement before using art materials with children. Acrylic craft paints with this labeling are a safe, common choice for indoor projects.
Do I need to seal an unfinished pumpkin cutout after painting?
Yes, especially for outdoor display, since even pre-primed blanks need an exterior-rated topcoat like polyurethane to hold up through weather exposure. Indoor pieces benefit from a basic clear topcoat too, mainly to protect the paint from fading and scuffing.
Can I wood burn or engrave an unfinished pumpkin blank myself?
Yes, a basic wood-burning pen works well for freehand lettering or simple designs on plywood or birch blanks, especially on 1/4" stock that resists burning through. Testing your pressure and speed on a scrap piece first helps avoid uneven scorch marks on the actual project.
Sources
- Art and craft safety guide (CPSC)
- Wooden pumpkin carving for fall decor
- Product & finishing guidance (manufacturer site)
Recommended
- 1/4" Plywood Autumn Cutouts: Shop, Finish, Display from a Georgia Shop
- Skip Sanding: Laser Shop Buy & Finish Unfinished Deer Cutouts
- Five Step Grit Progression for Crafters Painting Unfinished Wood Cutouts