Five Step Grit Progression for Crafters Painting Unfinished Wood Cutouts
The most reliable way to paint unfinished wood cutouts smoothly is to sand the surface even, seal or prime it, apply thin paint coats with light sanding between each one, and finish with a clear topcoat. That five-step order matters more than any single product. A grit progression of 120–180 for rough spots, 220 for the main surface, and 320–400 between coats keeps things flat. Blanks like a howling wolf cutout or a wooden guitar sign, cut from quarter-inch plywood, are good practice pieces because their flat faces show every shortcut you skip.
✦ Featured From Our Shop ✦
Handcrafted & laser engraved in Georgia, just for you
TL;DR:
- Proper surface preparation involves sanding with progressively finer grits from 120 to 400 and removing soot with alcohol to ensure smooth paint application.
- Sealing with a water-based sanding sealer followed by a primer prevents blotchy absorption and tannin bleed-through, especially on tannin-heavy woods like cedar and pine.
- Applying two to three thin coats of craft acrylic or spray paint with light, overlapping strokes yields the best finish, avoiding brush marks and pooling.
- Masking before engraving or using a wipe-off method ensures crisp, clean paint fills in intricate laser-cut details.
- Using a water-based polycrylic topcoat protects the finish without yellowing and must be applied in multiple light layers for a smooth, durable surface.
Table of Contents
- How Do You Prep and Sand Wood Cutouts Before Painting?
- Should You Seal or Prime Wood Cutouts First?
- What’s the Best Way to Paint Wood Cutouts Without Brush Marks?
- How Do You Get Clean Paint-Filled Engravings?
- When Should You Sand Between Coats, and How Do You Fix Mistakes?
- Which Topcoat Keeps a Painted Cutout Smooth and Protected?
- A Publisher’s Take on Painting Laser-Cut Blanks
- Where to Find Ready-to-Paint Wood Cutout Blanks
- Sources
- FAQ
How Do You Prep and Sand Wood Cutouts Before Painting?
Laser-cut blanks arrive with a thin layer of soot along the edges, a byproduct of the burning process. That char has to go before anything else happens. A light pass with fine sandpaper lifts most of it, and a wipe with isopropyl alcohol on a cloth handles the rest without soaking the wood.
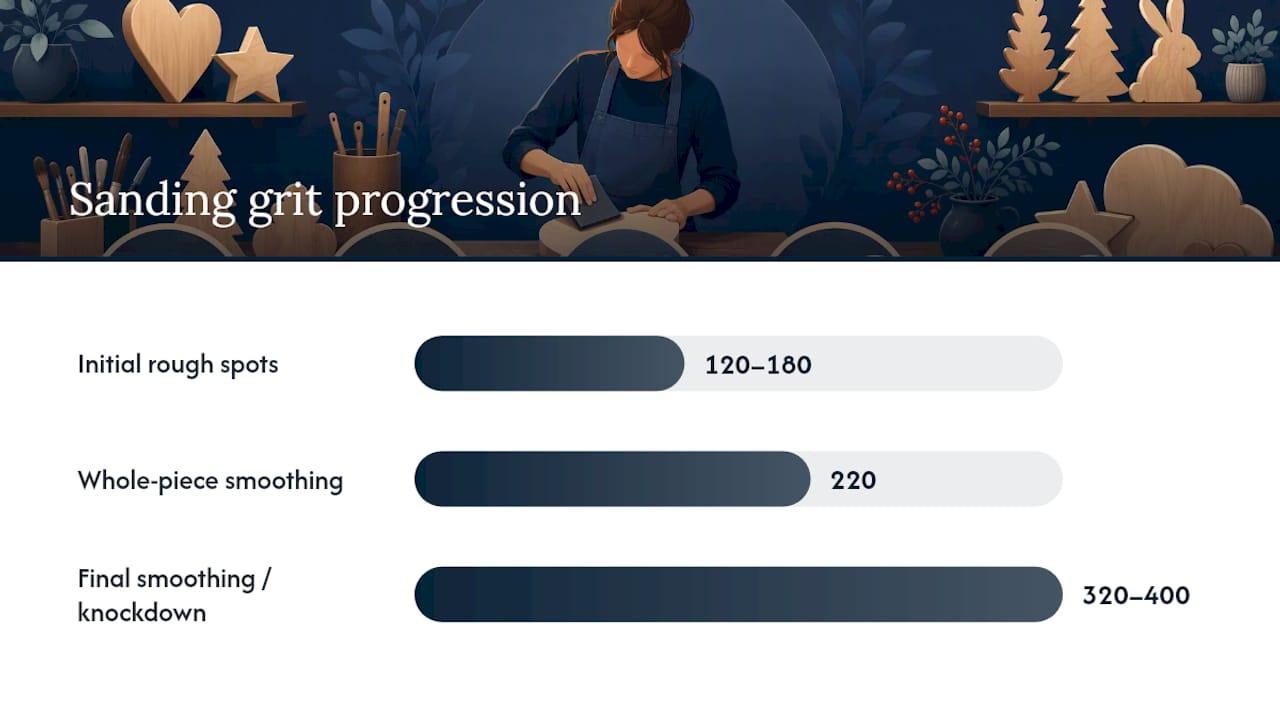
Sanding unfinished wood works best as a progression, not a single step. Start with 120–180 grit only on rough or splintered spots, then move the whole piece to 220 grit for a uniform surface. Save 320–400 grit for final smoothing or for knocking down raised grain between coats, a step covered in more detail further down. This staged approach is standard advice for prepping laser-cut wood for a silky-smooth result, and skipping straight to fine grit on rough wood just wastes sandpaper.
Shape dictates tool choice:
- Sanding sponges flex around curved outlines like a howling wolf’s back or ears without flattening the profile.
- A dowel wrapped in sandpaper reaches inside cutouts and tight interior curves that flat paper can’t touch.
- Needle files clean up small notches, like the space between a guitar’s strings or a wolf’s open jaw, where sandpaper is too clumsy.
Keep light pressure near edges so you don’t round off crisp detail, and support thin pieces with your palm flat underneath rather than gripping the edges, which is where thin plywood tends to snap. Once sanding is done, clear dust with a tack cloth or microfiber rag, then a quick blast of compressed air into engraved grooves where cloth can’t reach.
Pro Tip: Sand over a dark surface or with a small flashlight angled across the wood. Dust and missed rough patches show up instantly under raking light that you’d miss under overhead lighting.
Should You Seal or Prime Wood Cutouts First?
Sealer and primer do different jobs, and using only one often explains why a “smooth” paint job still looks patchy. Sanding sealer soaks into the wood’s pores and stabilizes them, which stops the blotchy, uneven absorption you get when raw wood drinks up paint unevenly in some spots and not others. Primer sits on top of that stabilized surface and gives paint something consistent to grip, while also blocking tannins that bleed through and yellow light-colored paint.
For most craft-grade woods, a water-based sanding sealer followed by a water-based primer is the simplest combination, and both dry fast enough to keep a project moving in an afternoon. Cedar, pine, and other tannin-heavy woods need a stain-blocking primer specifically, or you’ll see brown blotches ghost through white or pastel paint weeks later.
One shortcut worth knowing: tinting your primer with a small amount of your final paint color cuts down on the number of topcoats needed, especially over dark plywood. It’s a small step that saves real time on multi-coat projects.
A few rules of thumb:
- Let sealer dry fully before priming. Rushing this step traps moisture under the primer coat.
- After the first primer coat dries, feel the surface. If it’s slightly rough, that’s raised wood fiber, and a light pass with 320–400 grit smooths it before paint goes on.
- Two thin primer coats beat one thick one for hiding grain and tannins evenly.
Roughly three thin coats total, counting primer, tends to outperform one or two heavy ones on both texture and color depth.
What’s the Best Way to Paint Wood Cutouts Without Brush Marks?
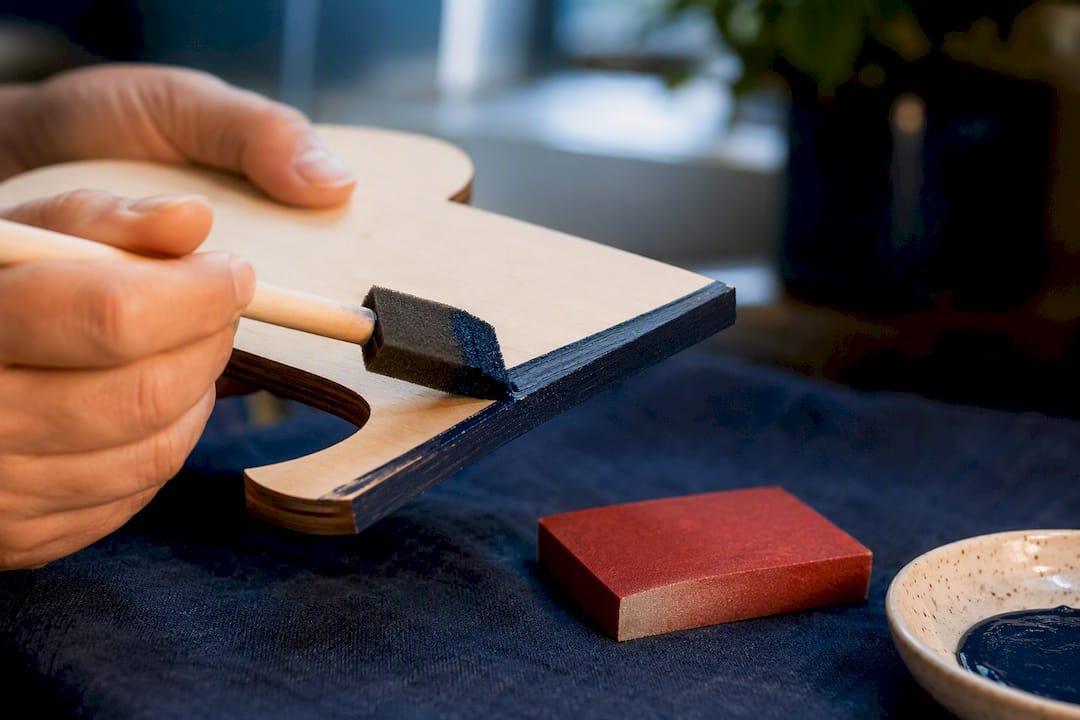
Brush choice changes the outcome more than most hobbyists expect. A foam brush lays down the smoothest coverage on flat, open areas like the body of a guitar cutout, because it doesn’t leave bristle lines. A flat synthetic brush gives you more control for edges and medium detail. A small round detail brush is worth keeping on hand for tight spots, like a wolf’s eye or the sound hole on a guitar shape. Spray paint dries fastest and levels out beautifully on flat surfaces, but it pools quickly in engraved lines and can blur fine detail if you don’t control the distance and coat thickness.
Here’s the sequence that avoids the most common paint failures:
- Load the brush lightly. A heavily loaded brush is the top cause of drips and pooling in corners.
- Apply thin, even strokes and keep a wet edge, meaning each new stroke slightly overlaps the still-wet edge of the last one so you don’t get visible lap marks.
- Let each coat dry fully before adding the next. Thin acrylic coats usually need 20 to 40 minutes, though high humidity can stretch that well past an hour.
- Plan on two to three thin coats rather than one thick one. Thin, repeated coats consistently outperform single heavy applications for smoothness and color richness.
Craft acrylics handle the vast majority of cutout projects fine and clean up with water. Artist-grade acrylics cost more but deliver noticeably richer color depth, worth it on a display piece or a gift you’re not repeating. If you go with spray paint, keep it well back from engraved details. It’s fast and smooth on flat wood, but it fills fine grooves quickly and blurs the crisp lines a laser cutter creates. Always paint in a ventilated space, whether that’s an open garage or a window fan pulling fumes outward, and keep a damp rag nearby for quick cleanup on skin or tools.
How Do You Get Clean Paint-Filled Engravings?
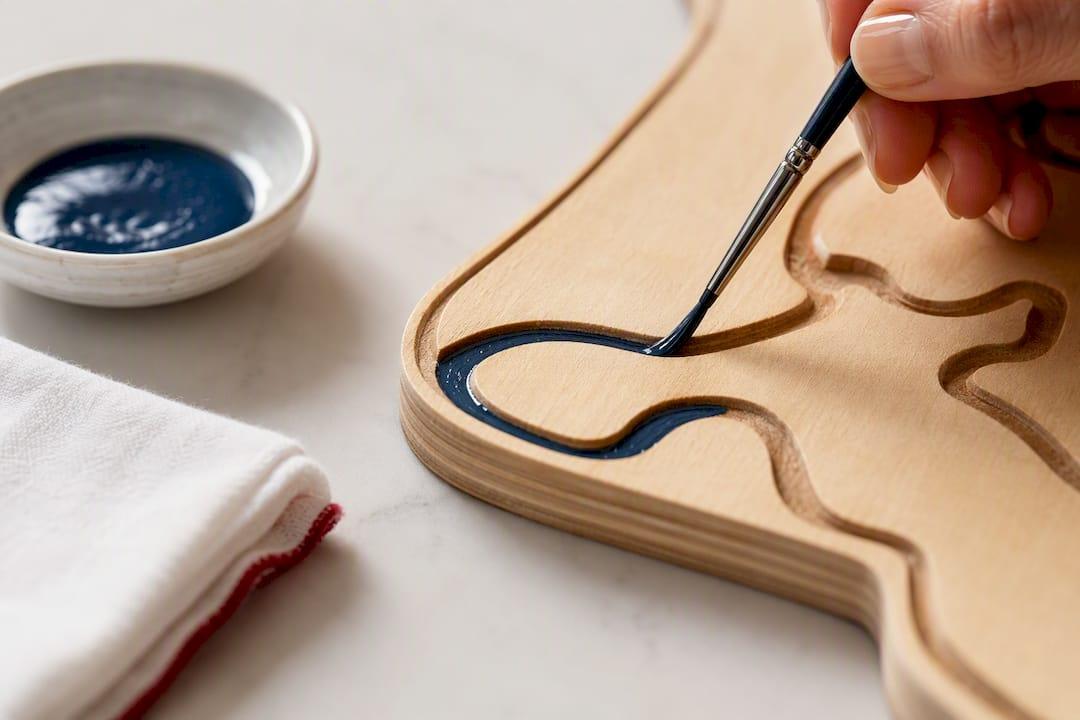
Two approaches handle engraved details, and knowing both gives you flexibility depending on when you’re finishing the piece. The first, mask-before-cut, requires planning ahead: apply transfer tape to the wood before it goes through the laser, so the engraving cuts through the tape as well as the wood. Paint over the whole masked surface, then peel the tape away, and paint sits perfectly in the recessed lines with sharp, clean borders. This method is standard practice among laser makers specifically because it produces the crispest fills.
If your blank is already cut and unmasked, the wipe-off method is a solid fallback, particularly on tight-grained woods like birch plywood:
- Brush paint over the engraved area, letting it pool into the recesses.
- Wait until the paint turns slightly tacky, not fully dry, then wipe the flat surface with a damp cotton swab or the edge of a plastic razor blade.
- Wipe in one direction rather than scrubbing, which pulls paint back out of the grooves.
- Touch up stray marks with 400-grit sandpaper once everything is fully dry.
Low-tack masking tape peeled at a shallow angle also protects crisp borders on painted sections without pulling color off when you remove it.
When Should You Sand Between Coats, and How Do You Fix Mistakes?
Wood fibers swell slightly whenever they absorb a water-based sealer, primer, or paint. That’s grain-raising, and it’s why a smooth-looking wet coat can dry with a faint rough texture. A light pass with 220 to 400 grit after the first coat knocks those raised fibers back down, and each coat after that gets progressively smoother. Sand gently, and stay off engraved detail and thin edges where you’d blur the shape or weaken the piece.
Most finish problems have quick fixes:
- Tannin bleeding through as brown blotches: re-prime the spot with a stain-blocking primer before repainting.
- Visible brush marks: light sand once dry, then recoat with a well-loaded but lightly applied brush.
- A wet drip forming in a corner: lift it immediately with a toothpick or the tip of a craft knife before it sets.
- Blotchy color from painting too thick: thin coats fix this faster than adding more paint on top.
Pro Tip: For fragile or intricate cutouts, rest the piece on a soft mat and move the sandpaper over the wood instead of moving the piece across the paper. It protects thin points from snapping mid-sand.
Which Topcoat Keeps a Painted Cutout Smooth and Protected?
A water-based polycrylic is the safest topcoat for most indoor decorative pieces, since it dries clear and won’t yellow painted whites or pastels over time. Oil-based polyurethane cures harder but ambers with age, which can dull bright colors on a display piece within a year or two. For cutouts with fine engraved detail, a spray clear coat levels out more evenly than brushing, since a brush can drag paint at sharp edges.
A few habits keep the topcoat itself smooth:
- Apply several light spray passes rather than one heavy coat, holding the can 8 to 12 inches from the surface.
- Let each coat cure fully, typically 24 to 48 hours, before handling or stacking pieces.
- A satin or matte sheen hides minor texture better than high gloss, which shows every imperfection.
- Watch for drips on vertical edges and orange-peel texture from spraying too close or too fast.
A Publisher’s Take on Painting Laser-Cut Blanks
We prep every unfinished blank the same way we’d tell a hobbyist to: sand, deburr the laser edges, and knock down raised grain before it ever reaches a customer’s workbench. Working with quarter-inch plywood day after day taught our team that most rough finishes trace back to skipped grit steps, not bad paint. If you’re prepping a blank for a gift, take the extra ten minutes on sanding before you prime. It’s the cheapest insurance against a finish that looks rushed.
— Gary
Where to Find Ready-to-Paint Wood Cutout Blanks
If you’d rather skip the material-sourcing step and start sanding right away, laser-cut blanks built for painting take a lot of the guesswork out of the process. The Howling Wolf Wood Cutout in quarter-inch plywood (on Etsy) has broad, flat surfaces that take a foam brush beautifully, plus enough silhouette detail to practice edge control without fighting tiny engraved lines. The Wooden Guitar Cutout Sign works well for anyone wanting to try the mask-before-cut fill technique on the sound hole and string details, since these are cut with clean, laser-sharp edges that hold paint crisply.
Both blanks arrive ready for the workflow covered above: sand, seal, thin coats, topcoat. If you want to browse more shapes suited to painting projects, from wall décor to gift signs, the full laser-cut wood cutout collection on Etsy is worth a look before your next project.
Sources
- Prep sanding guidance — Real Wood Furniture
- Tinting primer to reduce coats — KILZ blog
- Finishing laser and CNC projects — Craftgineer
- A complete guide to finishing laser cut wood — Cool Laser Files Store
- 7 pro tips for painting laser cut wood projects — Handyloom
FAQ
Can You Paint Directly on Unfinished Wood?
You can paint straight onto unfinished wood, but skipping primer or sealer usually causes uneven, blotchy absorption since raw wood soaks up paint at different rates across the grain. Sealing first gives a far more even, professional-looking result.
How Do You Paint Wood So It Looks Smooth?
Sand through a grit progression ending at 220 to 400, seal or prime the surface, then apply two to three thin paint coats with light sanding between each to remove raised grain. Finish with a clear topcoat applied in light, even passes.
What Is the Best Kind of Paint for Unfinished Wood?
Craft acrylics work well for most cutout projects and clean up easily with water, while artist-grade acrylics add richer color depth for display pieces. Both need a primed surface underneath to look their smoothest.
Can You Paint Over Finished Wood Without Sanding?
Sanding is still recommended even on previously finished wood, since new paint needs a slightly roughened surface to grip properly rather than sitting loosely on a glossy finish. A quick pass with 220-grit sandpaper is usually enough to prep an already-sealed piece for a fresh coat.
Recommended
- Crafty Tooth Cutout Ideas: Creative Uses for 1/4" Sanded Plywood
- Soldier Wood Cutout Crafts: A Painter’s Buying Guide
- Crafters: Stain a Wolf Silhouette on ¼-Inch Laser Cut Plywood