Prep Unfinished State Cutouts for String Art: Laser Cut Fixes
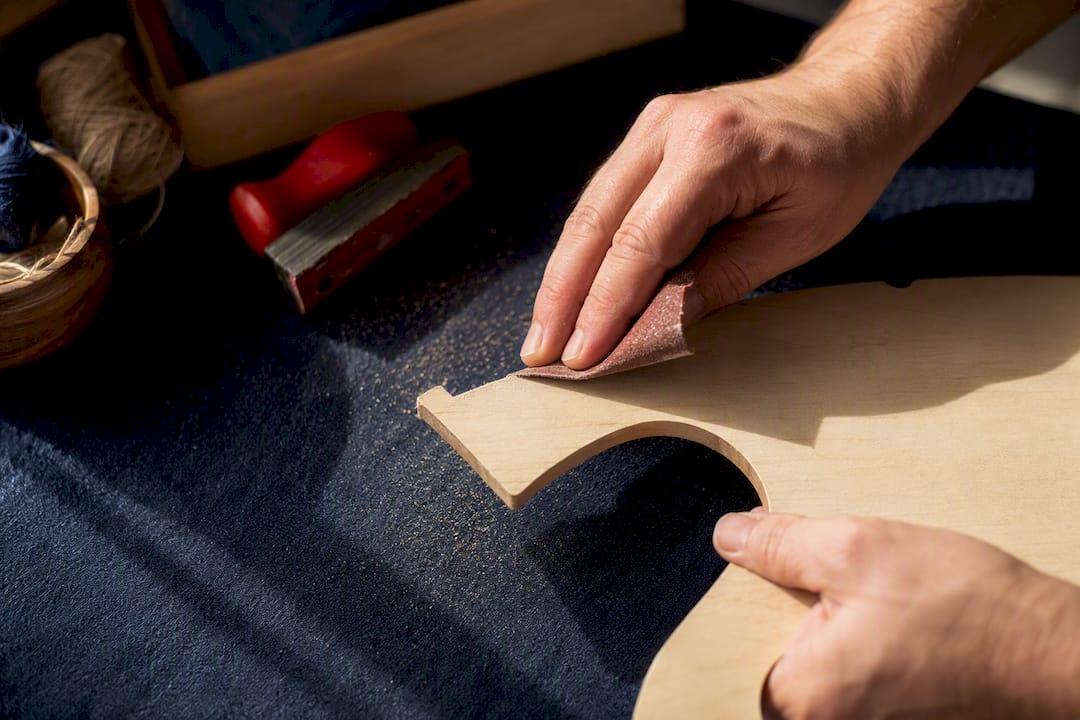
Sand your cutout with 120 to 220 grit sandpaper, wipe away every trace of dust, transfer your template, and mark nail spots roughly 3/8 to 1/2 inch apart before drilling pilot holes and setting nails at a consistent height. That sequence keeps thread from snagging, stops the wood from splitting, and gives you a finished piece that sits flat instead of warping. Skip a step, and you’ll be fighting the wood instead of enjoying the craft.
✦ Featured From Our Etsy Shop ✦
Handcrafted & Laser Engraved Just For You

TL;DR:
- Using plywood or laser-cut blanks with a thickness of at least 1/2 inch provides the best balance of durability and ease of nail insertion.
- Proper sanding with 120 and 220 grit sandpaper, followed by thorough dust removal, ensures a smooth, even surface that prevents thread snagging and promotes better paint adhesion.
- Accurate transfer and marking of nail spots, spaced roughly 3/8 to 1/2 inch apart and punched with an awl or center punch, are crucial for maintaining design integrity and spacing consistency.
- Drilling pilot holes with a bit slightly smaller than the nail shank and to a depth of 3/8 to 1/2 inch helps prevent splitting and ensures nails sit straight and secure.
- Achieving uniform nail height and proper thread tension minimizes warping and nail pull-out, with support supports like rigid backers improving stability on thinner or more delicate blanks.
Table of Contents
- How to Prepare an Unfinished State Wood Cutout for a String Art Project
- Supplies and Tools You Need Before You Start
- Choosing the Right Wood Cutout and Thickness for String Art
- Sanding and Preparing the Surface: Grit, Edge Work, and Dust Removal
- Transferring Your Pattern and Marking Nail Locations Accurately
- Drilling Pilot Holes and Starting Nails: Bit Sizing, Depth, and Alignment
- Nailing, Stringing Basics, and Avoiding Warping or Nail Pull-Out
- Finishes and Sealants: When to Paint, Stain, or Seal
- Troubleshooting Common Prep Problems
- Signature Laser Designs Notes: Adapting These Steps for Laser-Cut Craft Blanks
- Cleaning the Wood Surface Before You Start
- Why Prep Matters More Than the Stringing Itself
- Ready-to-Prep Cutouts That Skip Half the Work
- Sources
- FAQ
How to Prepare an Unfinished State Wood Cutout for a String Art Project
Preparing an unfinished state wood cutout for a string art project comes down to five things done in order: smooth the surface, clean it completely, transfer your design accurately, drill smart pilot holes, and keep every nail at the same height. Miss the sanding step and paint won’t sit right. Skip the pilot holes and you risk splitting a shape you’ve already spent time cutting a template for. Get the order right, though, and the rest of the project is mostly patience and thread.
Most makers underestimate how much the prep stage determines the outcome. A crooked nail or a rough patch of wood doesn’t just look sloppy. It throws off spacing across the whole design, and by the time you notice, you’ve already strung half your thread. Basic board prep, meaning sanding, marking, and drilling, typically takes 15 to 30 minutes for a small project. That’s a small investment against hours of untangling and re-stringing later.
Supplies and Tools You Need Before You Start
You don’t need a full workshop to prep a state cutout properly, but a few tools make the difference between a smooth process and a frustrating one.
- Sandpaper, 120 grit for the initial smoothing pass and 220 grit for a final polish.
- A drill or drill press, plus bits slightly smaller than your nail’s shank diameter.
- An awl or center punch to mark and indent nail positions before drilling.
- Needle-nose pliers for gripping small nails or veneer pins without pinching your fingers.
- A hammer, ideally a small craft or tack hammer for better control.
- Painter’s tape to secure your template without damaging the wood surface.
- A shop vac or tack cloth for dust removal between sanding and finishing steps.
For nails, most 1/2 inch to 3/4 inch boards work well with nails between 7/8 inch and 1 inch long, which leaves enough shank in the wood to hold firm without poking through the back. Thinner craft blanks, especially anything under 1/2 inch, do better with veneer pins or shorter finish nails. Look for nails with small, rounded heads. They’re easier to wrap thread around without snagging, and they look cleaner in a finished piece.
Thread choice depends on your design’s scale. Embroidery floss suits small, detailed patterns because it’s thin enough to layer without bulking up. Crochet thread or thin cotton twine holds up better on larger state outlines where you want visible texture. Safety gear is minimal here, mainly eye protection when drilling and a stable work surface, but a small wood block under your piece while hammering gives you far more control than working on a bare table.
Choosing the Right Wood Cutout and Thickness for String Art
Not every wood cutout handles nails and thread equally well. Thickness and material both affect how the piece holds up once you start hammering.
Plywood is the most forgiving choice for beginners. It resists splitting better than solid wood because of its layered grain structure, and it sands to a smooth, even finish. Birch and poplar plywood in particular take paint and stain without raising much grain. Solid wood cutouts look great once finished but split more easily along the grain, so pilot holes matter even more if you go that route. MDF sands to an incredibly smooth surface, which makes it appealing for painted designs, but it’s denser and can crumble slightly around nail holes if you don’t pre-drill carefully.
Thickness is where a lot of beginners run into trouble. A commonly recommended backing thickness is at least 1/2 inch to 3/4 inch for many string art methods, which gives nails enough depth to grip without poking through the other side.
- 1/4 inch plywood craft blanks work fine for string art, but they need shorter nails or veneer pins and benefit from a rigid backer glued to the reverse side for extra support.
- 1/2 inch to 3/4 inch boards are the sweet spot for standard nails and don’t usually need reinforcement.
- MDF blanks hold detail well but should be pre-drilled every time, even for small nails.
If you’re working with a thinner blank like 1/4 inch sanded plywood, plan your nail length and backing strategy before you even start marking the design.
Sanding and Preparing the Surface: Grit, Edge Work, and Dust Removal
Start with 120 grit sandpaper on any rough or unfinished cutout, working in the direction of the grain rather than against it. This removes mill marks, minor splinters, and the fuzzy texture that raw plywood edges often have straight out of the cut. Once the surface feels even under your palm, switch to 220 grit for a final smoothing pass. This step matters more than most beginners expect. Fine-grit sanding between 120 and 220 grit and thorough dust removal prevents yarn from snagging on rough patches and helps paint or sealant adhere evenly across the surface.
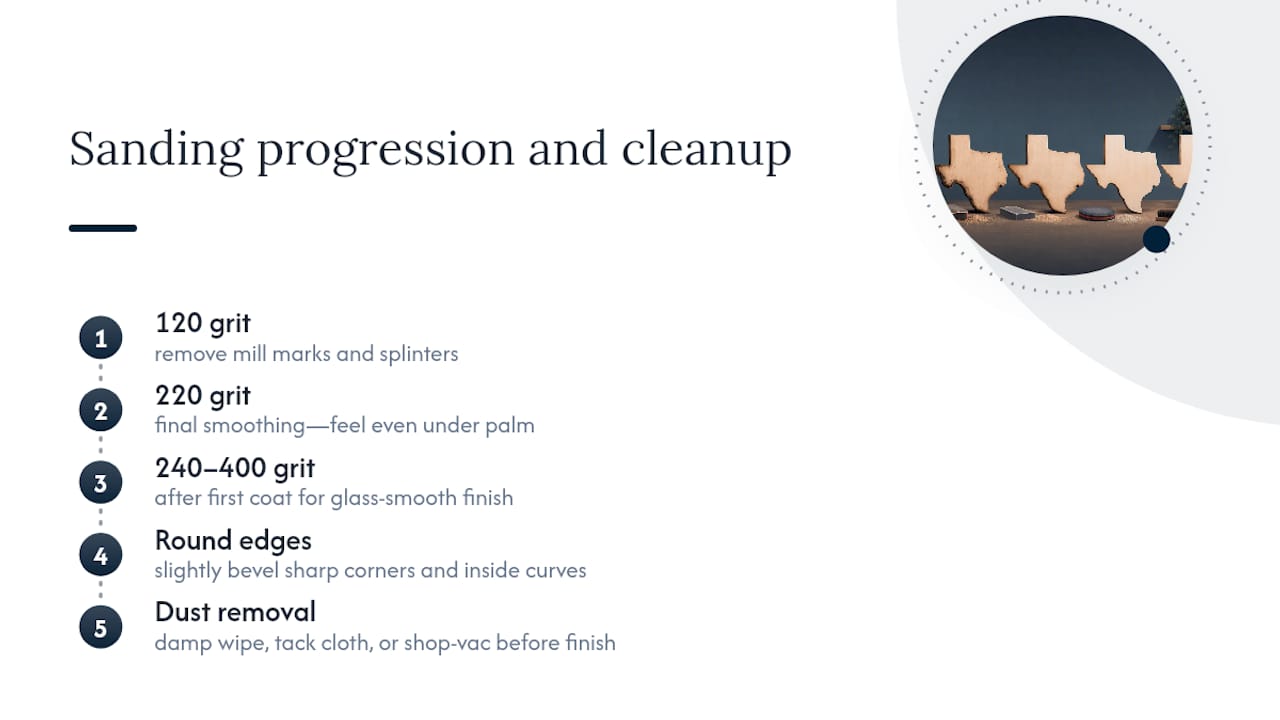
If you’re planning to paint or apply gesso for a very smooth base, add a light pass with 240 to 400 grit after your first coat dries. This knocks down any raised grain and gives you a glass-smooth surface for detail work.
Don’t skip the edges. Rounding sharp corners with sandpaper, even slightly, makes the piece safer to handle and gives it a more finished, professional look once it’s hanging on a wall. Pay extra attention to any inside curves or narrow points in your state’s outline, since those areas often get missed during the first sanding pass.
Once you’re done sanding, dust removal is non-negotiable. A dry cloth just pushes dust around. Use a damp cloth for a light wipe, followed by a tack cloth to catch anything left behind, or run a shop vac with a brush attachment over the whole surface. Do this immediately before drilling or finishing, not hours ahead, since dust resettles surprisingly fast in a workshop or garage.
Pro Tip: Sand outdoors or near an open window if you can. Fine wood dust from sanding cutouts gets into everything, and a quick breeze does more than any brush.
Transferring Your Pattern and Marking Nail Locations Accurately
Getting your design onto the wood accurately is what separates a state outline that looks crisp from one that looks lopsided. Print your template at 100% scale, since even a small print-scaling error will throw off every nail position downstream.
- Secure the template to the cutout using painter’s tape at the corners, or a light coat of low-tack spray adhesive for designs with a lot of detail. Check alignment against the edges of the cutout before you commit to marking anything.
- Mark nail spots with a pencil dot directly on the paper template, following your intended outline. For a state shape, this usually means tracing the border plus any internal points like a capital city or hometown marker.
- Punch each mark through the paper using an awl or center punch. This creates a small indent in the wood that guides your drill bit and keeps it from wandering once you remove the template.
- Space nails evenly, aiming for roughly 3/8 inch to 1/2 inch apart depending on how dense you want the finished design. Tighter spacing gives a more detailed silhouette but takes noticeably longer to string.
- Slow down on curves and corners. Tight bends in a state’s border need closer spacing than long, straight stretches, or the thread will pull unevenly across gaps.
- Number complex templates in pencil if your design has more than 40 or 50 points. It sounds excessive until you’re halfway through drilling and lose track of which mark comes next.
Drilling Pilot Holes and Starting Nails: Bit Sizing, Depth, and Alignment
Pick a drill bit that’s slightly smaller than your nail’s shank, not the same size. A hole that matches the nail exactly won’t hold it firmly once you start wrapping thread around it. Aim for a hole depth around 3/8 inch to 1/2 inch, enough to seat the nail securely without risking a poke-through on thinner boards.
- Wrap a small piece of tape around your bit at the depth you want, so you have a visual stop point every time.
- Use a drill press if you have access to one. It keeps every hole perfectly perpendicular and consistent, which translates directly into evenly seated nails.
- If you’re hand-drilling, brace your elbow against your body and check the bit’s angle against the surface every few holes to avoid drift.
- Drill straight down into each punched mark, letting the indent guide the bit rather than forcing it.
Pilot holes are the single biggest reason string art projects fail or succeed at the nail stage. Experienced makers point to the extra 15 to 20 minutes spent on careful marking and drilling as the step that prevents the most rework later, since a badly split board or a crooked nail is far harder to fix once thread is already wrapped around it.
Once holes are drilled, tap each nail in just a few millimeters by hand first to confirm it’s centered and straight before switching to full hammer strokes.
Nailing, Stringing Basics, and Avoiding Warping or Nail Pull-Out
Seat every nail to the same exposed height, usually leaving about 1/4 to 3/8 inch of nail above the surface. Uneven heights are one of the most common beginner mistakes, and they’re obvious the moment thread gets pulled across a design.
- Start each nail shallow, tap it a few times to confirm it’s straight, then drive it the rest of the way.
- Hold tiny nails or veneer pins with needle-nose pliers instead of your fingers to avoid smashed thumbs.
- A small wood block with a starter hole can help steady thin pins for initial tapping.
- Check nail height against a ruler or a spare piece of wood laid flat across several nails at once.
Thread tension should feel snug, meaning the string holds its path without sagging, but never so tight that the board visibly bows. Excessive pull across a large design is the main cause of warping in thin plywood or craft blanks. If you notice bowing partway through stringing, ease off the tension on a few passes, or once the piece is finished, flip the board and apply gentle counter-tension in the opposite direction to pull it back flat. For outdoor pieces or anything left in a garage or sunroom, sealing both faces of the board with an exterior-grade finish reduces warping over time far better than sealing just the front.
Pro Tip: If a nail leans no matter how you tap it, pull it out, add a small dab of wood glue into the hole, and reset it. The glue firms up the hole and gives the nail something to grip besides bare wood fiber.
If nails keep popping loose on a thin blank, that’s usually a sign the board needs a rigid backer glued to the reverse side rather than more force on the hammer.
Finishes and Sealants: When to Paint, Stain, or Seal
Whether you paint before or after nailing changes both the look and the difficulty of your project. Painting the background first gives you a fully sealed, even surface to nail into, and it’s much easier to get clean brush strokes without nails in the way. Painting after nailing lets you touch up spots the thread will cover anyway, but it’s fiddlier to work a brush around dozens of small nail heads.
- Clear acrylic spray is a fast, low-fuss option that protects the wood from moisture and handling oils without changing its color.
- Polycrylic gives a slightly more durable, wipeable finish, good for pieces that will get handled or dusted often.
- Primer or gesso creates a very smooth, opaque base coat, ideal if you’re painting a detailed design on a laser-cut plywood shape and want crisp color without visible grain underneath.
Always let any sealant or paint dry fully before hammering nails. Wet or tacky finish can gum up your drill bit and leave marks around each hole. For outdoor-hung pieces, seal both the front and back faces with an exterior-grade clear coat to keep moisture from warping the board unevenly over seasons.
Troubleshooting Common Prep Problems
Even careful prep runs into hiccups. Most are fixable in a few minutes if you catch them early.
- Small splits: work wood glue into the crack, clamp it overnight, then sand flush once dry. A split running the full length of a thin board usually can’t be saved and calls for a fresh blank.
- Paper fragments stuck in nail holes: pick them out with the tip of your awl, then lightly re-sand the immediate area.
- Bent or loose nails: pull them, widen the pilot hole by a hair, add a dab of glue, and reset.
- Warping after stringing: ease thread tension first. If the bow persists, flip the board and apply gentle counter-tension in the opposite direction, or glue a rigid backer to the reverse for a permanent fix.
None of these problems mean starting over. They just mean slowing down for five minutes before pushing ahead.
Signature Laser Designs Notes: Adapting These Steps for Laser-Cut Craft Blanks
Laser-cut blanks behave a little differently than a hand-cut board, mostly because they’re often thinner and already sanded smoother along the edges from the cutting process. For a 1/4 inch plywood shape or a detailed guitar-style cutout, shorter nails or veneer pins are the safer call, and a thin backer glued to the reverse gives peace of mind on any design with dense nail spacing.
A simple adapted workflow looks like this:
- Give the blank a quick light sand, since laser-cut edges are often already smooth but may have minor char marks worth knocking down.
- Tape on your template and punch each nail mark.
- Drill shallow pilot holes, shallower than you would on a thicker board, to avoid poking through the back.
- Use veneer pins or short finish nails instead of standard 1 inch nails.
- Add a rigid backer if your design has closely spaced nails across a large area.
Pre-finishing before nailing tends to work better on thin laser-cut blanks, since it’s harder to maneuver a brush around nails on a small, detailed shape once they’re in.
Cleaning the Wood Surface Before You Start
A clean surface matters just as much as a smooth one. Even a brand-new unfinished cutout can carry a light film of oil from packaging, handling, or the cutting process itself, and that residue interferes with how paint, primer, or sealant grips the wood.
Wipe the entire surface down with a slightly damp cloth after sanding, focusing on any spots that feel slick or shiny rather than matte. If you notice fingerprints or smudges, a bit of mineral spirits on a rag lifts oily residue without soaking into the grain the way water can. Let the wood dry completely before moving on to marking or finishing, since trapped moisture under a coat of paint or sealant tends to cause bubbling or uneven color later.
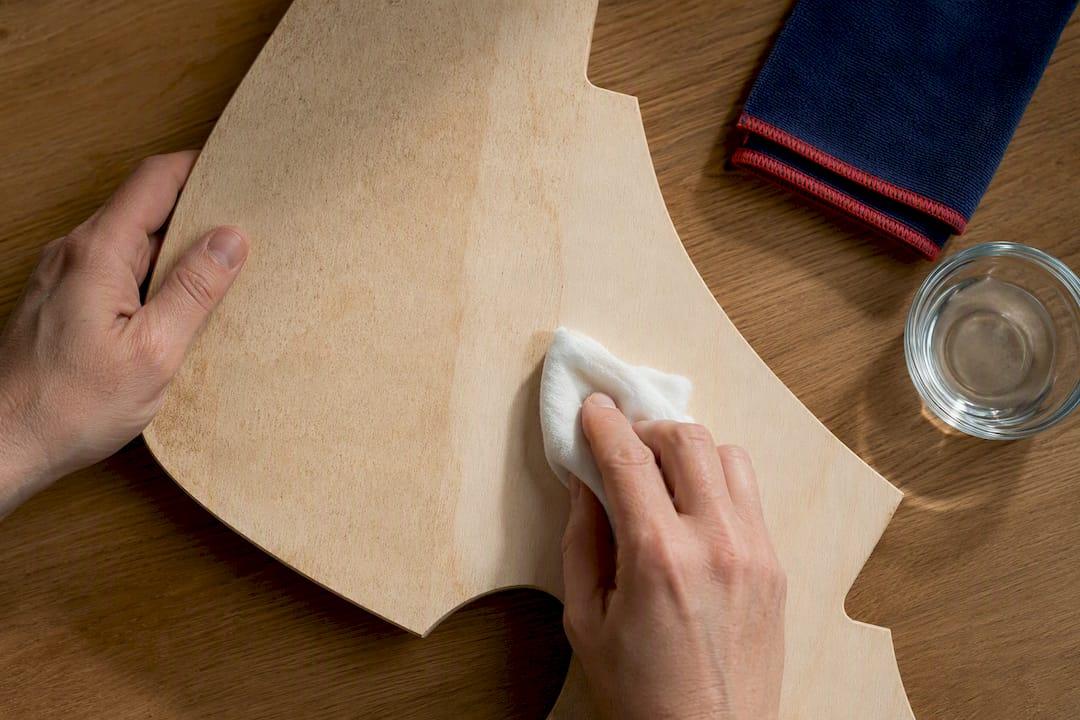
Dust is the other culprit worth watching for. It settles fast, especially in a garage or basement workspace, and it’s easy to miss on a light-colored wood surface. A final pass with a tack cloth right before you tape down your template catches anything a rag or vacuum left behind. If you’re working near sawdust from other projects, keep your cutout covered with a clean cloth between prep sessions so you’re not re-cleaning the same surface twice.
Why Prep Matters More Than the Stringing Itself
The conventional wisdom around string art treats stringing as the creative part and prep as the boring warm-up. That gets the emphasis backward. Nearly every flaw people blame on “bad stringing,” a lopsided outline, nails that lean, a board that bows, actually traces back to a rushed prep stage. The thread just makes the mistake visible.
What’s overrated is worrying about fancy tools. A drill press helps, but a steady hand and a piece of tape wrapped around a bit for a depth marker gets a beginner most of the way there. What’s underrated is spacing consistency. Readers fixate on nail height, and it matters, but uneven spacing between nails distorts a state’s outline far more than a nail sitting slightly higher than its neighbor.
If you’re working with a thin laser-cut blank, prioritize the backer decision before you even pick up sandpaper. Adding support after the fact means undoing nails you already placed. Decide that once, early, and the rest of the process gets a lot less stressful.
— Gary
Ready-to-Prep Cutouts That Skip Half the Work
Craft blanks are available that arrive sanded smooth, so you can skip straight to marking your template instead of starting with rough plywood edges. The Howling Wolf wood cutout in 1/4 inch plywood works well for a detailed string art piece, provided you pair it with veneer pins or short nails given its thinner profile. The wooden guitar cutout sign comes in larger sizes, which gives you room for wider nail spacing without sacrificing detail, and its precision laser-cut shape means you’re not fighting an uneven outline before you even start.
Before ordering, confirm the listed thickness against your planned nail length, especially for thinner blanks where a backer is worth adding. If precise scaling matters for your template, a partner resource on building an accurately scaled layout is worth a look before you print. Browse the wolf cutout listing or the guitar sign listing directly on Etsy to check current sizes and place an order.
Sources
- Norton Abrasives — Bare wood sanding
- Westfarthing Woodworks — 12 super tips for making string art
- A Pretty Life in the Suburbs — String art tips and tricks
- String Art Generator — Beginner guide first project
FAQ
What Type of Wood Is Best for String Art?
Plywood, especially birch or poplar, is the most beginner-friendly choice because it resists splitting and sands to a smooth, even surface. Solid wood looks great but splits more easily, so pilot holes matter even more.
What Is the 70/30 Rule in Art?
The 70/30 rule generally refers to balancing dominant and accent elements in a composition, roughly 70% of one visual element to 30% contrast. It’s a general design guideline rather than a fixed rule for string art specifically, and most makers adapt it loosely based on their own design’s density.
How Do You Make String Art on Wood?
Sand and clean the cutout, transfer your template, mark nail spots about 3/8 to 1/2 inch apart, drill shallow pilot holes, hammer nails to a uniform height, then wrap thread between the nails following your pattern.
How Do You Prep Wood for Crafts?
Sand with progressively finer grit from 120 up to 220, wipe away all dust with a damp cloth or tack cloth, and let the surface dry completely before marking or applying any paint or sealant.
Recommended