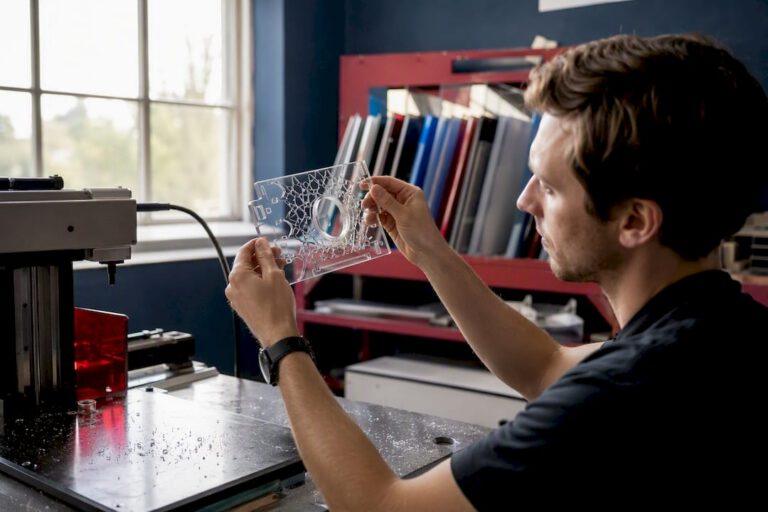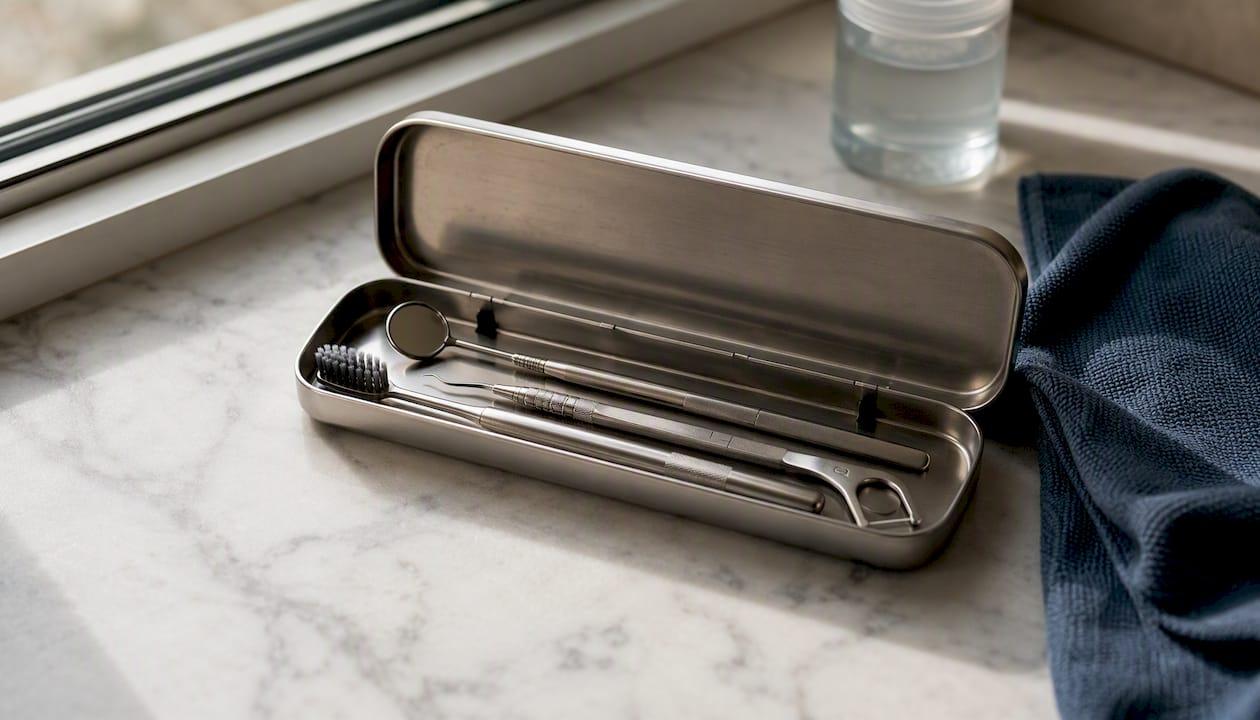
Personalized Dental Tools Set for Patients and Practices
Order a custom laser-engraved dental kit with autoclave-safe markings. For dental professionals, this is our best recommendation for clinical use. For individuals and consumer buyers, the best recommendation is a bundle that combines ingredient-focused products (such as nano-hydroxyapatite toothpaste) with personalized tools like a toothbrush, floss, tongue scraper, and a travel bag—modeled after modern consumer oral-care starter kits.
Here’s why it works:
✦ Featured From Our Shop ✦
Handcrafted & laser engraved in Georgia, just for you
- Durability: Laser-engraved stainless steel resists fading through repeated sterilization cycles, keeping your branding or personalization intact for years.
- Patient perception: A branded or gift-engraved kit signals care and professionalism before a single word is spoken.
- Predictable pricing: Custom engraving projects are quoted upfront by material, quantity, and design complexity, so there are no surprises at checkout.
Ready to get started? Request a quote or browse sample kit configurations below.
Key Takeaways
A laser-engraved dental kit with autoclave-safe markings is the most durable, clinically safe, and brand-consistent choice for both dental practices and individual buyers.
| Point | Details |
|---|---|
| Choose the right kit type | Match kit contents to the audience: consumer travel, patient welcome, orthodontic, or clinical instrument set. |
| Use autoclave-safe materials | Stainless steel with laser engraving is the only reliable choice for reprocessed clinical instruments. |
| Always get a proof and photo | Approve a digital proof and request a pre-production photo before any volume run begins. |
| Confirm lead time and MOQ | Small-batch runs typically take 3–5 business days after proof approval; volume runs may need 7–10 days. |
| Signaturelaserdesigns | Offers industrial laser engraving with proofing, pre-production photos, and autoclave-safe marking for dental kits. |
Table of Contents
- What does a personalized dental tools set typically include?
- What personalization options and materials work best?
- How is ordering, pricing, and turnaround handled?
- Which kit configuration fits your specific use case?
- Is your personalized kit clinically compatible and safe?
- How do you specify artwork and personalization correctly?
- What do finished kits actually look like?
- Why a dedicated custom engraver beats a marketplace kit
- Signaturelaserdesigns makes custom dental kits easy to order
- Sources
What does a personalized dental tools set typically include?
The contents of a custom dental tool kit vary by who it’s for and how it will be used. Four kit types cover most buyer needs.
Consumer travel kit: A toothbrush, floss, tongue scraper, and a compact travel bag form the practical core. Consumer starter kits sold today are positioned as complete daily routines in a single pouch, and that template translates well to personalized travel sets.
Patient welcome kit: Practices typically add a branded case, a printed care card, and sometimes a timer-enabled toothbrush to reinforce the 2-2-2 rule (brush twice daily, two minutes each time, two dental visits per year). This simple framework is widely recommended to guide which tools belong in the kit.
Orthodontic kit: Interdental brushes, orthodontic-friendly floss threaders, a travel mirror, and a small wax supply are the must-haves here. The case needs to be large enough to hold all of them without crushing the brushes.
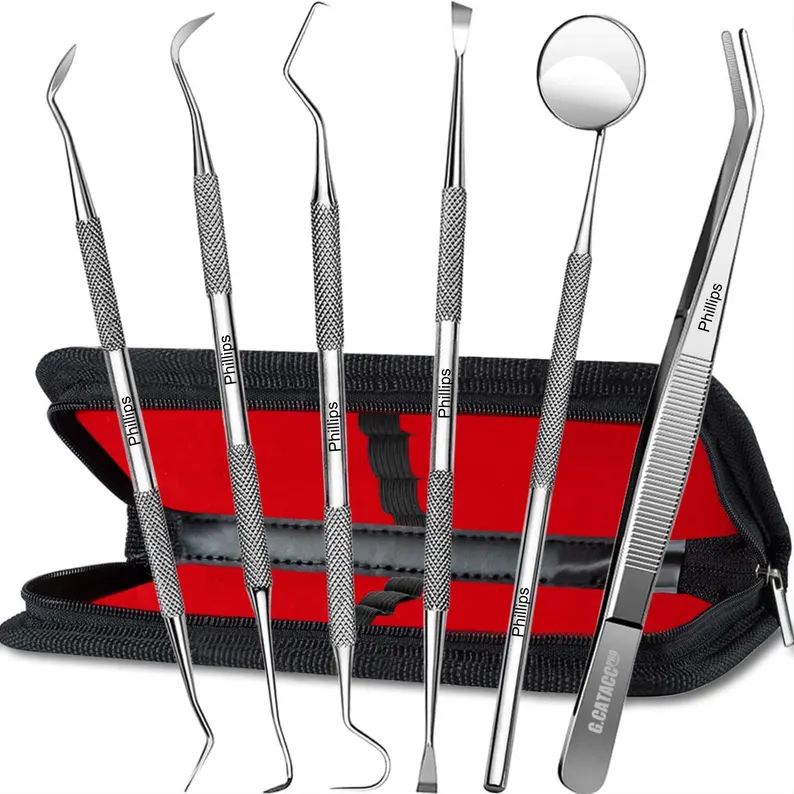
Practice instrument set: Stainless-steel scalers, explorers, mirrors, and curettes, each laser-marked with a practice name or instrument code. These kits prioritize clinical compatibility over aesthetics.
| Kit type | Primary audience | Sterilization needed |
|---|---|---|
| Consumer travel | Individuals, gift buyers | No |
| Patient welcome | New or returning patients | No |
| Orthodontic | Ortho patients | No |
| Practice instrument | Clinicians, hygienists | Yes |
Pro Tip: For orthodontic patients, include a pack of interdental brushes in at least two sizes and a spool of orthodontic floss with a built-in threader. Those two additions make the kit genuinely useful rather than decorative.
What personalization options and materials work best?
Personalization goes well beyond engraving a name. The method you choose affects durability, appearance, and whether the item can safely go through an autoclave.
Personalization methods:
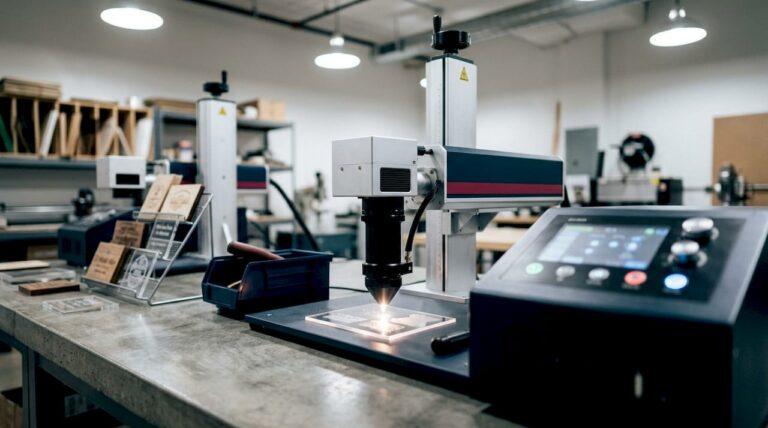
- Laser engraving: Removes material to create a permanent, recessed mark. Best for stainless steel and anodized aluminum. Autoclave-safe when done correctly.
- Laser etching: Melts the surface rather than removing it, producing a lighter mark. Works well on polished metal and hard plastics.
- Anodized color fill: A laser removes the anodized layer to reveal a contrasting color. Striking on aluminum cases and handles, but not suitable for high-heat sterilization.
- Pad printing and UV printing: Ink-based methods ideal for plastic cases and pouches. Not autoclave-safe; best for consumer or gift items only.
Modern consumer bundles increasingly pair ingredient-focused products like nano-hydroxyapatite toothpaste with personalized tools, treating the kit as a curated system rather than a purely cosmetic gift. That trend is worth noting when you’re building a consumer-facing kit.
| Material | Laser engraving | Autoclave-safe | Best for |
|---|---|---|---|
| Stainless steel | Excellent | Yes | Clinical instruments |
| Anodized aluminum | Excellent | Limited | Cases, handles |
| Hard plastic | Good | No | Consumer kits, cases |
| Silicone | Moderate | No | Grips, pouches |
| Leatherette | Good | No | Gift cases, pouches |
Pro Tip: Always request autoclave-safe marking for any instrument that will be reprocessed. Avoid engraving on or near cutting edges, since even shallow material removal can alter the geometry of a blade or scaler tip.
Understanding the differences between laser etching, engraving, and marking helps you choose the right method before you submit artwork.
How is ordering, pricing, and turnaround handled?
Pricing for a custom dental tool kit is driven by four main factors: material, quantity, artwork complexity, and finishing options like color fill or anodizing; understanding how automation and robotics improve precision and consistency in manufacturing can help optimize production workflow and scale, as explained in How It Works. Packaging adds cost too, especially for hard cases with custom foam inserts.
What raises or lowers per-unit cost:
- Higher quantities lower the per-unit price significantly on engraving setups.
- Simple text engravings cost less than detailed logos with fine linework.
- Color fill and anodized finishes add a per-piece charge on top of the base engraving fee.
- Rush production typically carries a surcharge, so planning ahead saves money.
Illustrative pricing ranges vary widely. A small batch of engraved stainless-steel instruments (10–25 pieces) with a simple text mark tends to run differently than a 100-piece patient welcome kit with branded cases and printed cards. Request a quote with your exact specs for an accurate figure.
Standard order workflow:
- Submit your request with material type, quantity, and design brief.
- Upload artwork (vector preferred) or describe the text and font.
- Review a digital soft proof showing placement and sizing.
- Approve the proof or request revisions.
- Production begins after written approval.
- Quality check on finished pieces.
- Shipment with tracking.
Production window: Small-batch runs of 10–50 pieces typically move through production in 3–5 business days after proof approval. Volume runs of 100 or more pieces may require 7–10 business days. Rush options are available for time-sensitive orders.
For practices ordering sample kits before committing to a full run, a single-piece or small-batch sample order is the right first step. It lets you validate fit, finish, and marking quality before scaling up.
Which kit configuration fits your specific use case?
Matching the right kit to the right audience saves time and avoids ordering items that won’t get used. Here are four configurations that cover the most common needs.
Patient welcome kit: Branded toothbrush, floss, tongue scraper, a printed 2-2-2 rule card, and a logo-engraved zipper pouch. Dental practices that reinforce the 2-2-2 rule as a patient communication tool find that a physical kit makes the message stick. The personalization here is practice branding, not individual names.
Orthodontic kit: Interdental brushes, floss threaders, orthodontic wax, a travel mirror, and a compact hard case. Personalization can include the patient’s name on the case or the practice logo on the mirror back. This kit works as a new-patient gift and a compliance tool.
Travel/personal kit: Toothbrush, floss, tongue scraper, and a leatherette pouch with a name or monogram engraved on the exterior. Consumer research on structured brushing routines shows that having the right tools on hand consistently is one of the strongest predictors of good home-care habits.
Hygienist/practice tray set: Laser-marked scalers, explorers, curettes, and mirrors organized in a color-coded tray. Marking typically includes instrument code, practice name, or both. This configuration prioritizes clinical function over gift appeal.
Pro Tip: Personalization for patient gifts should focus on the practice brand and a warm message. Clinical instrument marking should focus on identification codes and practice name.
Research on oral health outcomes confirms that diet and daily habits drive results more than any single product. A well-chosen kit reinforces good habits; a poorly chosen one just takes up drawer space.
Is your personalized kit clinically compatible and safe?
For any kit that includes reusable stainless-steel instruments, clinical compatibility is non-negotiable. Marking must not compromise instrument function or patient safety.
Clinical compatibility checklist:
- Confirm laser marking is applied to the shank or handle only, never on cutting edges or working tips.
- Verify marking depth is within the instrument manufacturer’s allowable tolerance.
- Request a compatibility statement from your engraving supplier before volume production.
- Follow your instrument supplier’s reprocessing guidance for cleaning, disinfection, and sterilization steps.
- Avoid anodized color fills on instruments that will be autoclaved; the color layer can degrade under high heat.
- Surface prep before marking (degreasing, passivation) improves adhesion and corrosion resistance.
Marking should never alter an instrument’s functional geometry. A laser mark on a scaler shank is safe and permanent. A mark placed on or near the blade tip risks changing the cutting angle, which is a patient safety issue, not just a cosmetic one.
Pro Tip: Before placing a volume order for marked clinical instruments, request a single marked sample and run it through your standard autoclave cycle. Inspect the mark and the instrument edge under magnification. That one test prevents a costly batch problem.
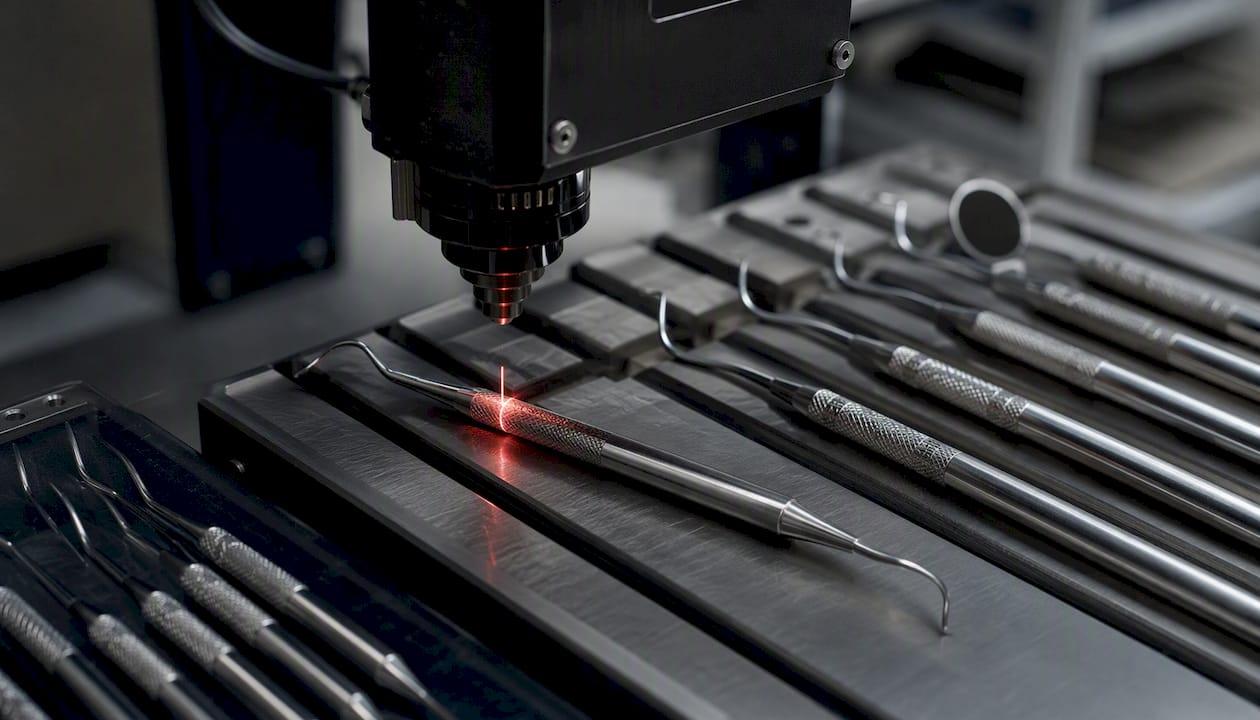
Signaturelaserdesigns’s industrial laser engraving services are built for exactly this kind of precision work, with material guidance and proofing built into every order.
How do you specify artwork and personalization correctly?
Getting artwork right before production starts is the fastest way to avoid delays. A few simple rules cover most situations.
File format and artwork checklist:
- Submit logos as vector files (AI, EPS, or SVG). Raster files (JPG, PNG) are acceptable only at 600 DPI or higher.
- Minimum stroke width for engraving on metal: 0.5 pt. Thinner lines tend to disappear or blur.
- Choose fonts with medium to bold weights for instrument shanks and small handles. Thin script fonts lose legibility at small sizes.
- Confirm text height: 2mm is a practical minimum for readable engraving on a toothbrush handle; 1.5mm is workable on instrument shanks with a clean sans-serif font.
Proof process:
- Submit artwork and placement notes with your order request.
- Receive a digital soft proof showing the design at actual scale on the item.
- Review placement, font size, and spacing carefully.
- Request a scaled mockup or pre-production photo if the item is a clinical instrument.
- Give written approval before production begins.
For detailed guidance on text sizing and file prep, the custom text engraving guide covers the technical specs in full.
Placement quick reference:
- Toothbrush handle: center of the flat face, 20–40mm from the base.
- Mirror back: centered, leaving 3mm clearance from the edge.
- Instrument shank: 10–15mm from the handle end, on the flat face.
- Case exterior: centered on the front panel or bottom-right corner for a monogram.
Pro Tip: Always request a pre-production photo of the actual instrument batch, not just a digital mockup. A photo confirms the real-world mark quality on your specific material lot before the full run is committed.
What do finished kits actually look like?
Seeing finished examples before ordering removes a lot of uncertainty. Here’s what a solid photo set from a supplier should include.
- A close-up of the engraving at actual scale, showing edge sharpness and depth.
- A full-kit layout photo with all components visible and the case open.
- A case interior shot showing foam cutouts, tray organization, or pouch pockets.
- A side-by-side of two finish options (matte vs. polished, for example) on the same instrument.
Case example 1 — Clinical instrument set: A hygienist’s tray of six stainless-steel scalers and two mirrors, each marked with a four-character instrument code and the practice name on the shank. Finish is matte, achieved by a light bead-blast before engraving. The marks read clearly under operatory lighting and survive repeated autoclave cycles without fading.
Case example 2 — Patient gift kit: A leatherette zipper pouch with a monogram on the front panel, containing a soft-bristle toothbrush, waxed floss, and a tongue scraper. The engraving uses a serif font in a 6mm cap height. The kit ships in a kraft gift box with a tissue liner.
The proof-to-production photo step is the single most important trust signal in a custom order. A supplier who sends you a photo of your actual marked batch before shipping is one who stands behind the work.
Why a dedicated custom engraver beats a marketplace kit
Most marketplace dental kits are assembled from stock components with a printed label slapped on the case. That works fine for a one-time gift. It does not work for a dental practice that needs 200 identical, autoclave-safe, instrument-coded scalers delivered in three weeks.
The real advantage of working with a dedicated industrial engraver is control. You choose the material, the marking method, the placement, and the depth. You see a proof before a single piece is produced. You get a pre-production photo before anything ships. And if a piece doesn’t meet spec, it gets remade, not explained away.
Marketplace kits also tend to conflate cosmetic personalization with functional marking. A printed logo on a plastic case is not the same as a laser-engraved instrument code on a stainless-steel scaler. For clinical buyers, that distinction matters every time an instrument goes through the autoclave.
The honest tradeoff: a dedicated engraver costs more per unit at very low quantities than a stock kit from a general retailer. But the quality gap closes fast as quantity rises, and the clinical safety argument doesn’t have a price-based counterargument.
Signaturelaserdesigns makes custom dental kits easy to order
Signaturelaserdesigns brings industrial-grade laser engraving to dental professionals and gift buyers who want more than a printed label. Our team handles metal instruments, aluminum cases, leatherette pouches, and more, with autoclave-safe marking available for clinical tools.
Every order includes a digital proof before production and a pre-production photo for instrument batches. Small-batch runs and sample orders are welcome. Pricing is quoted by material, quantity, and design complexity, so you know the full cost before committing. Fast turnaround keeps your practice timeline on track.
Whether you need 10 patient welcome kits or 500 marked scalers, we’re ready to help. Request a quote or browse our industrial engraving services to get started, or view our full engraving process to see how we work.
Sources
- Fluoride-Free Complete Oral Care Starter Kit
- Reprocessing of PDG Dental Hand Instruments and Accessories (PDF)
- The 2-2-2 Rule: Your Simple Guide to a Healthier Smile
- The 2-2-2 Rule: Your Simple Guide to a Healthier Smile
- What is the 3-3-3 rule for teeth? – Genesis Dentists
- In surprise, tooth decay afflicts hunter-gatherers | Science
Recommended