Finish One or a Batch of 20: Best Paint for Laser Cut Plywood
For most laser-cut plywood craft shapes, water-based acrylics (artist or craft acrylics) are the best choice for decoration. Whatever you pick, seal the exposed cut edges and prime before your finish coats, since laser char loves to cause tannin bleed and warping. Spray paint handles smooth batch work, while hand-applied acrylics or paint markers suit intricate, multi-color designs.
✦ Featured From Our Shop ✦
Handcrafted & laser engraved in Georgia, just for you
TL;DR:
- Clean soot from cut edges, sand faces with 220 to 400 grit, seal edges, and prime faces before painting to limit swelling and paint failure.
- Choose artist acrylics for detailed indoor décor, acrylic latex for moisture exposure, and enamel for frequently handled pieces that need a harder surface.
- Spray paint suits smooth batch coverage, but apply several light coats to preserve fine cuts; use brushes or paint markers for multicolor details and touchups.
- Apply two to three thin paint coats, sand lightly between layers, then use waterborne polyurethane indoors or spar urethane outdoors and allow full curing.
- For large batches, painting sheets before cutting saves time, but clean soot from every cut edge; detailed pieces are easier to paint after cutting.
Table of Contents
- Why These Paints Work Best on Laser-Cut Plywood
- Preparing Laser-Cut Plywood for Paint
- Priming and Sealing Exposed Edges
- Spray Paint vs. Brush-On Acrylics vs. Airbrush: Picking Your Method
- A Practical Painting Workflow You Can Follow Every Time
- Finishing and Sealing for Lasting Durability
- Fixing Common Laser-Cut Painting Problems
- What We’ve Learned Finishing Laser-Cut Craft Blanks
- Our Honest Take on Painting Laser-Cut Plywood
- Ready-to-Gift Plywood Cutouts, Finished or Unfinished
- FAQ
- Sources
Why These Paints Work Best on Laser-Cut Plywood
Each paint family brings its own balance of flexibility, durability, and ease of use, and matching the paint to your project saves you from redoing a piece halfway through a gift deadline.
Water-based artist and craft acrylics are the easiest starting point for most crafters. They dry fast, clean up with soap and water, and form a flexible film that moves with the wood instead of cracking when the plywood expands or contracts with humidity. For laser-cut ornaments, name signs, and other indoor decorative pieces, a good craft acrylic gives you vibrant color without a steep learning curve.
Purdue Extension’s finishing guidance points to 100% acrylic latex and high-quality artist acrylics as top choices for flexibility and moisture resistance on plywood, which matters because laser-cut edges are especially prone to soaking up water and swelling.
Enamels and alkyd paints trade convenience for toughness. They cure into a harder shell that resists scuffs and dents, which is worth the longer dry time and stronger odor on pieces that get handled daily, like a kitchen sign or a kids’ toy. The same Purdue guidance notes that solvent-borne enamels offer superior durability for high-wear items, even though acrylics remain better suited to quick, detailed work.
Polyurethanes and varnishes aren’t decorative paints themselves, but they finish the job as protective topcoats. They let you dial in a matte, satin, or gloss sheen on top of whichever paint you chose.
A quick breakdown by use case:
- Artist or craft acrylics: best for ornaments, keepsakes, and indoor décor with fine detail.
- 100% acrylic latex: best when the piece faces moisture, humidity, or outdoor exposure.
- Enamel or alkyd paint: best for items that get handled or bumped often.
- Polyurethane or varnish: not a color coat, but the topcoat that locks everything in and controls shine.
Preparing Laser-Cut Plywood for Paint
Skipping prep is the single biggest reason paint peels or looks blotchy on laser-cut pieces, so it’s worth doing right the first time; more on working with compatible primers and paints for unusual blanks can be found in this guide to painting PVC pipe.
- Clean off the soot. Laser cutting leaves a layer of char and soot along every cut edge. Wipe it away with a damp cloth or a vinegar-water solution before you do anything else; leftover soot blocks paint from bonding properly and can make your finish look muddy, as Rawlins Paints notes in its sanding guidance.
- Sand in stages. Start with a lighter grit to knock down raised wood fibers from the cutting process, then move to a fine 220 to 400 grit for a smooth painting surface. Go gently around delicate details or thin cutout sections so you don’t round off the shape you just cut.
- Test before you commit. Always try your paint on a scrap piece or a hidden spot first. Plywood faces and edges absorb paint differently, and color can look slightly different depending on which side you’re painting, so a quick test saves you from surprises on the finished piece.
Pro Tip: Keep a small stack of offcut plywood from every laser project specifically for testing new paint colors and primers before you touch your actual piece.
For crafters working with unfinished blanks, our step-by-step sanding and painting guide walks through this same grit progression in more detail.
Priming and Sealing Exposed Edges
Plywood edges are the weak point on almost every laser-cut project. Because they’re made of layered end grain, they soak up moisture far faster than the flat faces, which leads to swelling, checking, and paint that lifts right off if you skip this step. Purdue Extension recommends a water-repellent preservative or a compatible primer on edges specifically because sealing cuts down on the moisture absorption that causes paint failure.
You have a few solid options depending on the situation:
- Dewaxed shellac seals charred laser-cut edges quickly and works well as a first barrier coat before priming.
- Exterior-rated acrylic primer suits projects headed outdoors or anywhere humidity swings.
- Oil or alkyd primer gives extra blocking power against tannin bleed on naturally resinous plywood.
University art-material guidance warns that gesso and clear acrylic mediums are porous and shouldn’t be treated as substitutes for a true moisture-sealing primer, especially outdoors. For long-term exterior projects, that same resource points to MDO plywood as a more stable substrate for paint than standard sheet plywood.
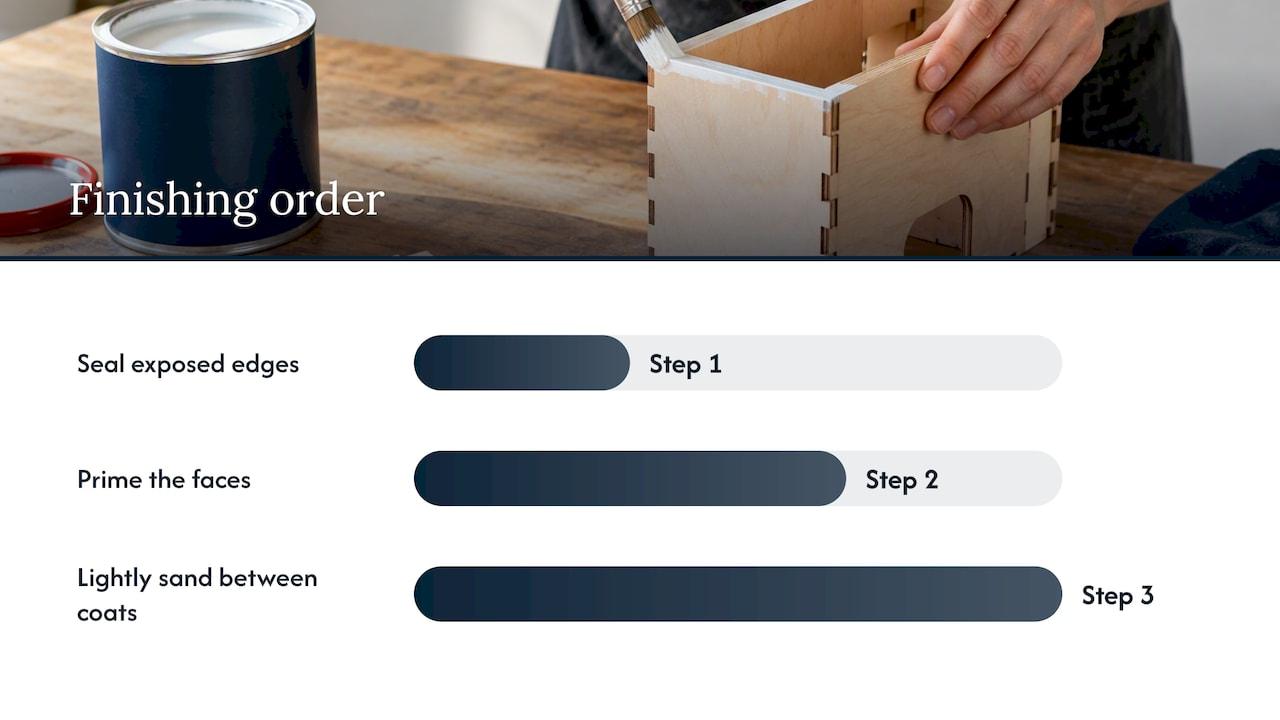
Work in this order: seal the edges first, prime the faces, then lightly sand between coats so everything bonds evenly. One caution worth remembering: shellac and certain acrylic topcoats don’t always play nicely together, so check compatibility before layering products, or do a small test patch first.
Spray Paint vs. Brush-On Acrylics vs. Airbrush: Picking Your Method
The right application method depends on how much detail you’re painting and how many pieces you’re finishing at once.
Spray paint gives you the smoothest, most even coverage and is the fastest route for batch work, like painting a dozen identical ornaments. Apply it in light, multiple coats rather than one heavy pass. Heavy spraying fills in fine kerf lines and softens the crisp detail your laser cut created.
Hand-applied acrylics and paint markers are the better pick when a piece has several colors or fine detail that needs a steady hand. They’re also the easiest to touch up later without redoing the whole piece.
Airbrushing sits in between: it lays down thin, even coats well-suited to small parts, but it takes some practice and requires thinning your paint to the right consistency before you start.
| Method | Best for | Dry time | Finish | Cleanup |
|---|---|---|---|---|
| Spray paint | Batch work, smooth coverage | Fast between light coats | Smooth, even | Minimal, but needs ventilation |
| Brush-on acrylics | Detailed, multi-color pieces | Fast, touch-dry quickly | Controlled, matte to satin | Soap and water |
| Airbrush | Small parts needing thin, precise coats | Fast once thinned correctly | Very smooth | Requires equipment cleaning after each use |
Whichever method you choose, work in a ventilated space, especially with spray paint or enamel, and clean your tools right away so dried paint doesn’t clog a nozzle or stiffen a brush.
A Practical Painting Workflow You Can Follow Every Time
Having a repeatable sequence keeps your results consistent, whether you’re finishing one keepsake or a batch of twenty.
- Prep the surface: clean soot from the edges and sand the faces smooth.
- Seal the edges with shellac or a compatible primer before any color goes on.
- Prime the faces so your paint has a uniform surface to grip.
- Apply two to three thin coats of paint, sanding lightly between each one. A Ray of Sunlight’s primer guide recommends exactly this approach, noting that light sanding between coats removes raised fibers and leaves a more uniform finish.
- Add a clear coat once your color layers are fully dry.
For sanding between coats, a fine grit (around 320 to 400) is usually enough; you’re just scuffing the surface so the next coat has something to grip, not removing material. On small or delicate parts, a light dry-sand with fine sandpaper is easier to control than wet sanding.
If you’re painting multiple colors, work light to dark and let each color dry fully before masking off the next section with painter’s tape. Paint pens and fine brushes are useful for adding detail lines or lettering after your base coats are done, since they give you more control than a full brush load of paint.
Finishing and Sealing for Lasting Durability
Your clear coat decides how long the project holds up, especially if it’s headed outside or into daily use.
- Waterborne polyurethane dries fast, stays clear over time, and works well for indoor keepsakes and gifts.
- Oil-based polyurethane adds a warm amber tone and strong durability, good for indoor pieces that get handled often.
- Spar urethane is formulated for UV and moisture exposure, making it the better choice for outdoor signs.
Match the finish to where the piece will live: a nursery keepsake only needs light indoor protection, while a porch sign needs a UV-resistant topcoat to avoid fading and water damage.
A relevant figure to keep in mind: Purdue Extension’s finishing research emphasizes that sealing exposed edges reduces the swelling and paint failure caused by moisture absorption through end grain, which is exactly where most laser-cut pieces fail first.
Before calling a piece finished, run a simple scratch test with a fingernail in an inconspicuous spot and a water-drop test to see if moisture beads or soaks in. Give your topcoat a full cure, not just a dry-to-touch check, before wrapping it as a gift or hanging it outside.
Fixing Common Laser-Cut Painting Problems
Even careful crafters run into a few recurring issues. Here’s how to handle them without starting over.
- Paint pooling in engraved lines: sand the area lightly, then reapply thin coats with a small detail brush instead of a loaded brush, working carefully around fine engraved lines so you don’t lose the detail.
- Tannin bleed or yellow blotches: spot-prime the affected area with a tannin-blocking primer or a shellac coat, as recommended in discussions of support-induced discoloration, before repainting.
- Warping: weight the piece flat while it dries, or clamp it gently between two flat boards overnight to pull it back into shape.
Pro Tip: If a blank keeps warping after drying flat twice, it’s usually faster to swap in a fresh piece of plywood than to keep fighting the same one.
Most of these problems trace back to rushed prep or paint applied too thick, so slowing down at the sanding and thin-coat stages prevents the majority of fixes you’d otherwise need later.
What We’ve Learned Finishing Laser-Cut Craft Blanks
In our own shop, the paint-then-cut versus cut-then-paint decision usually comes down to batch size and detail level. Painting full sheets before cutting speeds up production and keeps color consistent across a batch, though it still requires cleaning soot from the edges afterward, a workflow maker shops have documented well. Cutting first and painting after gives better control on pieces with fine internal detail, since you can see exactly where the color needs to go.
For a piece like our Howling Wolf wood cutout (on Etsy), the open silhouette benefits from cut-then-paint and a light acrylic wash. A detailed design like a guitar cutout sign (on Etsy) with string lines and curves does better with thin coats and a fine brush to preserve the engraved detail. Browse our full laser-cut wood cutout collection for more shapes to practice on.
Our Honest Take on Painting Laser-Cut Plywood
Most painting advice online treats every laser-cut shape the same, but the honest answer is that your process should change based on what you’re making and how many you’re making. A single detailed gift deserves patience: cut first, seal the edges, and build up thin coats by hand. A batch of twenty identical ornaments rewards a different approach entirely, where painting the sheet before cutting saves real time and still turns out clean results once you clean the cut edges.
Where we think crafters go wrong is skipping edge sealing because it feels like an extra step for a “quick craft project.” That one shortcut causes more peeling, bleeding, and warped pieces than a bad paint choice ever does. If you only have time to do one thing right, seal your edges before anything else touches them. Everything downstream, from color to clear coat, holds up better once that step is handled.
— Gary
Ready-to-Gift Plywood Cutouts, Finished or Unfinished
If all this sanding and sealing sounds like more than you want to tackle this weekend, we get it, and we’ve got you covered either way. We offer Custom Gift Creation for anyone who wants a laser-cut keepsake made and finished without picking up a paintbrush.
- Want a piece ready to hand over as a gift? Finished keepsakes are available through the shop to skip the painting entirely.
- Want to practice your own painting workflow on a blank? Our unfinished wood cutouts and craft blanks give you a clean, laser-cut starting point.
- Looking for a specific shape like the Howling Wolf cutout (on Etsy) or the Guitar cutout sign (on Etsy)? Those are available through our Etsy shop alongside our main store.
Visit our shop to see the full range and pick whichever route fits your project and your timeline.
FAQ
What kind of paint do you use for laser engraving?
For laser-engraved plywood, artist or craft acrylics work well for detailed decorative pieces because they dry fast and stay flexible. If the piece needs extra durability or moisture resistance, 100% acrylic latex paint is a stronger choice.
What type of paint is best for painting plywood?
The best choice depends on where the piece will live: 100% acrylic latex and high-quality artist acrylics are generally recommended for flexibility and resistance to cracking, according to Purdue Extension’s finishing guide. Solvent-borne enamel is a better fit when the surface needs to resist heavy wear.
How do I seal laser-cut wood?
Clean soot off the cut edges first, then seal them with dewaxed shellac or a compatible primer before adding any color. Purdue Extension notes that sealing exposed edges with a water-repellent preservative or primer reduces the moisture absorption that leads to swelling and paint failure.
What type of plywood is best for laser cutting?
Thinner, void-free plywood with consistent layers cuts most cleanly and leaves smoother edges for finishing. For long-term painted projects headed outdoors, MDO plywood is considered a more stable choice than standard sheet plywood.
Sources
- Finishing Plywood (Purdue Extension)
- The best primers to stop tannin bleed (arayofsunlight)
- Preparing wood panels for acrylics (University resources / MITRA archive)
Recommended
- Precision Laser Cutting 14 Inch Plywood: Hobbyist Guide
- Five Step Grit Progression for Crafters Painting Unfinished Wood Cutouts
- Crafters: Stain a Wolf Silhouette on ¼-Inch Laser Cut Plywood
- Craft Blanks for Wood Painting: Best Materials Guide