Fix a Laser Engraving That’s Too Light on Wood
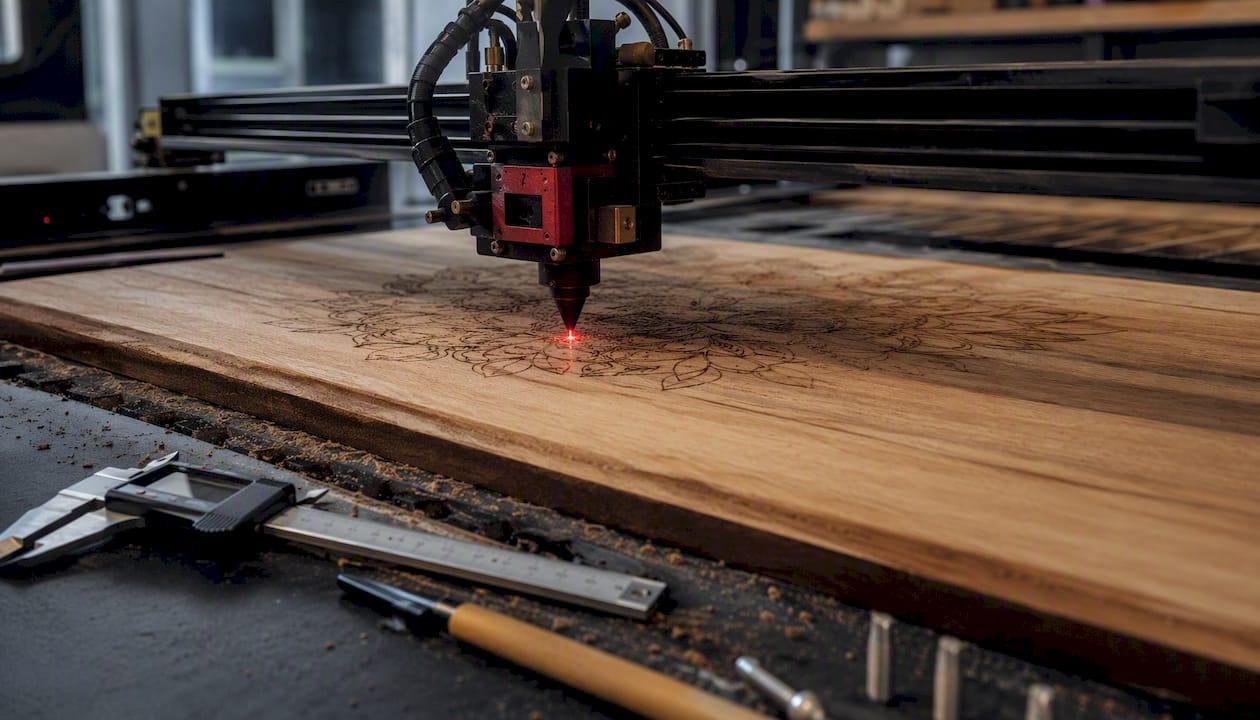
If your engraving came out faint, the fastest fixes are: run a small power/speed test grid on scrap from the same board, then adjust one variable at a time until you hit visible carbonization. If the piece is already done and you can’t re-engrave, fill the grooves with acrylic paint, gel stain, or India ink and wipe the surface clean.
✦ Featured From Our Shop ✦
Handcrafted & laser engraved in Georgia, just for you
Here’s the priority order to work through:
- Run a test grid first. Cut a 3×3 or 4×4 grid on scrap from the same board, varying power across columns and speed across rows. The darkest box without charring or ash is your target.
- Adjust energy density one variable at a time. Slow the speed by 10–15%, or raise power by 5–10%, but never both at once. A second pass at the same settings often deepens contrast without overburning.
- Try a Borax or baking-soda pre-treatment before re-engraving. Dissolve about 1 tablespoon of Borax or baking soda per cup of warm water, brush it lightly onto the wood, let it dry fully, then engrave. This pre-treatment method can meaningfully darken carbonization on pale woods.
- Use masking tape before you engrave. Medium-tack transfer tape protects surrounding wood from smoke staining and makes the engraved area read darker by contrast.
- If you can’t re-engrave: fill grooves with acrylic paint or gel stain, let it set for a minute, then wipe the surface. Shoe polish or India ink work for subtle darkening on keepsakes.
Key Takeaways: Fixing Light Laser Engraving on Wood Run a test grid on scrap, tweak power or speed by one step, and apply masking or a Borax pre-treatment if you need dark contrast fast.
Table of Contents
- What should you check before changing any machine settings?
- How to run a test grid and lock in a darker result
- How do power, speed, and passes interact to change darkness?
- How does wood species affect how dark your engraving gets?
- How do masking and air assist affect smoke staining and contrast?
- Symptom-by-symptom fixes for common engraving problems
- Safety and maintenance habits that protect your results
- When is it worth hiring a professional engraver?
- Key Takeaways
- What experienced engravers actually do differently
- When a professional re-engrave is the right call
- Useful sources and further reading
What should you check before changing any machine settings?
Faint engravings often have a simple cause that has nothing to do with power or speed. Work through this checklist before touching a single slider.
Focus height is the most common culprit. A beam that’s even slightly out of focus spreads its energy over a wider area, producing a washed-out, gray result instead of a crisp dark burn. Re-focus using your machine’s standard method and confirm the focal distance matches the actual surface height, especially on thicker or warped stock.
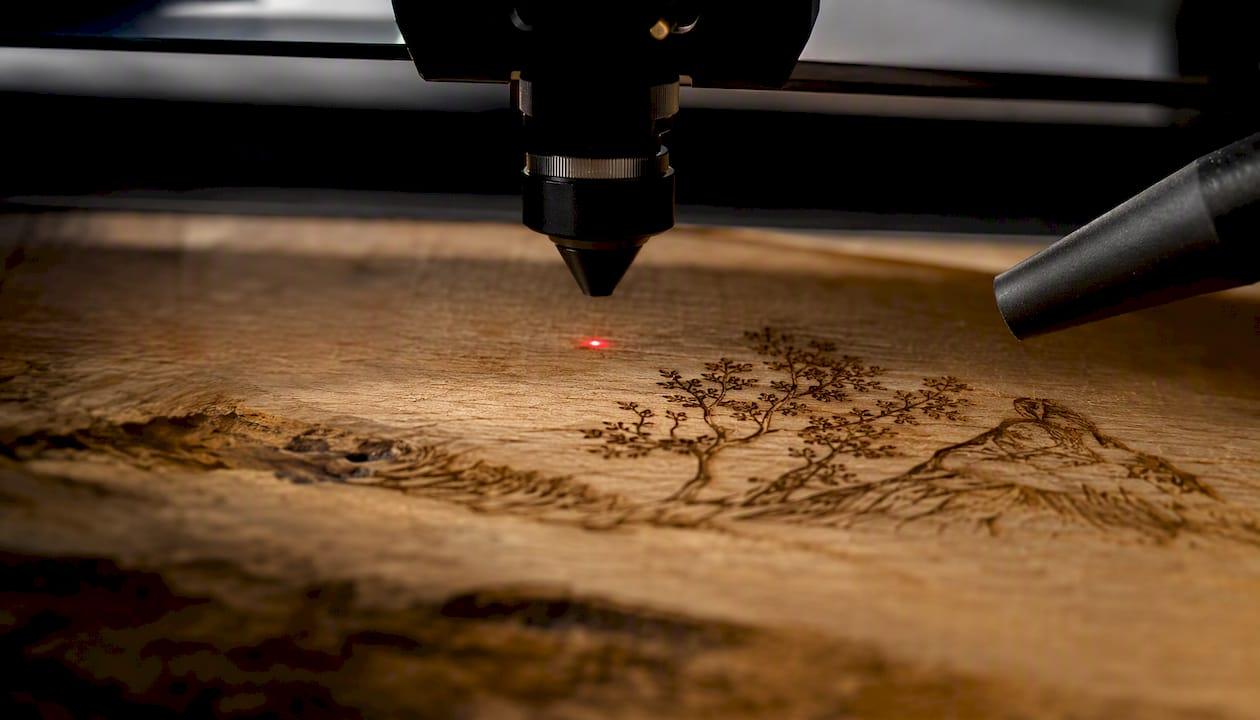
Lens and mirror cleanliness matters more than most people expect. Smoke residue on the lens scatters the beam and reduces effective power at the surface. A dirty lens on a 40W machine can behave like a 30W machine. Clean with a lint-free optical wipe and isopropyl alcohol before assuming your power setting is the problem.
Air assist level is a less obvious factor. High air assist clears soot efficiently, which is great for cut quality but can reduce the dark residue that gives engravings their contrast. If your air assist is set aggressively, try dialing it back slightly and observe the difference on scrap.
Surface condition changes everything. An existing stain, lacquer, or even a light oil from handling can act as a barrier between the laser and raw wood fiber. Sand lightly and wipe with a dry cloth before engraving. Glue pockets in plywood are notorious for producing pale or uneven spots.
Wood moisture reduces carbonization. A damp board absorbs energy as steam rather than converting it to char. Store wood flat in a dry space for at least 48 hours before engraving.
Pro Tip: Photograph your settings and the resulting scrap piece under the same light every time. A quick phone photo of the test grid next to your machine’s software settings takes 10 seconds and saves you from repeating failed runs.
How to run a test grid and lock in a darker result
A test grid is the single most reliable way to find the right settings for a specific board and laser. Vendor guides consistently recommend testing on scrap from the same board rather than copying charts from the internet, because wood variability and machine differences make universal numbers unreliable.
Setting up the grid
- Cut a piece of scrap from the same board you plan to engrave, ideally from the same region (edge vs. center can behave differently).
- Set up a filled rectangle or text element in your software, sized so each test box is roughly 15–20mm square.
- Assign power values across columns (for example: 40%, 50%, 60%, 70%) and speed values across rows (for example: 200, 150, 100, 80 mm/s). Label each axis in the file so the labels burn alongside the grid.
- Keep DPI/PPI, passes, and air assist constant for the first run. Change only power and speed.
- Run the grid and let the scrap cool fully before evaluating.
What to look for
The target is the darkest box that still shows clean edges and no white ash. Ash means you’ve gone past carbonization into overburn, which actually reduces contrast. A rich brown-black with crisp detail is the sweet spot. Academic research on hardwood engraving found that a 30–50 W power window at 120–200 mm/s scanning speed produced high-contrast results with minimal scorching, which is a useful reference range for CO2 machines.
Recording your results
| Parameter | Value to record |
|---|---|
| Power (%) | e.g., 40–50% |
| Speed (mm/s) | e.g., 150 |
| Passes | 1 or 2 |
| DPI/PPI | e.g., 300 |
| Focus offset | e.g., 0 or +0.5–3.0 mm |
| Air assist | On / Off / Low |
| Masking | Yes / No |
| Wood species | e.g., cherry, maple |
Save this table as a text file or photo and name it with the wood species and date. That recipe is reusable any time you work with the same material.
Pro Tip: Let each high-energy box cool for 30–60 seconds before running the next one. Cumulative heat in a small scrap piece can make later boxes appear darker than they really are, skewing your read.
How do power, speed, and passes interact to change darkness?
Energy density is the core concept: the laser deposits more energy per unit area when power is higher or speed is slower. Both levers move the same dial, but they don’t behave identically.
Slowing the speed increases dwell time, meaning the beam lingers longer over each point. This deepens carbonization but also raises the risk of overburning at the edges. Raising power increases peak intensity, which can produce a sharper, darker mark but also a harder edge that may look harsh on fine detail. The practical rule: adjust power and speed iteratively in small steps, and prefer multiple moderate passes over a single extreme setting.
Starting ranges by machine class
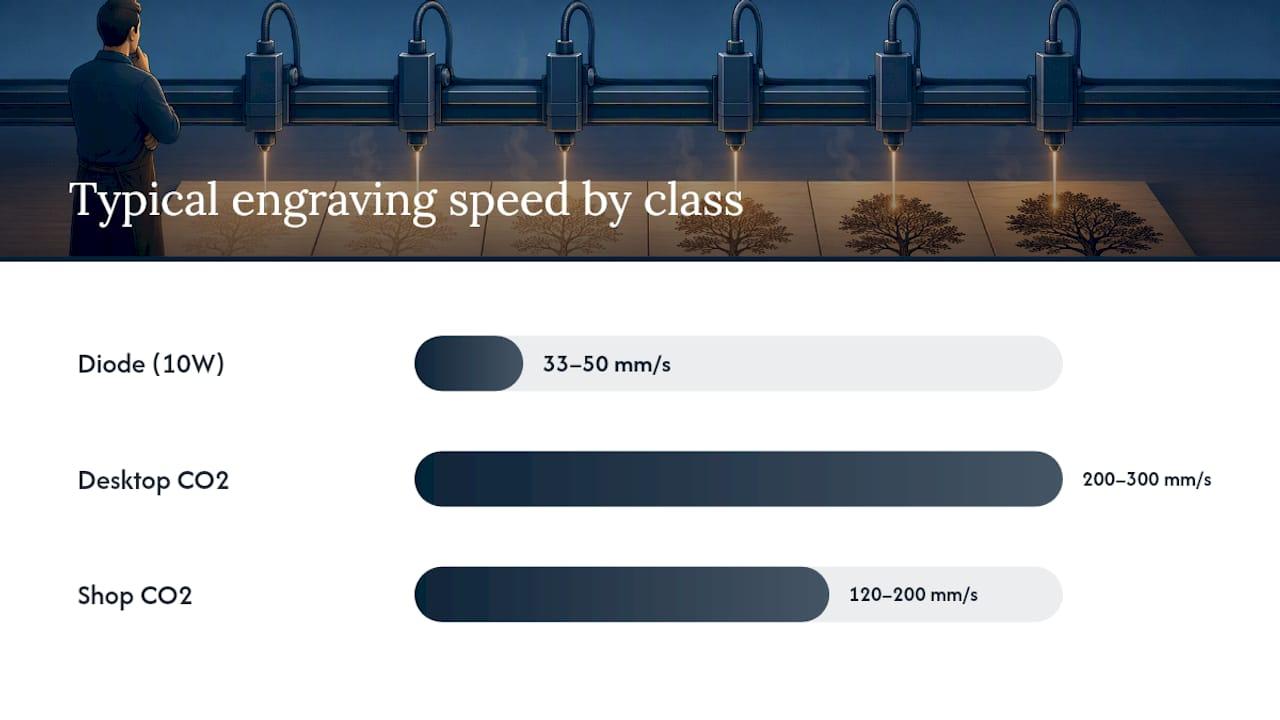
- Diode lasers (5–20W optical): These rely heavily on surface charring. Pale woods often need pre-treatment or masking to get visible contrast. A typical starting point for a 10W diode on basswood is around 70–80% power at 2000–3000 mm/min. Diode laser guides emphasize that pre-treatment and masking often do more than raw power increases on pale species.
- Desktop CO2 (30–40W): More forgiving. Start around 40–50% power at 200–300 mm/s and adjust from there. A second pass at the same settings usually deepens contrast without adding significant char.
- Shop CO2 (50–60W+): The academic sweet spot of 30–50 W and 120–200 mm/s applies here. Higher-power machines can engrave faster while still achieving deep carbonization, but they also overburn more easily on soft or resinous wood.
Defocusing for apparent darkness
Raising the workpiece slightly above perfect focus (a +0.5–3.0 mm offset) broadens the beam and spreads energy over a slightly larger area. Counter-intuitively, this can produce a darker perceived result on fills because it reduces harsh edge artifacts and creates a more even carbonization across the engraved zone. A secondary “line” pass after a fill pass uses the same principle to deepen contrast without re-running the full fill.
Higher DPI increases dot overlap, which raises the effective energy density of a fill. Moving from 254 DPI to 300 or 400 DPI on a tonal image can visibly darken the result, though it also increases run time.
How does wood species affect how dark your engraving gets?
Species choice is one of the biggest variables in engraving darkness, and it’s often underestimated. Light, even-grained woods like basswood, alder, and poplar are the easiest for visible contrast because their pale background makes even moderate carbonization pop. Dense hardwoods like walnut and cherry can produce stunning results but need careful tuning and slower test grids.
| Wood species | Contrast potential | Notes |
|---|---|---|
| Basswood | High | Pale background; shows contrast easily; very forgiving |
| Cherry | Very high | Rich reddish-brown base; carbonizes to near-black |
| Maple | High | Tight grain; crisp detail; responds well to moderate power |
| Walnut | Moderate | Dark base reduces perceived contrast; needs higher energy |
| Pine | Variable | Resin pockets cause uneven burns; test carefully |
| Birch plywood | Moderate | Glue layers can cause pale spots; mask always |
| MDF | High | Consistent but produces more fumes; not ideal for keepsakes |
Resinous woods like pine can produce dramatic dark burns in some spots and pale results in others, because resin pockets absorb and redirect heat unpredictably. Staining the wood before engraving can help even out the base color, though it may reduce the contrast between the engraved and unengraved areas. A better approach for pine is to engrave first, then apply a dark stain or wax fill to the grooves.
Moisture is a real factor. A board that feels dry to the touch can still hold enough moisture to reduce carbonization noticeably. Kiln-dried hardwoods from a reputable supplier engrave more consistently than construction lumber from a big-box store.
Pro Tip: Always cut your test scrap from the same board, not a different piece of the same species. Even two boards of the same species from the same supplier can behave differently. Mark which end of the board the scrap came from — edge pieces often have different grain density than center cuts.
How do masking and air assist affect smoke staining and contrast?
A brown halo around an engraving isn’t just cosmetic. It reduces the perceived contrast of the engraved area by making the surrounding wood look darker, which shrinks the visual difference between engraved and unengraved zones. Masking is the most reliable fix.
- Apply medium-tack transfer tape to the wood surface before engraving. The laser burns through the tape cleanly, and the tape catches smoke residue that would otherwise deposit on the surrounding wood. Peel the tape after engraving and the surrounding surface stays clean.
- Masking improves edge clarity because it prevents smoke from re-depositing at the edges of the engraved path, which is where halos form. Masking is widely recommended by vendors for exactly this reason.
- Air assist level is a trade-off. High air assist protects the lens and clears debris, but it also blows away the fine soot layer that contributes to dark contrast. Reducing air assist slightly can allow more soot to remain in the engraved area, deepening the result. Test this on scrap first, and never run with air assist fully off on materials that produce heavy smoke.
- Ventilation and fume extraction must remain adequate even when you reduce air assist. Reducing airflow at the nozzle does not reduce the fumes produced — it just changes where they go. Keep your exhaust running at full capacity.
- After engraving, peel the mask carefully and clean the engraved surface with a soft brush or compressed air. A very light sand with 220-grit paper can remove residual surface char without touching the engraved grooves.
Safety reminder: Altering air assist settings increases the risk of lens contamination and fire. Never leave the machine unattended when testing reduced air assist, and always confirm your extraction system is running before starting a job.
Symptom-by-symptom fixes for common engraving problems
Faint engraving overall
- Confirm focus height and clean the lens first.
- Run a test grid and increase energy density by one step (slower speed or slightly higher power).
- Apply Borax or baking-soda pre-treatment on the next attempt.
- Consider a second pass at the same settings before changing power.
Fuzzy or soft detail
- Check focus — this is almost always a focus issue.
- Reduce any defocus offset you’ve applied.
- Increase DPI/resolution in your software settings.
- Clean the lens and mirrors; a dirty optical path scatters the beam.
- Reduce line interval (increase LPI) for finer fills.
Brown halo or muddy marks around the engraving
- Apply masking tape before the next run.
- Increase speed slightly to reduce heat spread at the edges.
- Clean the surface after engraving with a soft brush and compressed air.
- Reduce power slightly and compensate with a second pass.
Uneven darkness across the board
- Check that the board is flat and the bed is level. Warped stock changes the focal distance across the piece.
- Test for glue pockets in plywood by engraving a small test area across the full width.
- Compensate for warped stock by shimming or using a hold-down fixture.
The troubleshooting flow is simple: observe the symptom, run one targeted test on scrap, evaluate the result, and lock in the winning recipe before touching the final piece.
Safety and maintenance habits that protect your results
Clean optics are not optional. A lens coated in smoke residue reduces effective power at the surface and produces inconsistent results that look like a settings problem. Clean the lens and mirrors after every few hours of engraving, or any time you notice a drop in contrast quality. Use optical-grade lens wipes and 99% isopropyl alcohol; never use paper towels or household glass cleaner.
Ventilation and PPE are non-negotiable, especially when you’re experimenting with pre-treatments or reduced air assist. Borax and baking-soda solutions are relatively low-risk, but the fumes produced when they carbonize under the laser are not fully characterized. Run your fume extractor at full capacity and wear an N95 or better respirator when working with any chemical pre-treatment. Solvent-based stains and spray paints used in finishing require the same protection plus gloves and eye protection.
Calibrate before you adjust. If your engravings have been getting progressively lighter over time, the cause is often a degrading laser tube (on CO2 machines) or a dirty optical path, not a settings drift. Run a power meter test or a standard test burn on a known material before assuming your recipe needs updating. A tube that’s lost output needs replacement, not a power increase that pushes the remaining life harder.
Chemical storage and disposal: Borax and baking-soda solutions can be disposed of down the drain in small quantities. Solvent-based stains and inks require proper disposal per your local regulations. Store all chemicals away from the laser work area.
Pro Tip: Keep a small piece of the same scrap material taped to the side of your machine. Before any production run, do a quick 10-second test burn on it to confirm your settings are still producing the expected result. It takes almost no time and catches tube degradation or focus drift before it ruins a finished piece.
When is it worth hiring a professional engraver?
Some situations call for a pro. If the piece is irreplaceable, a sentimental gift, or a high-value item, the risk of a failed DIY re-engrave outweighs the cost of professional help. The same applies when you need uniform, industrial-grade contrast across a large batch of parts, where even small variations in darkness are unacceptable.
Professional shops like Signaturelaserdesigns bring calibrated equipment, documented material recipes, and controlled workflows that are genuinely hard to replicate at home. Higher-power tubes, precision masking, and multi-pass workflows produce consistent results across a run, not just on a single test piece. For industrial laser engraving services, the process includes material-specific settings developed over many runs, not guesswork.
When you reach out for a quote, prepare the following: a high-resolution file of your design, clear photos of the faint or failed engraving, the wood species and dimensions, your desired contrast level, and any finishing preferences. The more detail you provide, the faster and more accurate the quote.
Pro Tip: Small boutique providers can often rescue sentimental items with spot repairs or high-control re-engraving on the original piece. If you’re not sure whether a piece can be saved, send photos and ask — most shops will give you an honest assessment before you commit to anything.
Key Takeaways
The single most reliable fix for a faint wood engraving is to run a power/speed test grid on scrap from the same board, adjust one variable at a time, and document the winning recipe before touching the final piece.
| Point | Details |
|---|---|
| Test grid first | Run a power vs. speed grid on scrap from the same board before changing any production settings. |
| Energy density sweet spot | A moderate power and speed range produces high contrast with minimal scorching on hardwoods. |
| Non-destructive rescue | Fill grooves with acrylic paint, gel stain, or India ink to darken a finished piece without re-engraving. |
| Masking and pre-treatment | Borax/baking-soda pre-treatment and medium-tack masking tape are two of the highest-impact, lowest-risk upgrades. |
| Signaturelaserdesigns | For irreplaceable or high-volume pieces, professional re-engraving with calibrated recipes reduces risk significantly. |
What experienced engravers actually do differently
The most common mistake is adjusting multiple variables at once. You change power, speed, and DPI in the same run, the result looks different, and now you have no idea which change made the difference. Experienced operators change one thing per test, every time, without exception.
The second mistake is skipping the scrap test entirely. It feels like a waste of material, but a 10-minute test run on a $0.50 piece of scrap is a much better trade than ruining a $40 cutting board or a one-of-a-kind memorial piece. The test grid habit is what separates operators who get consistent results from those who rely on luck.
Here’s what actually works in practice: keep a settings log in a simple spreadsheet or even a notebook. Record the wood species, the source (kiln-dried vs. construction lumber), the date, and the winning settings from your test grid. Label your scrap pieces with a marker and keep them in a labeled bag. Photograph every test result under the same light source, ideally with a ruler in the frame for scale.
Masking and Borax pre-treatment are the two techniques that most hobbyists discover late and wish they’d known earlier. Masking alone can transform a muddy, smoke-stained result into a clean, high-contrast engraving on the same settings. Borax pre-treatment on pale basswood or maple can produce a depth of carbonization that would otherwise require significantly more power. Neither technique costs much, and both are reversible at the testing stage.
The other habit worth building: always check your optics before blaming your settings. A lens cleaned at the start of a session produces noticeably sharper, darker results than one that’s been running through a long job without attention.
When a professional re-engrave is the right call
When the piece matters too much to risk, Signaturelaserdesigns offers rescue re-engraving, contrast restoration, and custom finishing for wood items that didn’t come out right the first time. Our team works with calibrated equipment and material-specific recipes developed across hundreds of runs, so the result is consistent and controlled rather than experimental.
To get an accurate quote fast, send us a high-resolution version of your design file, clear photos of the faint engraving, the wood species and dimensions, and your preferred contrast level or finish. The more detail you share, the faster we can give you a real answer. For custom industrial parts engraving (on Etsy) or sentimental keepsakes that need careful handling, we’re ready to help. Reach out through our website or Etsy storefront to get started.
Useful sources and further reading
These are the sources that informed this guide, organized by what they’re most useful for:
- Wood laser engraving guide (Zapcraft)
- How to get dark, high-contrast laser engraving on dark wood (OMTech)
- How to darken laser engraving on wood (Thunder Laser USA)
- How to darken laser engraving on wood (LaserEngravingTips)
- How to improve engraving contrast with diode laser (BlazexLaser)
- What’s the best wood for CO2 laser cutting and engraving? (RedshiftLaser)
Recommended
- How to Care for Laser Engraved Wood: Full Guide
- The Art of Precision: Exploring Industrial Laser Engraving Services – Signature Laser Designs
- Craft Blanks for Wood Painting: Best Materials Guide