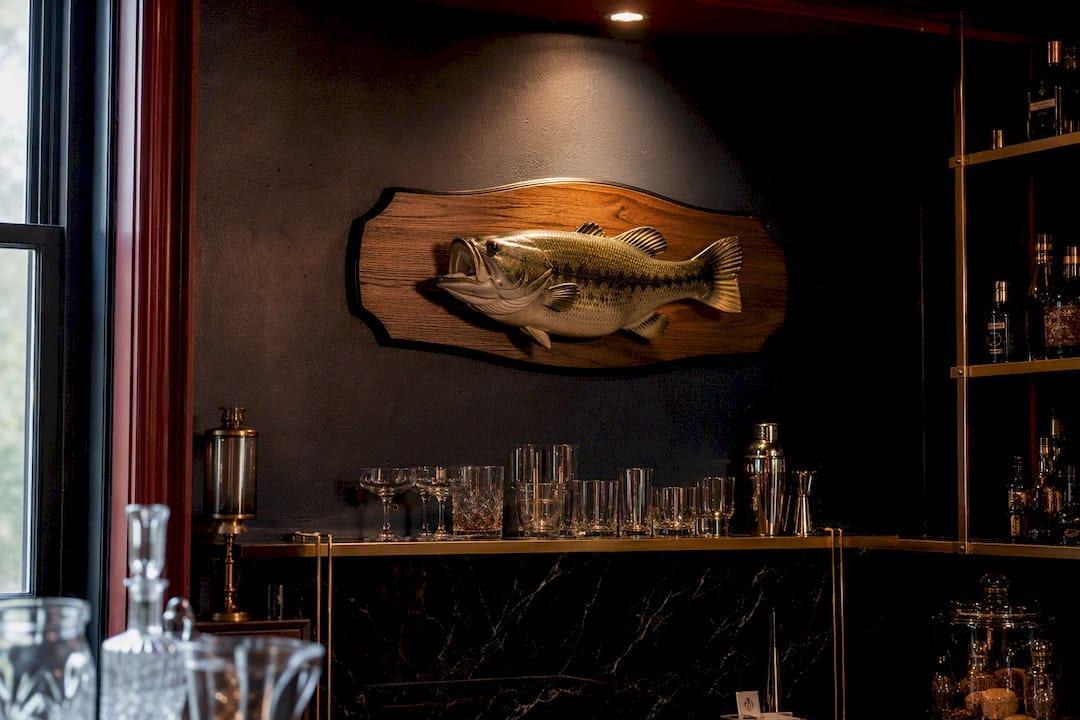
Practical Home Bar Plaque: Jumping Bass Placement, Mounting, Lighting
Hang your personalized jumping bass plaque centered over the back bar or mantel, mounted with hidden stand-offs for a floating look, and lit with an adjustable spotlight to bring out its three-dimensional depth. Confirm the size against a paper template before drilling, and match your hardware to the wall type. From there, lighting and finish choices do the rest.
✦ Featured From Our Shop ✦
Handcrafted & laser engraved in Georgia, just for you
Key Takeaways: Displaying Your Jumping Bass Plaque
- Using a French cleat or toggle bolt depends on the weight of the plaque and wall material, with heavier pieces requiring stud anchoring.
- Proper lighting with directional spotlights from above enhances the plaque’s three-dimensional effect by casting shadows on its layered surfaces.
- Material choices like wood intarsia offer authentic depth but need humidity protection, while metal plaques are more durable and require less maintenance.
- For optimal visibility, size the plaque relative to the focal wall area, and test sightlines from seating and entry points before committing to placement.
- DIY installation suits lighter plaques under 15 pounds on drywall, but heavier or masonry-mounted plaques benefit from professional mounting to ensure safety and longevity.
Table of Contents
- Where should you display a jumping bass plaque in a home bar?
- What’s the best way to mount a jumping bass plaque?
- How do you light a 3D bass plaque to bring out depth?
- Wood, metal, or something else: choosing your plaque material
- Styling the plaque with your existing bar setup
- How big should your plaque be, and how do you check the sightline?
- Keeping your plaque looking sharp for years
- Commissioning your own personalized plaque
- Is it safe to mount a heavy or sharp-edged plaque above a bar?
- What personalization options work best for a jumping bass plaque?
- How do you fit a bass plaque into your existing bar theme?
- DIY or professional installation: which one should you choose?
- Why a commissioned plaque beats anything off a shelf
- Ready to commission your own jumping bass plaque?
- Where to look for more plaque inspiration and product examples
- Sources
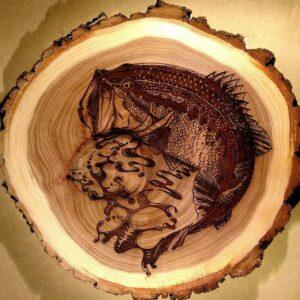
Where should you display a jumping bass plaque in a home bar?
The biggest decision isn’t the plaque itself. It’s whether the piece anchors the room as a single centerpiece or plays a supporting role in a larger scene.
If your home bar has a mantel, a back bar hutch, or one clear wall behind the taps, that’s your stage. A jumping bass plaque centered above that focal point reads as a deliberate statement piece, the kind of thing guests notice the second they walk in. Placement guides for home bars consistently show this above-mantel or above-back-bar position as one of the highest-impact spots in the room, largely because it sits at the natural resting point for the eye.
Gallery walls work differently. Here, the plaque becomes one voice in a conversation with lake maps, old photos, and other memorabilia, rather than the star of the show. This suits bars with less obvious focal architecture, or homeowners who want a personal story told across several pieces instead of one big statement.
Shelving and built-in niches offer a third option, especially in smaller bars. Tucking the plaque into a lit shelf alongside glassware adds layered depth without demanding its own wall.
A few placement rules keep the display from feeling like clutter:
- Check sightlines from the main seating area, the bar entrance, and across the room, not just from directly in front.
- Leave breathing room. A plaque crowded by shelf brackets or light switches loses its impact.
- Resist stacking multiple fish-themed pieces in one sightline. Designers generally recommend one strong centerpiece rather than several competing fish items, which keeps the space from tipping into theme-park territory.
- For compact footprints, borrow layout ideas from portable bar setups, which solve for exactly this kind of tight-space focal planning.
What’s the best way to mount a jumping bass plaque?
Mounting hardware needs to match both the plaque’s weight and your wall type. Layered wood intarsia pieces and larger metal plaques often weigh more than they look, so guessing at hardware is where most home installations go wrong.
Hidden stand-offs create a floating effect that suits dimensional pieces, since the small gap between plaque and wall lets shadows form naturally. A French cleat is the better call for heavier wood plaques. It distributes weight along a horizontal bar rather than a single point, which matters when a plaque runs several pounds. Lighter pieces do fine with keyhole hangers or D-rings and standard picture wire.
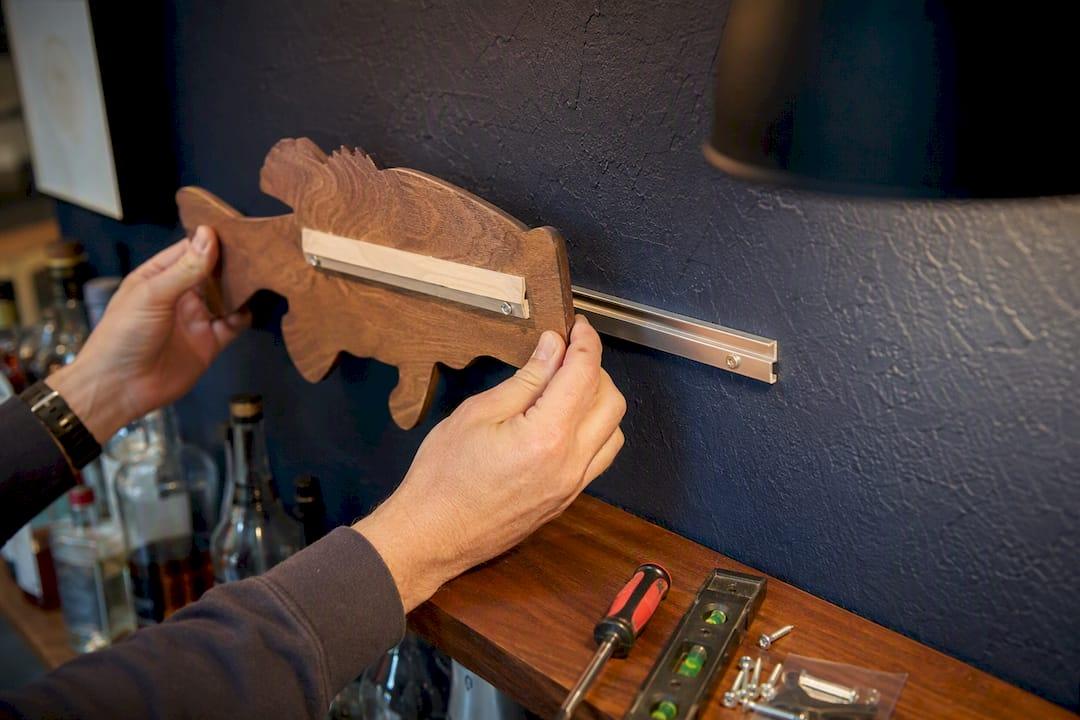
Wall type changes your anchor choice. Drywall needs a toggle bolt or heavy-duty anchor rated for the plaque’s weight; masonry calls for a sleeve anchor or concrete screw.
Before you touch a drill, run through this checklist:
- Weigh the plaque, or check the listed weight, before choosing hardware.
- Flip it over and check the back. Many custom pieces ship without hanging hardware installed, so confirm whether yours has predrilled holes or a cleat mount.
- Locate studs if the plaque exceeds 15 pounds; don’t rely on drywall anchors alone for anything heavier.
- Mark your height and centerline with painter’s tape before drilling.
- Use a level for the final check, not just the eye.
- Drill pilot holes slightly smaller than your screws to avoid splitting wood trim or plaster.
For plaques mounted to a fireplace surround, mantel construction basics are worth a look first. The substrate behind the mantel face affects which anchors will actually hold.
Pro Tip: Ask your fabricator to predrill mounting holes or attach a cleat before shipping. It’s a five-minute request that saves you an afternoon of guessing at hardware once the plaque arrives.
How do you light a 3D bass plaque to bring out depth?
Flat lighting flattens everything, including a plaque carved specifically to look like it’s mid-leap. Directional light is what makes the layers, fins, and shadow lines actually read as three-dimensional.
An adjustable spotlight or picture light angled from above at roughly 30 to 45 degrees creates the shadow play that layered pieces are built for. Layered wood intarsia art depends almost entirely on this kind of raking light. Without it, the depth that took hours to carve just disappears into flat color.
Under-shelf LED strips or a slim backlighting channel behind the plaque add a second layer of separation from the wall, especially useful in a gallery-wall setting where you want the piece to stand slightly apart from flatter photos and frames.
Color temperature matters more than most people expect:
- Warm white (around 2700K to 3000K) flatters wood tones and intarsia grain.
- Neutral to cool white (3500K to 4000K) suits powder-coated metal plaques and keeps colors accurate rather than yellow-tinted.
- Avoid placing a bare bulb at eye level near seating. Glare off a glossy finish is distracting, not dramatic.
Finish sheen changes how light behaves on the surface. Matte finishes scatter light and emphasize texture and grain, which suits detailed wood carving. Satin and gloss finishes bounce more light and read brighter from across the room, at the cost of showing every fingerprint and dust smudge. Designers who work with layered fish art tend to favor lighting that highlights motion and grain over flat brightness, since the goal is depth, not shine.
Wood, metal, or something else: choosing your plaque material
Material drives everything else about your display, from mounting hardware to how often you’ll need to clean it.
Layered wood intarsia, built from dozens of individually cut and shaped wood pieces, produces genuine physical depth and shifting shadow as viewers move past it. Handcrafted intarsia bass art is typically finished with a clear protective varnish and shipped ready to hang, but wood is more sensitive to humidity swings than metal, which matters in a bar environment near ice wells and sinks.
Powder-coated or laser-cut metal plaques trade a bit of dimensional depth for durability and easy upkeep. Steel jumping bass plaques commonly come in multiple sizes and color finishes, often with mounting hardware already included, which simplifies installation considerably. The tradeoff is weight. Metal plaques of the same size run heavier than wood, so factor that into your hardware choice.
A few finish notes worth knowing before you order:
- Marine varnish handles humidity best for wood pieces near a bar sink or ice machine.
- Polyurethane topcoats are a solid mid-tier choice for drier bar rooms.
- Industrial powder coating on metal resists scratches and fingerprints far better than raw or painted metal.
- Matte wood finishes hide dust; gloss metal finishes show it, so factor cleaning frequency into your choice.
Neither material is objectively better. Wood tends to win on warmth and texture, metal wins on low-maintenance durability, and the right call depends on how much upkeep you actually want to do.
Styling the plaque with your existing bar setup
A jumping bass plaque doesn’t have to live alone on a bare wall. How you compose the space around it decides whether the room feels curated or just busy.
Decide early whether you want one dominant centerpiece or a cluster of smaller complementary pieces. A single large plaque, centered and well-lit, tends to carry more visual weight than three smaller items competing for attention. Reserve the multi-piece approach for gallery walls where variety is the point.
Material and color pairings reinforce the mood you’re after. A dark wood intarsia plaque suits a cabin-style bar with leather stools and warm brass fixtures, while a brushed metal or powder-coated piece fits a cleaner, more industrial setup. Designers who work with fish-themed decor generally recommend balancing rustic warmth with clean modern lines so the display feels intentional rather than novelty-shop kitsch.
For gallery-style groupings, a few composition rules keep things tidy:
- Keep spacing between frames consistent, typically 2 to 3 inches apart.
- Let the plaque sit slightly larger or centered so it reads as the visual anchor within the group.
- Mix in a lake map, an old fishing photo, or a printed catch record for narrative depth rather than repeating fish silhouettes.
- Consider a printed vinyl backdrop, such as a subtle lake-map wallpaper, behind the grouping. Custom wall graphics can add that layer without the cost of a full mural.
How big should your plaque be, and how do you check the sightline?
Size errors are the most common regret homeowners have after installing wall art, and they’re also the easiest to avoid before you ever pick up a drill.
A workable rule of thumb: size the plaque to a moderate portion of the width of the focal span behind it, whether that’s your mantel or the back bar counter. Go smaller than that and the piece looks lost; go bigger and it can overwhelm bottles, glassware, or trim below it.
- Measure the width of your mantel or back bar section first, not the wall as a whole.
- Cut a paper or cardboard template to your candidate plaque size and tape it to the wall.
- Step back to your main seating spots and the bar entrance to check how it reads from a distance.
- Adjust height so the visual center sits around 57 to 60 inches from the floor for mixed seated and standing viewing, lowering slightly if guests are mostly seated.
- For offset or asymmetrical layouts, shift the template rather than the whole composition, and recheck sightlines from both directions before committing.
Painter’s tape outlines work just as well as a full template if you want to test a few positions quickly before settling on one.
Keeping your plaque looking sharp for years
Upkeep depends almost entirely on material. Varnished wood plaques need occasional dusting with a soft, dry cloth and an avoidance of harsh chemical cleaners that can dull the finish. Powder-coated metal is more forgiving. A damp microfiber cloth handles most grime without damaging the coating.
Humidity is the real threat in a bar setting. Proximity to ice wells, sinks, or an under-counter cooler can expose wood plaques to condensation over time, which shortens the life of the varnish and, eventually, the wood itself.
A short seasonal checklist keeps things in order:
- Wipe down the plaque monthly, more often if it’s near cooking or drink prep areas.
- Inspect mounting hardware twice a year for looseness, especially on stand-off mounts.
- Reapply a protective coat on wood pieces every two to three years, sooner if you notice dulling or moisture spotting.
- Check for rust bloom on any exposed metal edges near sinks.
Commissioning your own personalized plaque
Ordering a custom jumping bass plaque comes down to four cost drivers: material, size, design complexity, and how many personalization lines you want engraved.
Larger pieces and layered wood intarsia designs cost more than a simpler laser-cut metal silhouette, since intarsia work involves more individual cutting and hand finishing. Adding a name, date, or short message typically adds a modest line-item rather than a major jump, but intricate custom artwork (a specific lake outline, a boat name, a family crest) does add design time.
A typical project moves through a few clear stages: quote request, design proof for approval, fabrication, finishing, and shipping. Knowing this sequence upfront helps you plan around a birthday or holiday deadline instead of ordering at the last minute.
When you request a quote, ask specifically about:
- Predrilled mounting holes or a cleat attachment, so you’re not solving hardware problems after delivery.
- Finish options and whether marine-grade coating is available for bar environments near water sources.
- Turnaround time from proof approval to shipping, since layered wood pieces generally take longer to fabricate than metal cutouts.
Pro Tip: When budgeting, ask for a breakdown by line item, material, size, personalization, and mounting hardware, rather than one flat number. It makes it much easier to see where you can adjust size or detail to fit your budget without guessing.
Is it safe to mount a heavy or sharp-edged plaque above a bar?
Weight and edge sharpness both deserve real attention before installation, not an afterthought once the plaque is already on the wall.
Heavier plaques, particularly wood intarsia pieces or large metal cutouts, put real strain on a single hanging point. Mounting into wall studs rather than drywall alone is the standard safeguard for anything beyond a light decorative frame. If studs don’t line up where you need them, a rated toggle anchor or a French cleat spreads the load across a wider section of wall rather than concentrating it on one screw.
Placement above seating areas needs extra caution. A plaque mounted directly above a bar stool or a spot where guests lean back carries real risk if hardware fails, so keep heavier pieces slightly offset from where people actually sit whenever the layout allows it.
Sharp-edged metal cutouts, especially designs with fins, tails, or thin extended details, deserve a second look at height and traffic flow. Mounting these above eye level and away from high-traffic walking paths reduces the odds of an accidental bump. If the plaque has exposed fasteners or a raw cut edge on the back, check that nothing protrudes past the mounting surface where it could snag a passing sleeve or shoulder.
Before finishing installation, give the mount a firm tug test. It should hold solid weight without shifting, and any wobble is a sign to add a second anchor point rather than trust the piece as-is.
What personalization options work best for a jumping bass plaque?
Personalization is what turns a decorative fish plaque into a keepsake worth building your bar around. The most common customization requests include a name, a date, a lake or river name, and a short phrase, such as a favorite fishing quote or a family nickname for the bar itself.
Personalized bass fish metal art commonly showcases these exact elements, name and message text engraved or cut directly into the design, giving a clear sense of how much text realistically fits without crowding the fish silhouette itself.
A few practical tips make the personalization process smoother:
Keep text short. One name and a short date or location line reads cleanly; a full paragraph tends to compete with the fish design rather than complement it. Choose a font that matches your bar’s overall style, script for a rustic cabin feel, clean block lettering for a more modern setup. Consider placement of the text carefully. Some designs run the personalization along the base or a separate nameplate rather than across the fish body, which keeps the silhouette clean while still telling the story.
Color and material choices also factor into personalization. Powder-coated metal opens up a wide color palette to match team colors, house colors, or a specific lake’s flag or crest. Wood intarsia leans on natural grain and tone variation instead, so personalization there usually comes through an engraved nameplate or a small brass tag rather than colored text.
How do you fit a bass plaque into your existing bar theme?
A jumping bass plaque works in nearly any home bar style, but the supporting details around it decide whether it looks intentional or out of place.
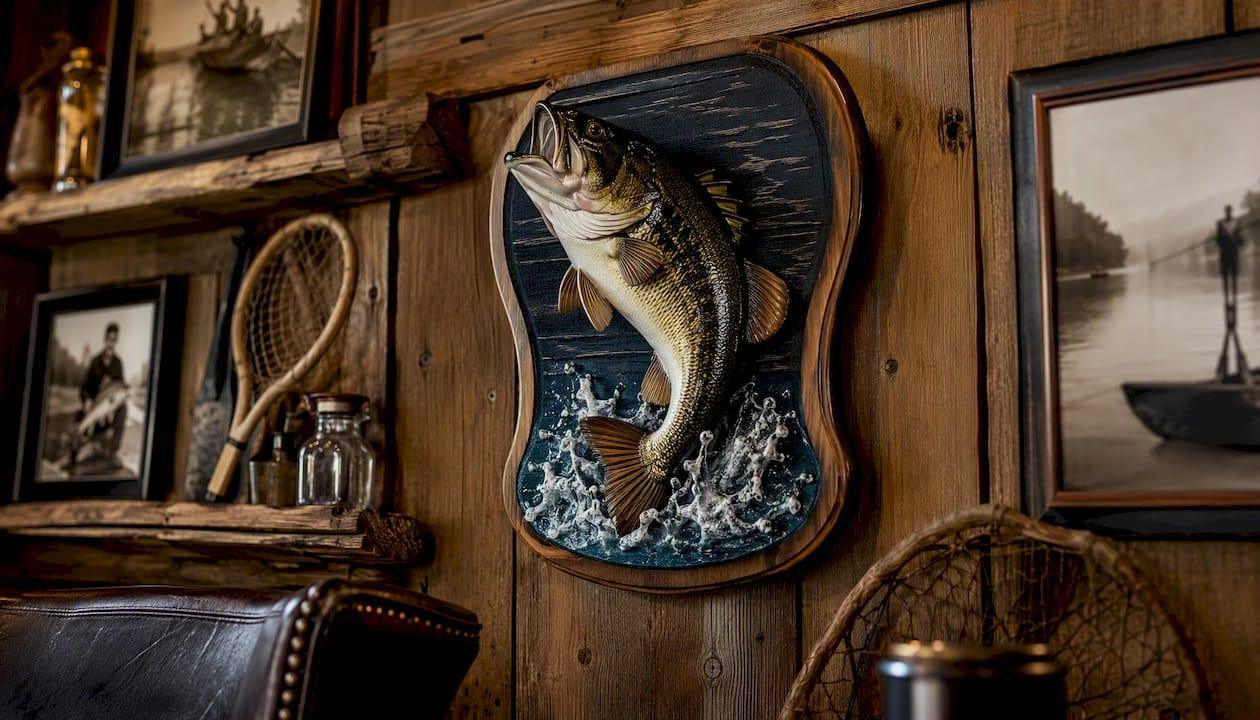
In a rustic cabin-style bar, pair the plaque with warm wood shelving, leather stools, and soft amber lighting. The bass becomes a natural extension of the room rather than an add-on. A more modern industrial bar, with concrete or metal accents and clean lines, suits a powder-coated metal plaque better than an ornate wood-carved one, since the finishes read as part of the same visual language.
Sports-bar or man-cave setups often welcome a mix of memorabilia, so the plaque can share wall space with jerseys, neon signs, or a scoreboard clock without clashing, as long as it’s given its own clearly defined zone rather than crammed into a busy corner.
If your bar leans coastal or lake-house, consider echoing the theme with rope accents, a printed lake map, or blue and tan textiles nearby. This ties the plaque into a broader story instead of leaving it as an isolated fish on a wall.
Whatever the theme, one guideline holds across all of them: let the plaque anchor the space rather than blend into a wall of unrelated objects. A single well-placed piece against a clean backdrop almost always outperforms a crowded wall of mismatched decor, regardless of style.
DIY or professional installation: which one should you choose?
Most homeowners can install a lighter plaque themselves with basic tools, a stud finder, a level, and the right wall anchors. DIY mounting costs next to nothing beyond hardware, typically under $20, and works fine for plaques under roughly 15 pounds going into drywall with proper anchors.
Heavier wood intarsia pieces, large metal cutouts, or installations into masonry or brick change the calculation. A professional installer brings the right anchors and experience with load-bearing placement, which matters more as plaque weight climbs. Professional mounting typically runs somewhere between $75 and $200 depending on wall type and plaque size, though costs vary by region and installer.
The tradeoff isn’t just cost. DIY installation gives you full control over timing and exact placement, but it also means troubleshooting stud locations and anchor selection yourself. Professional installation costs more upfront but removes the guesswork, particularly valuable for masonry walls, unusually heavy pieces, or plaques mounted above high-traffic seating where a mounting failure carries real risk.
For most standard drywall installations with a plaque under 20 pounds, DIY is the practical choice. Reach for a professional once you’re dealing with masonry, a plaque over 20 pounds, or a placement above seating that raises the stakes if the mount ever loosens.
Why a commissioned plaque beats anything off a shelf
A mass-produced plaque tells nobody’s story. The lake, the name, the date, that’s what turns a decorative fish into something a guest actually stops to ask about, and it’s the piece of this whole conversation that store-bought decor simply can’t replicate.
Craftsmanship matters here too. A well-prepared plaque, predrilled, properly finished, ready to hang, saves you the guesswork this article just walked through. That’s the difference between decor you install once and forget about, and decor you have to keep fussing with.
— Gary
Ready to commission your own jumping bass plaque?
Signaturelaserdesigns builds display-ready plaques with the mounting prep already worked out, so you’re not left guessing at hardware once the piece arrives. We handle material selection, personalization layout, and a design proof before anything goes into production, and we can prep the back with predrilled holes or a cleat mount based on your wall type.
 (on Etsy)
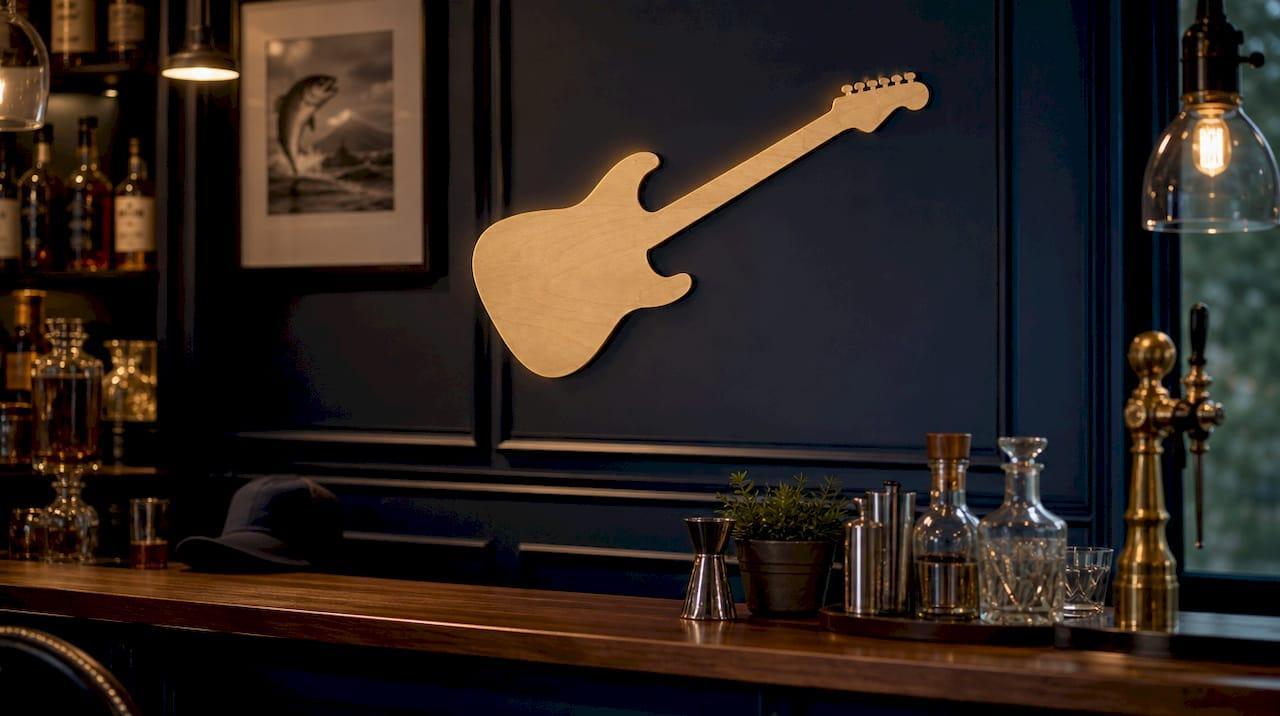
Pricing scales with material, size, and how many personalization lines you want engraved, and we’ll walk you through that breakdown before you commit to anything. If a bass plaque isn’t quite your style, our laser-cut wood cutouts page shows other custom decor options, including a wooden guitar cutout sign (on Etsy) that works well for music-themed bars. Curious what a personalized fishing gift looks like for someone else on your list? Check our engraved gifts for fishermen roundup for ideas.
To get started, send us your bar’s dimensions, the wall type you’re mounting to, and your personalization text. We’ll send back a clear, itemized quote so you know exactly what you’re paying for before a single cut is made.
Where to look for more plaque inspiration and product examples
A handful of pages are worth bookmarking if you’re still narrowing down style, size, or finish before you order.
- Home bar design galleries show real placement examples across mantels, back bars, and gallery walls.
- Layered wood bass art illustrates how intarsia depth and shadow actually look in finished pieces.
- Steel bass wall signs offer a useful reference for size ranges and powder-coat color options.
- Rustic cabin wall art guidance covers pairing warm wood tones with manufactured décor pieces.
- For mounting substrates, mantel-building basics explain what’s behind the wall before you drill.
Sources
- 250+ Inspiring Home Bar Designs & Ideas
- Largemouth Bass Wall Decor That Feels Real | Reelistic Replicas
Recommended