How to Make a DIY Nursery Sign With a Goat Wood Cutout
A goat wood cutout makes a sweet, simple nursery sign: sand it smooth, paint it with water-based acrylic, add your baby’s name in vinyl, seal it, and hang it well away from the crib. Most people finish the whole project in a weekend, and the only real waiting is paint and sealer drying time.
✦ Featured From Our Shop ✦
Handcrafted & laser engraved in Georgia, just for you
We laser cut wood shapes in our Georgia shop, so we see what crafters run into. This guide walks through the full project, from choosing the cutout to hanging it safely. It also covers the mistakes that cause most do-it-yourself nursery signs to look homemade in the wrong way.
TL;DR
- Pick a cutout in the right size, sand it smooth, and paint it with water-based, low-VOC acrylic.
- Use heat transfer vinyl (iron-on) for the name on bare or lightly painted wood, and press at 300°F for 40 to 45 seconds, then let it cool before peeling.
- Seal with a clear coat, and skip small beads, buttons or other loose add-ons that could become a choking hazard.
- Never hang the sign above a crib or bassinet. Use hardware rated for the wall and the weight.
Table of Contents
- Why a goat makes a good nursery sign
- What you need
- Step 1: Plan the design on paper
- Step 2: Sand the cutout
- Step 3: Paint the goat
- Step 4: Choose your lettering method
- Step 5: Seal the sign
- Step 6: Hang it safely
- Our perspective: keep the goat simple
- Troubleshooting common problems
- Make it a gift
- Want us to do the engraving?
- FAQ
- Sources
Why a goat makes a good nursery sign
Goats have a friendly, slightly goofy look that suits a farmhouse, woodland or storybook nursery. The silhouette is simple, so it paints well even if you have never painted anything fancier than a fence. A baby goat, called a kid, also gives you an easy pun for a name sign, a baby shower gift or an announcement of a new arrival.
The search results for this project are a mix of 4-H display cutouts, door hanger templates and paper decoupage ideas. What they rarely cover is the part that matters in a nursery: finish, adhesion and safe placement. That is what we focus on here.
What you need
Gather everything before you start so the paint does not dry while you hunt for a brush.
The cutout. A laser-cut plywood goat is flat, light and has clean edges. Our laser-cut wood cutouts are made to order in our shop, and you can browse the unfinished blanks on our blanks page. Pick a size that suits the wall. A cutout around 12 inches tall reads well on a shelf or a small wall, while a larger one needs more room around it to look intentional.
Sandpaper. A few sheets in medium and fine grit. We explain the full sequence in our five step grit progression for painting unfinished wood cutouts.
Paint. Water-based acrylic craft or latex paint in your palette. For a nursery, check the label for low-VOC wording. Guidance for art studios from Connecticut College’s environmental health office favors water-based acrylics over solvent-based paints because they are easier to clean up and pose fewer inhalation risks.
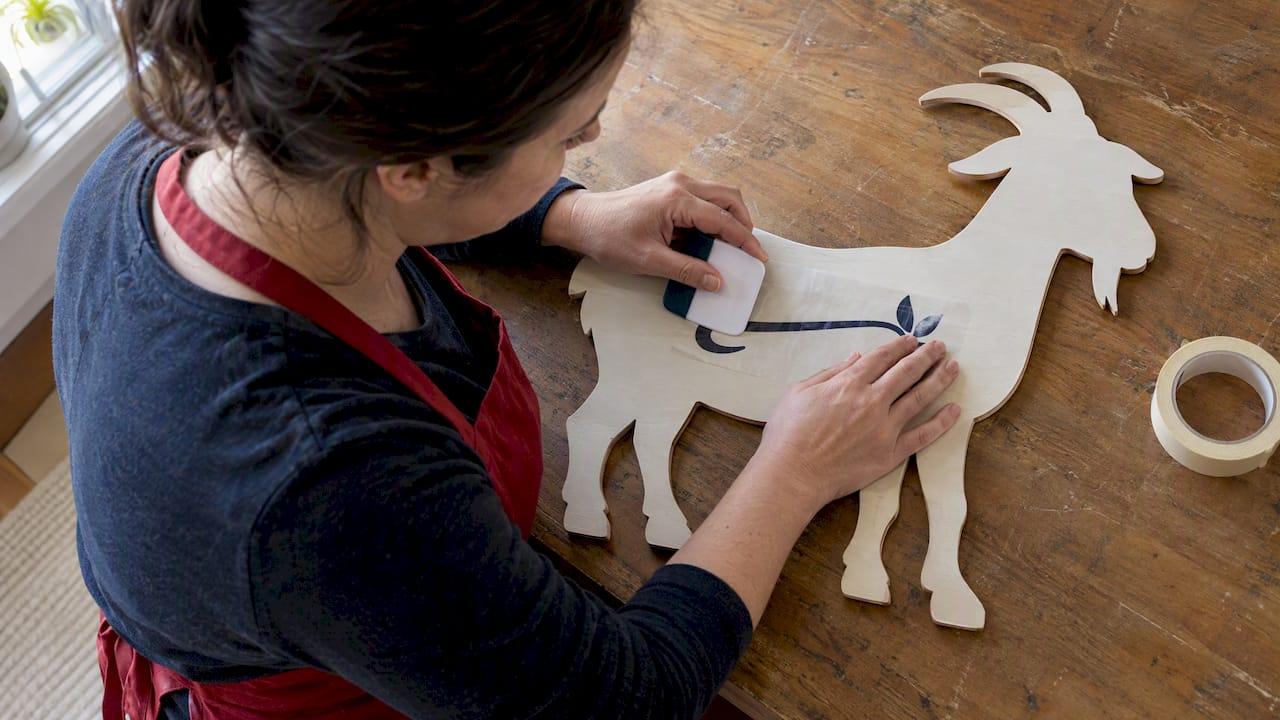
Lettering. Either iron-on vinyl (heat transfer vinyl, or HTV) or permanent adhesive vinyl, plus a cutting machine if you want the name cut for you. You can also paint the letters by hand with a stencil or a steady brush.
Sealer. A clear water-based coat such as polycrylic, or a light spray sealer.
Tools. Soft brushes, a foam brush, a tack cloth or lightly damp rag, masking tape, a ruler, a scraper or burnishing tool, and a heat source if you are using iron-on.
Step 1: Plan the design on paper
Before you touch the wood, sketch the layout. Decide three things.
- Colors. Goats look charming in cream, soft gray, tan or even sage green. A white goat with tan ears and hooves reads clearly against a darker wall. A pale goat disappears on a pale wall, so think about contrast.
- Lettering. Will the name go on the goat’s body, or on a separate piece, such as a board, a banner or a second cutout? On a goat silhouette the body is the biggest flat area, so a short name fits nicely there. A long name usually looks better on its own plaque below the goat.
- Extras. Eyes, a nose, a little flower crown, a bow tie. Paint these. Do not glue on buttons or beads.
That last point is a safety call, not a style one. The Consumer Product Safety Commission’s nursery guidance stresses choosing products with safety in mind from the start, and a sign with small loose parts can become a choking hazard if a toddler ever gets hold of it. Flat painted details are the safer choice.
Step 2: Sand the cutout
Laser-cut edges have a slightly darker, toasted look from the cutting beam. Some crafters love it. If you want a crisp painted edge, lightly sand it.
Start with a medium grit to knock down any rough spots, then move to a fine grit until the surface feels like a smooth page. Sand with the grain on the flat faces, and use a folded piece of sandpaper for the tight curves around the horns, ears and legs. Wipe off all the dust with a tack cloth or a barely damp rag and let the wood dry.
Do not skip this. Paint and vinyl both show every ridge and fuzzy fiber. If you want the full walkthrough for plywood shapes, our guide on the best paint for laser-cut plywood covers finishing one piece or a batch of twenty.
Step 3: Paint the goat
Work in a well-ventilated room, with a window open if you can. Water-based acrylic is the easy choice here, and it dries fast.
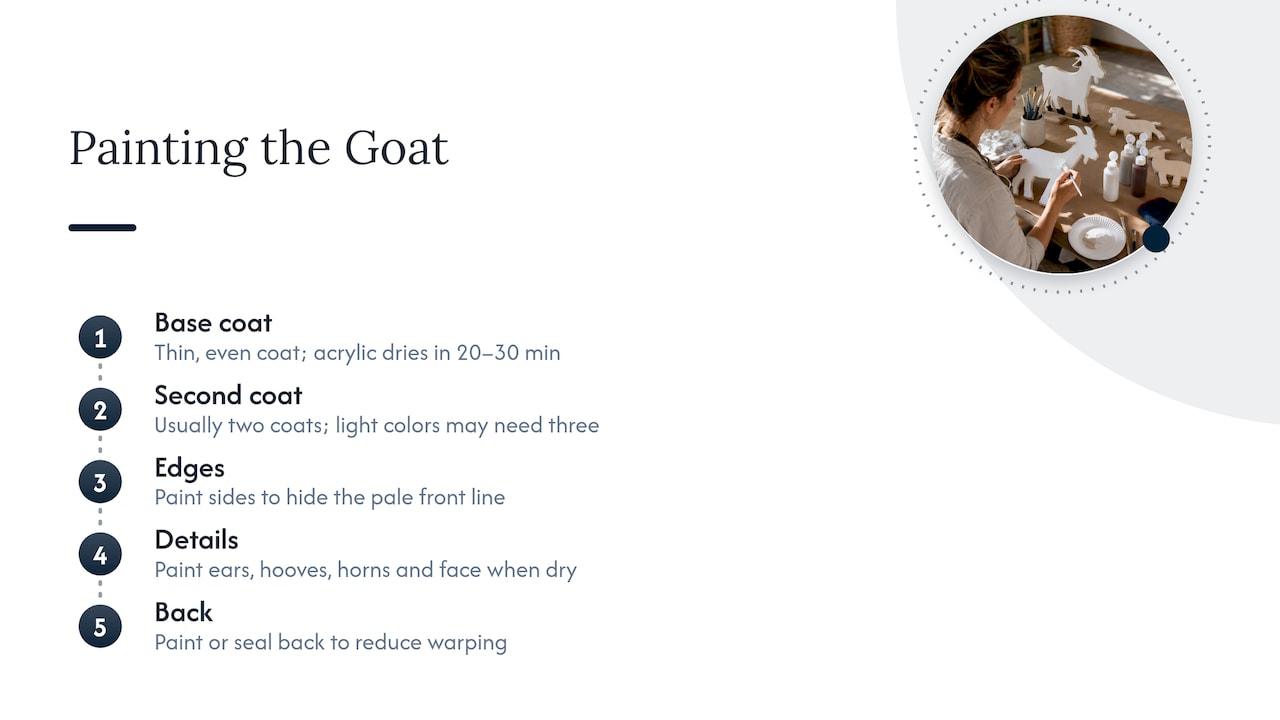
Base coat. Use a soft brush or foam brush and apply a thin, even coat. Thin coats look better than one thick coat, which drips along the edges and fills the details. Let it dry completely, usually 20 to 30 minutes for acrylic, though the label on your paint is the final word.
Second coat. Most colors need two coats, and light colors over bare plywood often need three. Lightly sand with very fine paper between coats if you feel any roughness.
Edges. Paint the sides of the cutout too. Bare edges show up as a pale line from the front, particularly on dark colors.
Details. Once the body is dry, paint the ears, hooves, horns and face. A small round brush and patience do the job. For a clean line between two colors, wait until the first is fully dry, then tape the edge with painter’s tape and press it down before painting.
Back. Paint or seal the back so moisture does not warp the wood unevenly. Plywood is stable, but a thin cutout can still bow if only one side is coated.
Step 4: Choose your lettering method
This is the choice that decides how the sign will look and how long it will last. You have two main routes with vinyl, plus a hand-painted route.
| Method | Best for | Watch out for |
|---|---|---|
| Iron-on vinyl (HTV) | Wood cutouts, because it bonds to the wood fibers | Needs correct heat and time, and a cool peel |
| Permanent adhesive vinyl | Smooth, sealed surfaces | Depends on good transfer tape and burnishing |
| Hand-painted or stenciled | A softer, handmade look | Needs a steady hand and a stencil for clean edges |
The Abbi Kirsten guide to vinyl on wood compares HTV and permanent vinyl in detail. Our takeaway for a goat cutout: iron-on works well on the bare or lightly painted body, while permanent vinyl suits a smooth, fully painted and sealed surface.
Applying iron-on vinyl
The Cricut help center page on pressing on wood lists 300°F as the setting for iron-on on wood, with a press time of 40 to 45 seconds. Those numbers are for that specific machine, so follow the instructions on your own heat press or vinyl package if they differ.
- Cut the name in mirror image, with the shiny carrier side facing down on the mat.
- Weed away the extra vinyl, leaving only the letters on the carrier sheet.
- Center the name on the cutout with the hinge method described below.
- Cover it with a protective sheet, press at the recommended heat and time, and keep the pressure even.
- Let the cutout cool to room temperature before you peel the carrier. Crafter Abbi Kirsten points out that on wood a cool peel helps the adhesive bond to the fibers rather than lifting with the liner.
A household iron is harder to control on wood because the heat is uneven and the surface is rigid. If you do not have a heat press, permanent vinyl is usually the friendlier option.
Applying permanent vinyl
Permanent vinyl needs a smooth, fully dry painted surface. Cut the name, weed it, and cover it with transfer tape. Burnish the tape firmly with a scraper so the letters grab the tape, position the lettering, then burnish again through the tape before peeling it back slowly at a sharp angle. Cricut’s welcome sign tutorial stresses pressing the design firmly into the surface, which helps prevent peeling at the edges.
The hinge method for perfect centering
The same Cricut tutorial describes a trick that saves a lot of crooked names. Tape the design across its center with masking tape, forming a hinge. Lift one half, peel the backing off that half and cut it away, then lay the half down onto the wood and smooth it. Repeat with the other side. Measure from the edges of the goat before you tape, so you know the name sits where you want it.
Painting the name by hand
If you prefer a handmade look, print the name at the size you want, rub pencil graphite on the back, tape the paper in place and trace over the letters to transfer them. Then paint over the pencil lines with a small brush. Pick a simple, thick font, since thin script is difficult to paint cleanly on a small area.
Step 5: Seal the sign
Sealing protects the paint from fingerprints, dust and the occasional wipe-down. Use a clear water-based coat in a matte or satin finish. Apply thin layers with a soft brush, and let each dry before the next. Two coats are plenty for an indoor nursery sign.
One caution: with iron-on vinyl, test your sealer on a scrap first. Some brush-on sealers can leave a slightly different sheen over vinyl than over paint. A light spray sealer is gentler on lettering, and the finishing guidance we draw on suggests different clear coats for permanent vinyl and iron-on. If the sign might ever see a porch or a sunny window, our piece on the best clear coat for outdoor wooden signs goes deeper into durable finishes.
Let the sign cure fully, ideally for a couple of days in a ventilated space, before it goes into the baby’s room. That helps any lingering paint smell fade.
Step 6: Hang it safely
This is the step many tutorials skip, and it is the one that matters most in a nursery.
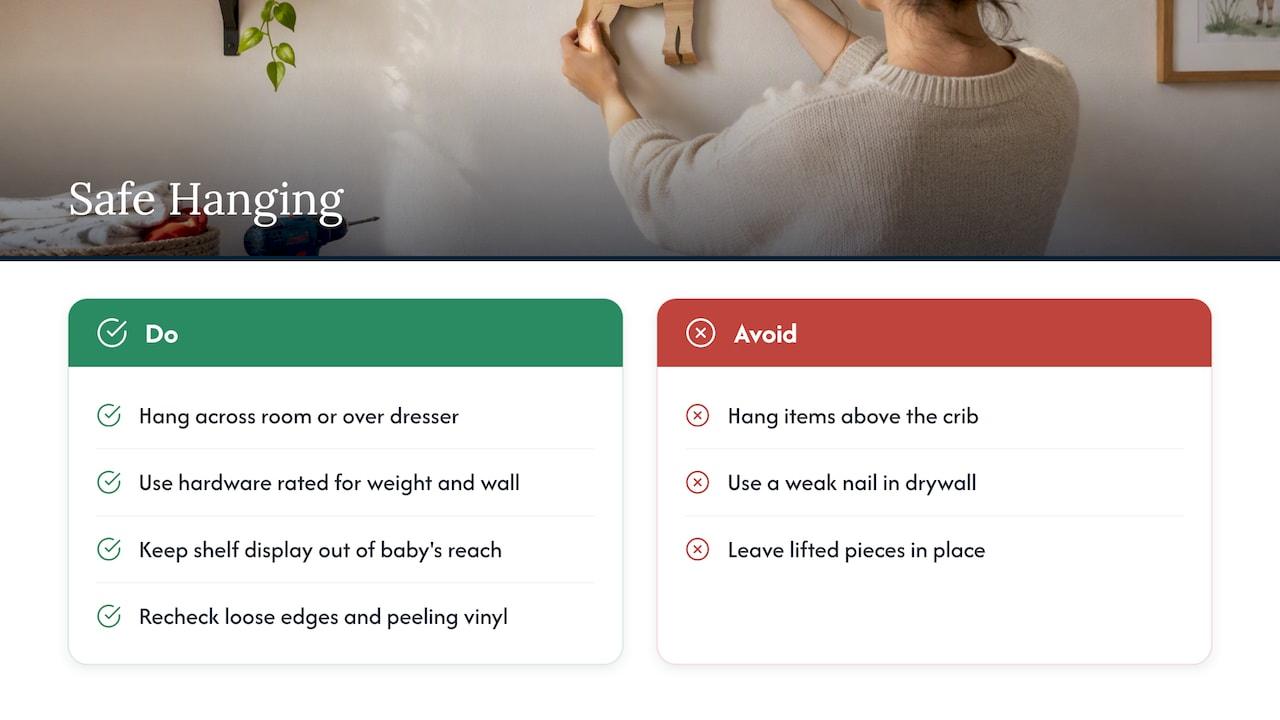
Keep it away from the crib. The CPSC’s safe nursery guide advises against hanging items above a crib. Health Canada’s nursery setup page gives the reason: wall hangings can fall, and children can climb to reach them as they grow. Hang the goat on a wall across the room, over a dresser, or in a reading corner, not over the sleep space.
Use the right hardware. The same Canadian guidance says hanging hardware should be rated for the weight and type of wall. A thin plywood cutout is light, but a stud, a proper anchor or a rated adhesive hook is still better than a weak nail in drywall.
Consider a shelf instead. A cutout leaning on a shelf, dresser or ledge with a small stand behind it avoids wall hardware completely. Keep it out of the baby’s reach.
Think about the future. A nursery sign stays in the room for years. If you plan to move it into a toddler’s room, check it again for loose edges or peeling vinyl, and take it down if any piece lifts.
Our perspective: keep the goat simple
We cut wood shapes every day, and the signs that people love longest are rarely the busiest ones. A single goat, a soft color palette and a name in a clean font will look better in five years than a sign with layers of ribbon, glitter and charms.
We also think the best homemade gift is one where the crafting shows care, not complexity. If you are making this for a baby shower, put your effort into smooth sanding and even paint. Those two things make a sign look professional more than any fancy technique.
When you want the lettering to be perfect and do not own a cutting machine, a laser-engraved piece can fill the gap. Engraving is burned right into the wood, so there is no vinyl to peel. And if a goat is not quite what you pictured, a shape or script name from our shop can be the starting point for the same finishing steps in this guide.
Most of all, take your time with the first coat of paint. Nearly every disappointing project we hear about comes from rushing the prep.
— Gary
Troubleshooting common problems
The paint looks streaky. You probably applied it too thick or went back over it while it was drying. Let it dry, sand lightly with fine paper, and apply another thin coat.
The vinyl lifts at the edges. Usually the surface was dusty, too rough or not pressed hard enough. Press again at the recommended heat, and let it cool fully before peeling. For permanent vinyl, burnish more firmly.
The wood grain shows through. Plywood has a visible grain that can telegraph through light paint. Add another coat, or accept it as part of the rustic look.
Bubbles under the vinyl. Pierce a bubble with a pin and smooth the vinyl down from the center outward.
The sign warped. Moisture on one side only can bow thin wood. Seal both sides next time.
Make it a gift
A finished goat sign is a lovely baby shower gift, particularly with the baby’s name or a due date. Add a date, a birth weight or a short phrase in the same vinyl. If you are making several, paint them as a batch: sand all of them, paint all the base coats together, and add lettering afterward.
For a keepsake that goes with it, a customized wooden baby feet cutout for a guestbook makes a fun shower activity, with guests signing the wood. Our script name cutouts can also pair with the goat if you want a laser-cut name rather than vinyl lettering.
Want us to do the engraving?
If you would rather skip the lettering step, we can help. Signature Laser Designs makes personalized, laser-engraved wood and metal gifts to order in our Georgia shop, and we also offer unfinished wood blanks for crafters. Start with our custom gift creation service to tell us what you have in mind, or look through the blanks and personalized wood pieces to find a shape you can finish yourself.
FAQ
Can I use a goat cutout for a nursery if I do not have a Cricut?
Yes. You can paint the name by hand with a stencil or a graphite transfer, or order a laser-engraved piece. A simple painted goat with no lettering also looks lovely in a nursery.
What kind of paint is safest for a nursery sign?
Water-based acrylic with a low-VOC label is a sensible choice, and it is easier to clean up than solvent-based paint. Paint in a ventilated room and let the sign cure before it goes into the baby’s room. Check the paint label for any child-safety statement as well.
How do I transfer words to wood?
The easiest ways are vinyl (iron-on or permanent), a stencil, or a graphite transfer: print the words, rub pencil on the back, trace over them and then paint. Vinyl gives the sharpest letters. Graphite transfer needs no special tools.
Can I hang the goat sign over the crib?
No. The CPSC advises against hanging decor above a crib. Put it on another wall, on a shelf out of reach, or over a dresser with secure hardware.
Should I seal a sign that has iron-on vinyl?
Yes, with a light, thin coat, but test it on a scrap first. A spray sealer is often gentler on iron-on lettering than a brush-on coat.
Sources
- Cricut Autopress: Pressing on wood, Help Center
- The Safe Nursery, CPSC
- Setting up a safe nursery, Canada.ca
- How to make custom welcome signs with Cricut
- The Ultimate Guide To Vinyl On Wood: HTV vs. Permanent Vinyl
- Safety Guide for Art Studios, Connecticut College
Recommended
- How to Customize a Wooden Baby Feet Cutout for a Guestbook
- Should You Buy, Commission, or DIY a Deer Silhouette Sign?