Seal Glitter on Unfinished Holiday Wood Cutouts Without a Dull Finish
For most holiday wood cutouts, spray a clear craft sealer in light mist coats, then top with a brush-on Polycrylic or Mod Podge once the sealer has locked the glitter in place. Save resin for a glass-like finish. Test everything on a scrap of the same wood first when working with our blanks at Signature Laser Designs.
✦ Featured From Our Shop ✦
Handcrafted & laser engraved in Georgia, just for you
TL;DR:
- Before sealing, sand lightly, remove dust, test the finish on the same wood, and let the adhesive cure overnight to prevent clouding or shifting glitter.
- Fine glitter usually seals smoothly in 2–3 light spray coats, while chunky glitter needs extra coats or resin to level its raised texture.
- Apply clear spray between 55°F and 75°F, with humidity below 60%; Krylon lists 10–15 minutes to touch dry and about 2 hours to handle.
- Add one or two light brush on coats of Polycrylic or Mod Podge only for extra hardness, then wait 24 hours before heavy use.
- Most craft sealers are rated for interior use, so porch ornaments need an exterior rated topcoat suited to outdoor exposure.
Table of Contents
- What materials and tools do you need to seal glitter on wood?
- How should you prep unfinished wood before adding glitter?
- Which method works best for applying glitter to wood?
- Which sealer should you use, and how do you apply it?
- How do you fix dull sparkle, bumps and drips?
- What is the step-by-step recipe from bare wood to finished glitter?
- Why do we recommend these steps?
- Where can you buy ready-to-finish holiday cutouts?
- FAQ
- Sources
What materials and tools do you need to seal glitter on wood?
Gather everything before the glue comes out. Glitter projects move fast once the adhesive is down, and a missing brush or a forgotten drop cloth turns a fun afternoon into a sticky scramble. Here is the shopping list we point crafters to.
Adhesives
- Tacky craft glue, brushed on in a thin, even layer
- Mod Podge in gloss or matte, which works as both adhesive and sealer
- Spray adhesive, handy for covering large flat areas quickly
Sealers
- Krylon craft sprays such as Glitter Blast Clear Sealer or Crystal Clear Acrylic Coating, which are made for craft materials including wood
- Minwax Polycrylic in spray or brush-on form for a harder interior topcoat
- Mod Podge sealer for a brush-on finish that doubles as glue
- Two-part epoxy resin when you want a glass-like surface
Tools and protection
- Foam brushes and soft-bristle brushes
- Disposable trays or paper plates to catch excess glitter
- A respirator or mask for sprays and resin, plus gloves
- A drop cloth and a tack cloth
Glitter type changes your sealing plan more than most people expect. Fine glitter lies flat and seals smoothly in a few thin coats. Chunky glitter creates a bumpy surface that swallows sealer and needs more coats to smooth out. Metallic flakes tend to show every layer of coating, so keep those coats especially light.
Your workspace matters too. Krylon recommends applying clear craft sprays between 55°F and 75°F with humidity below 60%. Outside that window, the finish can turn cloudy or tacky, and that is a hard mistake to undo once glitter is underneath.
Pro Tip: Lay out your sealer, brushes and a scrap piece of the same wood on your workspace before you open any glitter. If you can reach everything without walking away, you will not be tempted to rush a coat.
How should you prep unfinished wood before adding glitter?
Good prep decides whether your glitter stays put for ten years or flakes off by New Year’s Day. Unfinished plywood cutouts are friendly to work with, but they still need a little attention. Our five step grit progression for painting unfinished wood cutouts covers the sanding side in more depth, and the same habits apply here.
- Sand lightly. This smooths the face and edges without closing up the wood so much that glue cannot grip. Sand with the grain, and ease any sharp corners.
- Remove every trace of dust. Wipe the cutout with a tack cloth. Dust trapped under glue becomes a bump under glitter, and it will show through your sealer.
- Check for oils or residue. Wood that has been waxed, oiled or handled with greasy hands will resist adhesive. Plain, raw plywood is what you want.
- Decide whether to paint first. If you want an opaque, solid-colored base, paint the cutout and let it dry fully before adding glitter. A painted base reflects light behind the glitter, so you often need fewer glitter layers and fewer sealer coats. Our guide to the best paint for laser cut plywood can help you choose.
- Run a scrap test. Glue the same glitter to a scrap of the same wood, let it dry, and spray your chosen sealer on it. You are looking for dulled sparkle, color bleed or curling flakes. Craft-Art advises choosing non-yellowing, clear-drying sealers and testing on a hidden area or scrap before finishing the whole piece, and we agree.
- Let the adhesive dry completely. Overnight is a reliable minimum before any sealer touches it. Sealing over damp glue is the most common reason a finish clouds or the glitter shifts.
If you would rather skip sanding guesswork, our unfinished wood blanks are ready for a light scuff and a coat of glue.
Which method works best for applying glitter to wood?
There is no single best way to attach glitter. The right choice depends on the look you want, the glitter you own and how patient you are feeling. We use several methods regularly, and each one has a place.
Spray adhesive
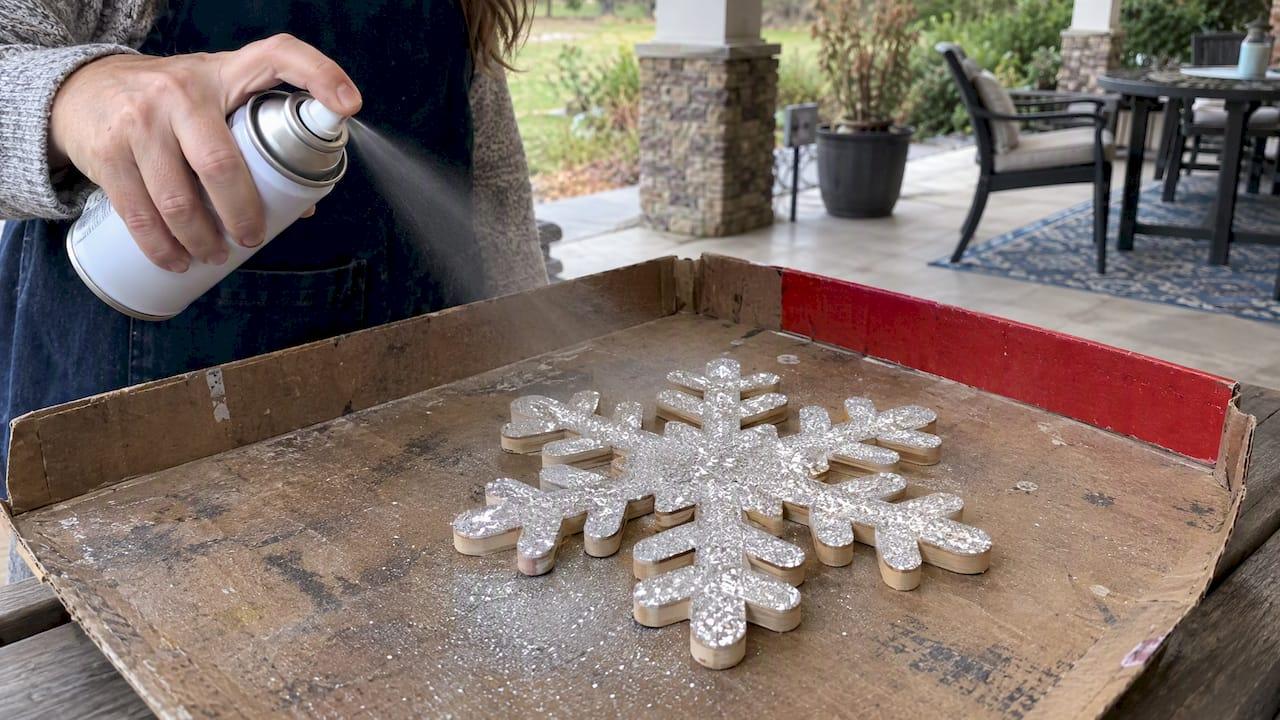
Spray adhesive is the fastest route for large, flat cutouts like a big wooden guitar or a wolf silhouette. Set the cutout on a catch tray or cardboard box lid, hold the can at a suitable distance, and mist in a sweeping motion until the surface looks evenly tacky. Sprinkle glitter immediately and generously, then tap off the excess onto your tray. Let it cure before sealing. The upside is speed and even coverage. The downside is overspray, so work in a ventilated space and protect nearby surfaces.
Glue and sprinkle
This is the classic method, and it gives you the most control over fine details. Brush a thin, even coat of tacky craft glue or Mod Podge across the area you want to sparkle. Thin matters: thick glue pools in corners, dries slowly and can leave a rubbery edge around your glitter. Sprinkle glitter on generously, tap off the excess, and let everything cure fully. Reapply to any thin spots once the first layer has set. Use a small brush to work glue into tight spots such as the ear tips on a wolf or the strings on a guitar.
Mod Podge as adhesive and first sealer
Mod Podge is a favorite because it does two jobs at once. Plaid, the maker of Mod Podge, describes Mod Podge Gloss as both an adhesive and a sealer, applied in thin, even coats with a foam or soft-bristle brush. The brand’s own guidance lists about 15–20 minutes of dry time between coats. Mod Podge also states that its gloss formula is an all-in-one glue, sealer and finish and recommends a 24-hour cure before heavy use. Brush a coat on, sprinkle your glitter, let it dry to the touch, then brush a second thin coat over the top to lock the glitter in. Go gently, because a loaded brush will drag loose glitter across the surface.
Paint-mix or medium-mix
Some crafters stir glitter directly into paint or a clear medium and brush it on. It is the easiest approach for a glitter-colored background, and it keeps glitter from drifting around the workspace. The trade-off is sparkle: glitter suspended in paint sits at different angles under a film of liquid, so it reflects less light than glitter sprinkled onto wet glue. We suggest this for backgrounds and borders, then adding a sprinkled layer where you want real shine.
Adjusting for glitter size
Fine glitter forgives almost anything and produces a smooth surface that seals in two or three light coats. Chunky glitter is dramatic, but its raised edges catch sealer unevenly. Plan on extra thin coats, or consider resin if you want those chunks buried under a smooth surface. Fine and chunky glitter mix beautifully when you put chunky pieces on the focal point and fine glitter around the edges.
Pro Tip: Tape off any areas you want to keep bare wood, such as the back of an ornament or a hanging loop, before you spray or brush on glue. Peel the tape while the glue is still slightly tacky to get a clean edge.
Which sealer should you use, and how do you apply it?
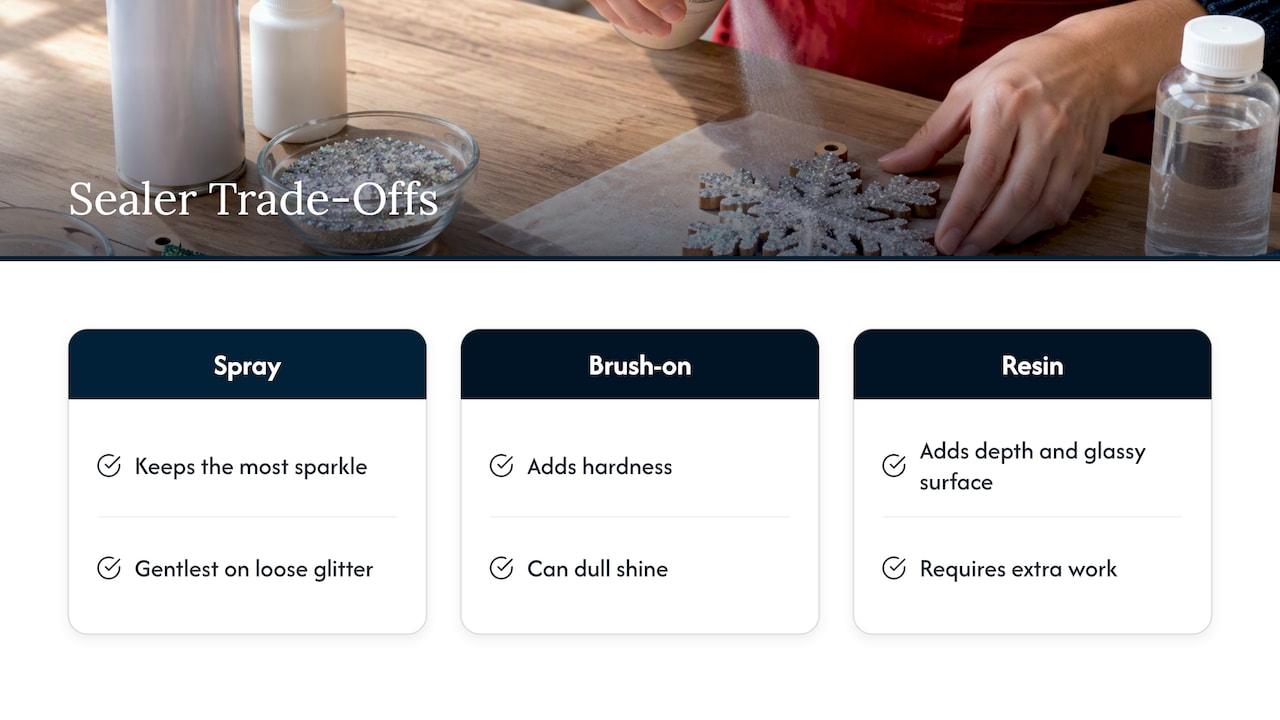
Every sealer trades something. Spray keeps the most sparkle and is the gentlest on loose glitter. Brush-on finishes add hardness but can dull shine. Resin gives depth and a glassy surface at the cost of extra work. Whichever you choose, thin coats beat heavy ones every time.
Spray sealers
Spray sealers are the best first layer because the fine mist does not push glitter around. Krylon states its clear craft sprays typically dry to the touch in 10–15 minutes and reach handling dryness in about 2 hours. For a more shimmery result, Krylon’s Glitter Shimmer Finish Spray dries to touch in about 10 minutes and to handle in about 2 hours. If you want a non-yellowing, moisture-resistant gloss for interior projects, Krylon Crystal Clear Acrylic Coating is a common pick. For extra gloss and depth, Krylon Triple-Thick Crystal Clear Glaze delivers a high-gloss protective finish, so check the label for substrate suitability.
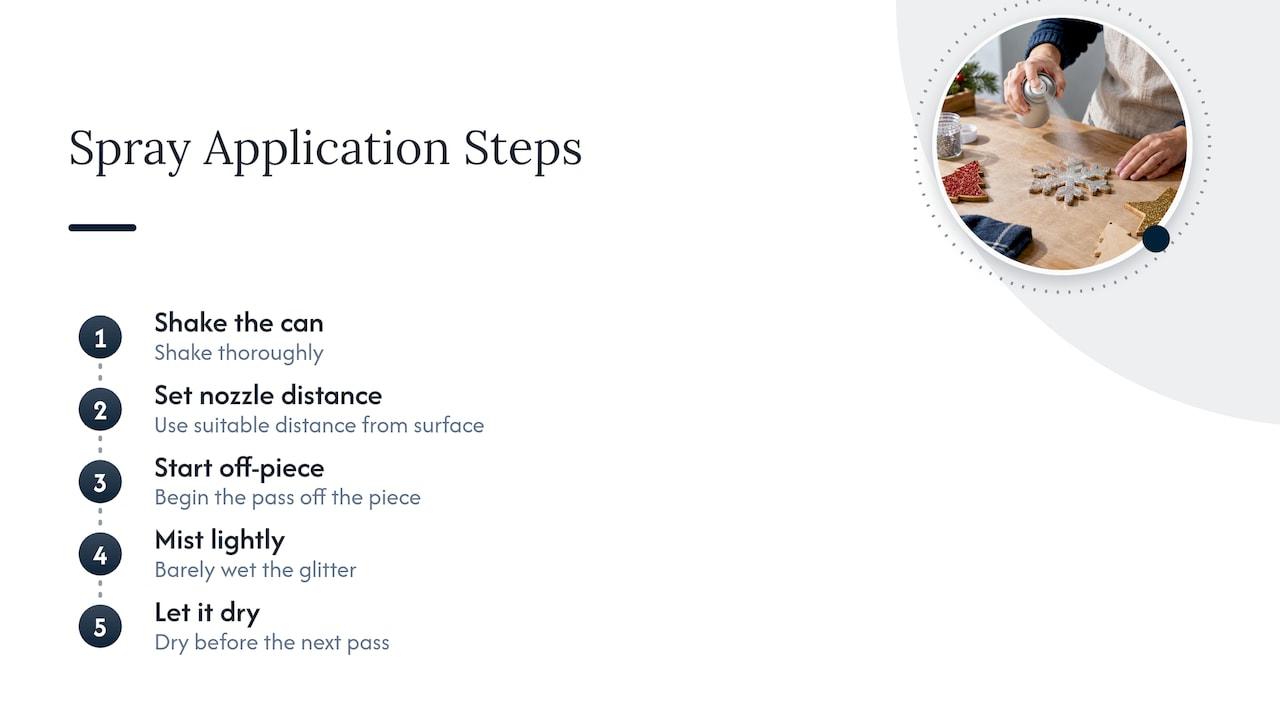
How to apply: shake the can thoroughly, start with the nozzle at a suitable distance from the surface, and begin the first pass off the piece before sweeping across it. Your first coat should be a light mist that barely wets the glitter. You will be tempted to add more. Resist, and let it dry before the next pass.
Brush-on Polycrylic
Minwax Polycrylic is a water-based finish designed for interior wood, and it works well as a hardening topcoat once spray sealer has locked the glitter in place. Woodworking Advisor notes that Minwax recommends at least three coats on unfinished wood and 24 hours before heavy use. Brush it on in light, even strokes in one direction. Do not overwork it, because going back over a drying coat leaves streaks and can lift glitter.
Mod Podge as the finish
If you used Mod Podge as your adhesive, a final thin coat of Mod Podge sealer keeps the finish simple. Plaid’s Mod Podge Academy also recommends a finishing spray after the full Mod Podge cure for projects that need extra durability, so a spray-then-brush routine suits ornaments that will be handled often. Remember that Mod Podge brush-on layers can soften the look of glitter more than spray does.
Epoxy resin
Resin gives you the glass-like depth you see on professional keepsakes, but it asks more of you. It needs careful mixing, good ventilation, a level surface and a long cure. We suggest it for small ornaments or when you already feel comfortable working with it. If you are new to resin, try it on a scrap first, and expect bubbles you will need to chase away.
Practical coat counts
- Start with 2–3 light spray coats and wait the label time between each
- Add 1–2 light brush-on coats of Polycrylic or Mod Podge only if you need extra hardness
- Stop as soon as the surface feels smooth and the glitter no longer sheds
- Treat the label’s temperature and humidity ranges as part of the recipe
Krylon’s guidance for clear craft sprays: dry to the touch in 10–15 minutes and handling dryness in about 2 hours, applied between 55°F and 75°F with humidity below 60%. Those timings mean a spray-sealed ornament can usually be moved the same afternoon, but give brush-on topcoats their full 24 hours before heavy use. Source: Krylon
Indoor versus outdoor
Almost every craft sealer here is rated for interior use. A glittered cutout hanging on a porch will meet rain, sun and temperature swings that craft sprays were not built for. If your project is headed outdoors, read our guide to the best clear coat for outdoor wooden signs and choose an exterior-rated topcoat instead.
How do you fix dull sparkle, bumps and drips?
Even careful crafters hit problems. Most are fixable, and a few are easy to prevent next time.
- Dull sparkle: This is usually overcoating. Too many wet layers bury the glitter’s edges. Switch to lighter spray passes on your next piece, and test a light gloss spray on a scrap to make sure it keeps the sparkle you want.
- Gritty or bumpy finish: Brush away loose flakes with a soft, dry brush, then add more thin sealer coats to bind and smooth the texture. If the bumps come from chunky glitter and you want a truly smooth surface, a layer of resin can level it, but that means committing to a new finish.
- Runs, drips or pooling: Wait for the full cure, sand the spot very lightly, wipe away the dust and recoat with a lighter pass. Heavy first coats and holding the can too close are the usual causes, so keep the can moving.
- Clouding or whitening: Some sprays react with certain glitters or adhesives, and humidity makes it worse. Check the label’s temperature and humidity limits, wait for a drier day and test on a scrap before committing.
- Sealer softening the glue underneath: The adhesive was not fully cured. Wait longer, especially in cold or humid rooms, and give the glue a full night before the first sealer pass.
If a mistake leaves you with a piece you hate, sanding back to bare wood is always an option on plywood cutouts. We would rather you start over than keep a finish that frustrates you.
What is the step-by-step recipe from bare wood to finished glitter?
Here is the whole process in one place. Print it, tape it above your workspace and check off each step.
- Sand and test. Sand the cutout with 180–220 grit, wipe away all dust with a tack cloth and run a scrap test with your glitter and sealer.
- Apply adhesive and glitter. Choose your method (spray adhesive, glue and sprinkle, or Mod Podge). Apply a thin, even coat, sprinkle glitter generously and tap off the excess.
- Wait for the full adhesive cure. Overnight is the safest minimum. Do not rush this step, because everything that follows depends on it.
- Mist on spray sealer. Make several light passes from a suitable distance, waiting between coats according to the can’s directions. Work in the recommended temperature and humidity range.
- Add an optional topcoat. Once the spray has locked the glitter down, brush on one or two light coats of Polycrylic or Mod Podge for extra hardness.
- Let it cure. Allow 24 hours for basic handling and up to 48 hours for a fuller cure before hanging, wrapping or packing the piece.
Pro Tip: Photograph your scrap test next to the finished piece. If you ever make a second batch for gifts or a craft fair, you will know exactly which glitter, glue and sealer combination you used.
Why do we recommend these steps?
We are a shop in Georgia that offers unfinished wood cutouts to crafters, so we hear the same finishing questions again and again. Does the sealer dull the sparkle? Why does the glitter flake after a week? Can I seal glitter with the glue I already have? Over time those questions shaped the order of this guide: prep thoroughly, build in thin layers, and let each stage dry longer than feels necessary.
The part most people overlook is restraint. Sealing glitter is a trade between shine and durability, and nobody gets both at full strength. Protection helps a piece that will be handled, packed and displayed year after year, but a purely decorative piece that hangs untouched on a shelf may need only the lightest mist. Decide how much handling your project will see before you decide how many coats it gets.
If you want to practice on compatible blanks, our unfinished cutouts at Signaturelaserdesigns give you a place to run scrap tests.
— Gary
Where can you buy ready-to-finish holiday cutouts?
If you would like to start with wood that is already cut and suited to holiday projects, we have blanks that suit glitter work well:
- Wood cutouts (on Etsy): explore unfinished shapes for your project. Find wood cutouts here (on Etsy).
- Wood cutouts (on Etsy): explore more shapes for a gift or seasonal project. See wood cutouts here (on Etsy).
Plywood is a smart choice for glitter because it is sturdy enough to handle glue and several thin coats, yet light enough to hang. Clean edges frame glitter nicely, and flat faces take adhesive evenly.
Want to browse more? Our full selection of unfinished wood blanks and personalized gifts is ready to ship, and if you would rather have us do the engraving, our Custom Gift Creation service turns your idea into a finished keepsake. Pick a blank, grab your glitter and start your sparkle this season.
FAQ
How can I seal glitter on wood?
Let the glue dry completely, then mist a clear craft spray sealer over the glitter from a suitable distance. Build two or three thin coats, waiting between each as the label directs. Add a light brush-on topcoat only if you need extra hardness.
What can I put over glitter to seal it?
Clear acrylic craft sprays, Minwax Polycrylic and Mod Podge sealer all work over glitter on wood. Spray is gentlest on loose glitter, so it makes a good first layer. Craft-Art recommends non-yellowing, clear-drying sealers and a test on scrap first.
What is the best sealer for glitter?
For most crafters, a clear craft spray such as Krylon Crystal Clear Acrylic Coating or Glitter Blast Clear Sealer is the easiest way to protect glitter without pushing it around. Choose resin only when you want a smooth, glass-like surface and are comfortable working with it.
What is the best glue to secure glitter on wood?
Tacky craft glue and Mod Podge both hold glitter well when applied in a thin, even coat. Mod Podge Gloss works as glue, sealer and finish, which keeps your supply list short. Spray adhesive suits large, flat cutouts.
Sources
Recommended
- Five Step Grit Progression for Crafters Painting Unfinished Wood Cutouts
- Prep Unfinished State Cutouts for String Art: Laser Cut Fixes
- Finish One or a Batch of 20: Best Paint for Laser Cut Plywood
- Skip Sanding: Laser Shop Buy & Finish Unfinished Deer Cutouts