
Best Permanent Industrial Marking for Steel: A Practical Guide
For steel that will be painted, galvanized, or put through heavy handling, dot peen marking (0.3–1.0 mm depth) and mechanical scribing (0.2–0.5 mm) are your most reliable permanent steel marking solutions. For finished, high-detail parts, personalized gifts, and medical-grade stainless, fiber-laser annealing or ablation wins on precision and surface integrity. The single rule that drives every good decision: choose by the part’s post-processing lifecycle, not by what looks sharpest on day one.
✦ Featured From Our Shop ✦
Handcrafted & laser engraved in Georgia, just for you
- Dot peen: deep, tamper-proof marks (0.3–1.0 mm depth) that survive painting, hot-dip galvanizing, and sandblasting
- Mechanical scribing: continuous incised lines for high legibility where dot patterns read poorly
- Fiber-laser annealing: high-contrast, corrosion-safe marks with no material removal
- Fiber-laser ablation: tactile, machine-readable marks for DataMatrix and serial codes
Standards like ASTM E1444 (magnetic particle inspection) and ISO 9001 traceability requirements frequently mandate permanent, readable marks on steel components. UDI regulations under FDA 21 CFR Part 830 add a further layer for medical devices.
Pro Tip: If your steel is harder than 63 HRC, skip mechanical methods entirely. Stylus wear becomes severe and mark quality drops fast. A fiber laser is the pragmatic call for hardened tool steels.
Table of Contents
- What are the best permanent industrial marking methods for steel?
- How do you choose the right method by lifecycle and environment?
- What does “permanent” actually survive in the real world?
- What do cost, speed, and maintenance actually look like over time?
- How should you prepare steel and design marks that last?
- Which method is right for your specific use case?
- Key Takeaways
- A note on what we look for before we mark
- Permanent marks on steel, done right by Signaturelaserdesigns
- What most guides get wrong about permanent steel marking
What are the best permanent industrial marking methods for steel?
Understanding how each method actually works makes the choice obvious once you know your part’s lifecycle.
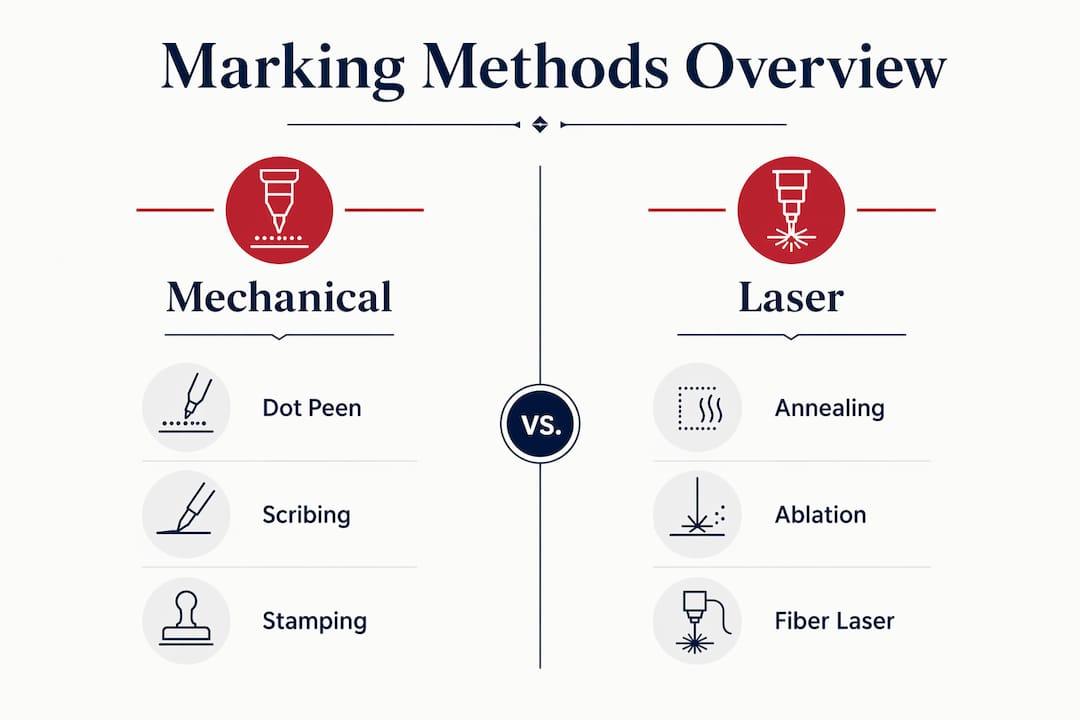
Dot peen marking
A carbide stylus oscillates rapidly under CNC control, displacing material rather than removing it. That compaction is what makes dot peen so durable: the mark is physically pressed into the steel, not etched onto it. Typical depths run 0.3–1.0 mm for parts destined for thick coatings.
Strengths:
- Survives painting, galvanizing, sandblasting, and abrasion
- Works on curved, flat, and recessed surfaces
- Low operating cost; only the stylus wears
Limits:
- Slower than laser for high-volume variable data
- Hardness ceiling near 63 HRC; above that, mark quality degrades
Mechanical scribing
A diamond-tipped or tungsten carbide stylus cuts continuous lines rather than a dot matrix. Scribing achieves depths of 0.2–0.5 mm depending on steel hardness, and the unbroken line improves legibility for alphanumeric text on rough or coarse-grain surfaces where dot patterns can look fragmented.
Strengths:
- Cleaner, crisper characters on coarse steel
- Quiet operation compared to impact methods
- Good depth for moderate coating survival
Limits:
- Not ideal for 2D DataMatrix codes
- Still subject to the 63 HRC hardness ceiling
Fiber laser: annealing vs. ablation
Laser marking on steel is not a single technique. The distinction between annealing and ablation matters enormously for your application.
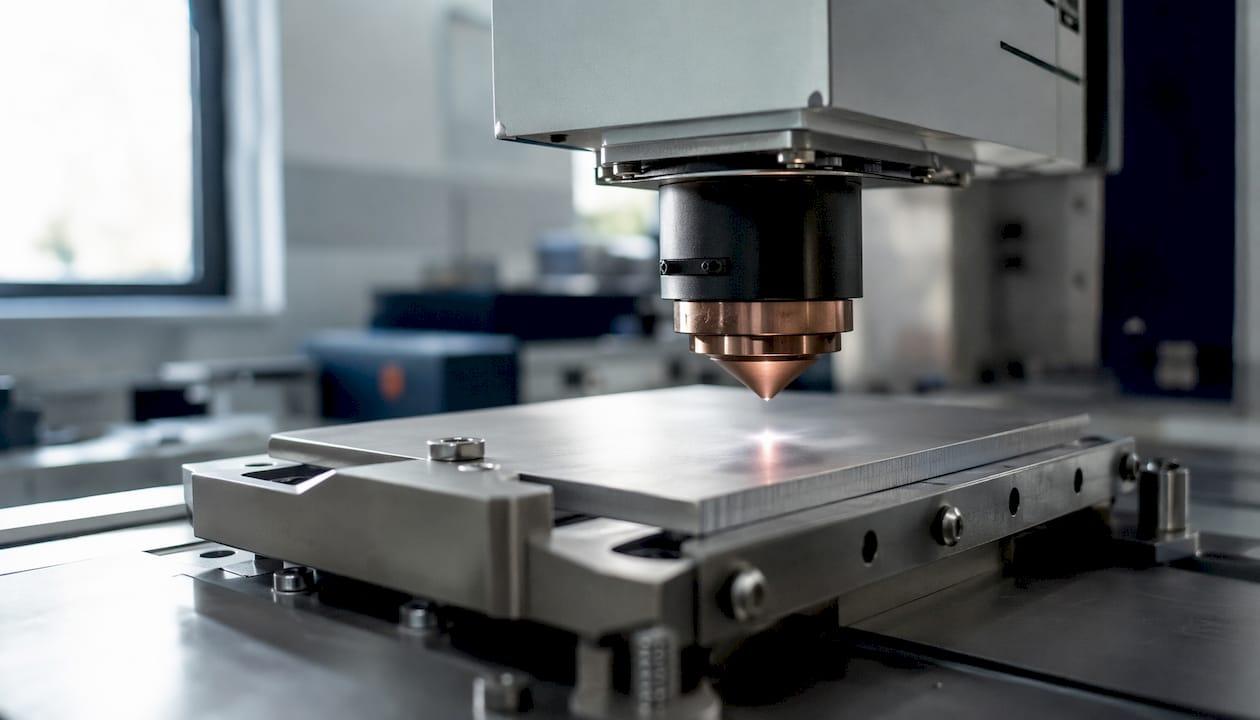
Annealing uses controlled heat to oxidize the steel surface, creating a dark, high-contrast mark without removing any material. On chromium-containing stainless steels, this preserves the passive oxide layer, which means corrosion resistance stays intact. That is why annealing is the go-to for medical devices, food-contact tools, and finished gifts.
Ablation (engraving) removes material to create a tactile indentation. It is more durable under abrasion than annealing alone and is preferred for DataMatrix codes, serial numbers, and hand tools that see daily contact.
MOPA fiber lasers allow pulse-duration control that minimizes the heat-affected zone, making them especially effective for repeatable annealing on stainless steel with sharp, consistent contrast.
Strengths (laser):
- No contact, no stylus wear
- Integrates with automated lines and variable data systems
- Handles complex logos, QR codes, and DataMatrix with precision
Limits:
- Higher upfront capital cost
- Surface-only annealing marks will not survive heavy coatings
Other methods worth knowing
Chemical etching, stamping, and deep roll marking each have a place. Stamping is fast and cheap for simple alphanumeric codes on soft steel. Chemical etching suits stainless and titanium when laser access is limited. For mixed-method reliability on metals, pairing dot peen depth with laser surface detail covers the widest range of post-processing scenarios.
How do you choose the right method by lifecycle and environment?
The part’s post-processing plan is the primary driver in method selection, not aesthetics.
| Post-Processing / Environment | Recommended Method | Minimum Depth / Style | Why It Survives |
|---|---|---|---|
| Hot-dip galvanizing | Dot peen or stamping | 0.3–1.0 mm | Zinc coating fills shallow marks; depth keeps them readable |
| Heavy paint or powder coat | Dot peen | 0.3–1.0 mm | Paint obscures surface marks; indentation stays visible |
| Sandblasting | Dot peen | 0.5–1.0 mm | Abrasive media erodes shallow marks quickly |
| Outdoor / UV / chemical exposure | Laser ablation or dot peen | Ablate or 0.3–1.0 mm | Deep or oxidized marks resist weathering |
| High-temperature service | Dot peen or laser ablation | 0.3–1.0 mm | Thermal cycling degrades surface-only marks |
| Finished stainless / medical | MOPA laser anneal | Anneal (no removal) | Preserves corrosion resistance; meets UDI/ISO requirements |
| Personalized gifts / tools | Fiber laser anneal or ablation | Anneal or light ablation | High detail, clean aesthetics, corrosion-safe |
| Sterilization cycles | MOPA laser anneal | Anneal | No crevices for bacteria; surface integrity maintained |
The Coating Rule: if the part will be painted or galvanized, physical indentation depth is required. Surface-only laser marks, however sharp they look, will disappear under thick coatings.
- For personalized gifts and finished tools: fiber-laser annealing or micro-ablation, no coating to worry about
- For hand tools and shop fixtures: deeper laser ablation or shallow scribing for tactile legibility
- For heavy industrial parts: dot peen at 0.3–1.0 mm, full stop
- Combining methods works well: anneal stainless for aesthetics, then add a dot-peen DataMatrix for critical traceability
Stainless steel’s corrosion resistance is one reason annealing is preferred over ablation for finished parts; ablation can open micro-crevices that compromise the passive layer.
What does “permanent” actually survive in the real world?
Permanence is not absolute. It depends on depth, method, and what the mark faces after application.
- Abrasion: Dot peen at ≥ 0.3 mm survives heavy mechanical abrasion. Laser annealing fades under sustained grinding.
- Hot-dip galvanizing: Physical indentation of 0.3–1.0 mm is required to remain readable after zinc coating.
- Sandblasting: Depths below 0.5 mm risk erasure. Dot peen at 0.5 mm or greater holds up reliably.
- Chemical exposure: Laser-annealed stainless resists most industrial chemicals. Mechanical marks on bare carbon steel may corrode at the mark edge without a protective coating.
- Sterilization (autoclave): MOPA laser annealing is the standard choice; no crevices, no material removal, no corrosion risk.
- High temperatures: Marks on parts that cycle above 500°F need depth or a thermally stable oxide layer. Annealing on stainless holds well; surface-only ink or paint-fill marks do not.
Hardness limit: Mechanical methods face a practical ceiling near 63 HRC. Above that threshold, stylus wear accelerates sharply and mark consistency drops. Fiber laser is the right call for hardened tool steels.
Machine-readable DataMatrix codes need a minimum module size of roughly 0.3 mm per cell to remain scannable after moderate abrasion or coating. Laser ablation at that scale holds up better than dot peen for dense 2D codes, since the continuous ablated walls give scanners cleaner contrast.
What do cost, speed, and maintenance actually look like over time?
Upfront cost and operating cost tell different stories, and ignoring either one leads to a poor decision.
Dot peen and stamping systems carry lower capital costs and minimal consumables. The main recurring expense is stylus replacement, which varies by material hardness and cycle volume. Lasers cost more to buy but eliminate contact-wear variables almost entirely. No stylus, no ink, no consumable replenishment on a production schedule.
- Dot peen: lower upfront, predictable stylus replacement cycles at 0.3–1.0 mm depth, great for rugged one-off or low-volume marking
- Fiber laser: higher upfront, near-zero consumables, faster throughput on high-volume automated lines
- Stamping: lowest cost for simple fixed codes, no flexibility for variable data
For high-volume lines with variable serial numbers or DataMatrix codes, laser integration with standard industrial interfaces pays back the capital cost faster than most buyers expect.
Pro Tip: Estimate your break-even by dividing the laser’s cost premium over dot peen by your per-mark stylus cost. If you’re marking more than a few hundred parts per day, the laser typically wins on total cost of ownership within 18–24 months.
How should you prepare steel and design marks that last?
Surface prep and mark design are where permanent marks succeed or fail before the stylus or laser even touches the part.
Surface preparation checklist:
- Degrease with an appropriate solvent (acetone or IPA) to remove oils and release agents
- Remove rust or mill scale from the mark zone using wire brushing or light abrasive
- Confirm surface flatness or fixture the part to prevent movement during marking
- Position the mark away from weld zones, stress concentrations, and edges on thin-walled parts
- Verify the mark location clears any post-processing fixtures or masking areas
Design rules for readable, long-lasting marks:
- Minimum font height: 2.5 mm for dot peen; 1.0 mm for laser (smaller is possible but reduces scan reliability)
- Line width: at least 0.3 mm for mechanical methods; laser can go finer but verify with a post-process scan
- For annealing on stainless: use high-contrast black oxide settings; avoid deep ablation that opens the passive layer
- DataMatrix codes: minimum 10×10 modules, each cell ≥ 0.3 mm; add a quiet zone of at least one module width
- For custom tool engraving, keep text aligned with the tool’s long axis for the best readability under wear
One material-specific note: annealing on stainless steel keeps corrosion resistance intact. Avoid deep mechanical marks on thin-walled or highly stressed parts where notch effects could affect structural integrity.
Which method is right for your specific use case?
Here are the direct recommendations, by application.
- Personalized gifts and finished decorative tools: Fiber-laser annealing or micro-ablation. High detail, clean aesthetics, no corrosion risk. For custom engraved gifts that people actually keep, this is the right call.
- Hand tools and shop fixtures: Deeper laser ablation or shallow mechanical scribing. Tactile marks hold up under daily contact and cleaning.
- Heavy industrial parts going through coating or galvanizing: Dot peen at 0.3–1.0 mm, or stamping for simple fixed codes. No other method reliably survives hot-dip galvanizing.
- Medical-grade stainless steel: MOPA laser annealing. Preserves corrosion resistance, meets UDI requirements under FDA 21 CFR Part 830, and survives repeated autoclave sterilization cycles.
Key Takeaways
Fiber-laser annealing is the best choice for finished stainless and personalized items, while dot peen at 0.3–1.0 mm depth is the only reliable option for steel that will be painted, galvanized, or sandblasted.
| Point | Details |
|---|---|
| Lifecycle drives method choice | Choose depth-first (dot peen/scribing) when coatings follow; choose laser for finished or high-detail parts. |
| Coating Rule minimum depth | Marks must reach 0.3–1.0 mm to survive hot-dip galvanizing or heavy paint. |
| Hardness ceiling for mechanical methods | Dot peen and scribing degrade above 63 HRC; use fiber laser for hardened steels. |
| Laser economics at volume | Laser’s near-zero consumables typically offset higher upfront cost within 18–24 months at high daily volumes. |
| Signaturelaserdesigns for custom work | Signaturelaserdesigns handles fiber-laser annealing and ablation for gifts, tools, and industrial parts with proofing included. |
A note on what we look for before we mark
At Signaturelaserdesigns, we ask every customer three things before we quote a permanent mark on steel: the material grade, the post-processing plan, and the minimum depth or contrast spec required. Those three details determine whether we set up a fiber-laser anneal, a deeper ablation pass, or recommend a mechanical method for your job. If you’re ordering a custom gift or a personalized tool, a high-resolution vector file (AI, EPS, or SVG) gives us the cleanest result. For industrial batches, a DXF with mark location callouts speeds up proofing. We always offer an in-process photo or a marked sample before a full run ships, so you can confirm the mark looks exactly right. Our industrial laser engraving services cover everything from single custom pieces to production batches, and we’re happy to walk through the spec with you before you commit to an order.
Permanent marks on steel, done right by Signaturelaserdesigns
If you’ve read this far, you know that getting a truly permanent mark on steel takes more than pointing a laser at it. It takes matching the method to the part’s whole life. That’s exactly what Signaturelaserdesigns does for every order, whether it’s a single engraved gift or a batch of industrial components.
We offer per-piece pricing for custom gifts and tools, and setup-plus-per-piece pricing for batch industrial runs. Small custom orders typically turn around in 3–5 business days; larger industrial batches are quoted with a confirmed lead time before production starts. Every order includes a proofing step, either a photo of the marked part or a short video for complex marks, so nothing ships until you’re satisfied.
Ready to get a permanent mark that actually lasts? Place your order or request a proof (on Etsy) today, and our team will confirm the right method, depth, and file format for your specific steel and application.
What most guides get wrong about permanent steel marking
The conventional wisdom treats “laser marking” as a single answer to every steel marking question. It isn’t. Annealing and ablation behave completely differently, and neither one is the right call when the part is headed into a galvanizing bath. The real mistake most buyers make is choosing a method based on what looks sharpest on a clean, uncoated sample, then discovering the mark has vanished after the first coat of paint.
The other thing worth saying plainly: tool wear and maintenance costs are almost always underestimated for mechanical methods. A dot peen stylus on hardened steel wears faster than most spec sheets suggest, and the cost adds up quietly. Lasers remove that variable entirely, which is one reason high-volume shops tend to migrate toward them once volume justifies the capital.
For personalized gifts and finished tools, fiber-laser annealing is genuinely the best choice available today. The marks are sharp, corrosion-safe, and look great for years. For anything going through a coating process, depth is non-negotiable. Knowing which situation you’re in before you order is the single most valuable thing this guide can give you.